If you have a need to transfer your files from your Android device to your desktop computer, you can make these transfers with ease. Since users transfer their files on a regular basis now, these processes have been simplified. In fact, with only a few basic steps and the proper tools, you can have everything on your android device transferred to your desktop without a hassle. In fact, most people will find that this process is simple to do, and they do not need a lot of technical savvy experience to transfer all of their files over.
Part 1: How to Transfer Android Files via USB
Part 2: Solutions for Android USB File Transfer Not Working
Part 3: Alternative to Android USB File Transfer
Having said that, here are the steps that you will need to complete the transfer process successfully.
Step 1. Make sure that you have all of the essential resources in one centralized place before beginning this task. You will need your Android device, your desktop computer, and a USB cable.
Step 2. Once you have all of these resources in place, the next step in this process is to decide what you want to transfer. This is because you will have the capability to do the following types of transfers:
- Transfer your files from and to both Android external and internal storage and your desktop
- Transfer your files from your external storage to your external storage on an android phone and an android tablet.
- Transfer all of your files from one or more Android devices to other Android devices, including the most commonly used, your Android phone to your Android tablet.
Therefore, with this step, you can pick and choose which one that you want or need to do.
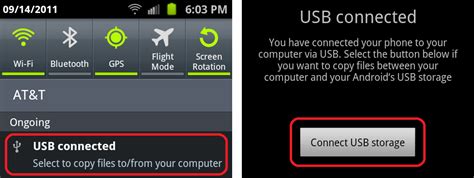
Step 3: To transfer the files that you need to place on your desktop, you should make sure to plug your USB cable into your android device, and the other end of this cable into your desktop's USB port.
Step 4: When the connections to both are secured, the next step is to double click on the device's icon on your desktop so that you can view the files that you want to transfer. You will have the option of choosing specific files one by one or you may want to select all of your files at once. In either case, once you make your selections, you can begin the transfer process.
Step 5: When this transfer process is completed, you can create a new folder that you can drag and drop all of the files into. This step is up to you and your needs.

Read Also: How to Fix Android Bootloop Issue?
When transfers are being made, the user can experience several different kinds of problems before the transfer is complete. So, it is essential for the user to know what to expect if all of the files do not go over as planned. Here are some of the most common problems that a user can encounter when they have initiated the transfer process.
1. USB cable comes detached from the desktop computer or from the Android device during the transfer process. When this occurs, the process for the transfer will not be complete and the user will receive a message that tells them that this has occurred.
2. The files are out of sync. When files are out of sync the dates may be out of order so it may be difficult to find text messages that were sent doing a specific period of time.
3. File transfer is only partially complete because there is not enough file space on the desktop to store all of the information that is being transferred.
4. Files lost in the transfer and need to be recovered to ensure that they are stored on both the android phone and the desktop computer.
5. Some of the data files can be corrupted during the transfer so they cannot be opened by the user.
You May Want to Know: How to Solve Android Stuck on Boot Screen
Though there are many different ways to transfer files from one Android device to your desktop, some of the options tend to be a lot better than others. Specifically, when you are considering using Coolmuster Android Assistant to make your transfers. It is able to transfer and manage Android contacts, SMS, call logs, photos, videos, music, apps and more on computer. Android Assistant is one of the most notable and best alternative for these kinds of activities.This is because this software will allow you to make your transfers in no more 2 to 3 steps at most.
Step 1. Connect your Android phone with your computer
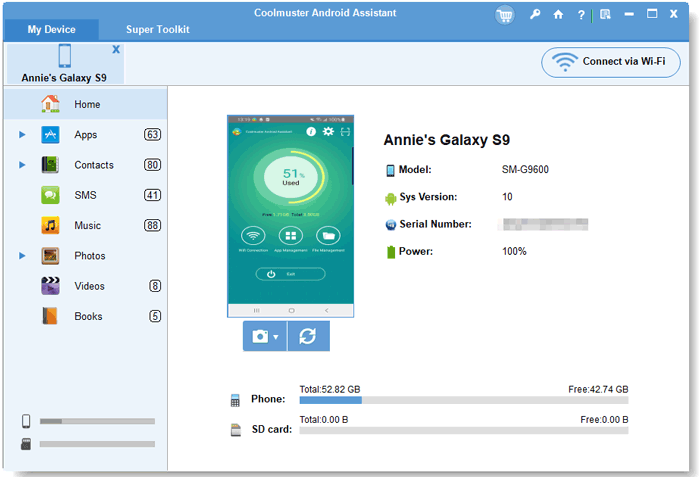
Download and install Android Assistant on your computer. Launch it and use a USB cable to connect your Android device to your computer. (You may have to open USB debugging on Android phone before Android Assistant can open and read all your phone data)
Once your connected Android phone is detected by the program, a screen will pop up with all the data categories of your smartphone on the left hand side column and an icon for your smartphone in the middle.

Step 2: Transfer Android phone data to computer
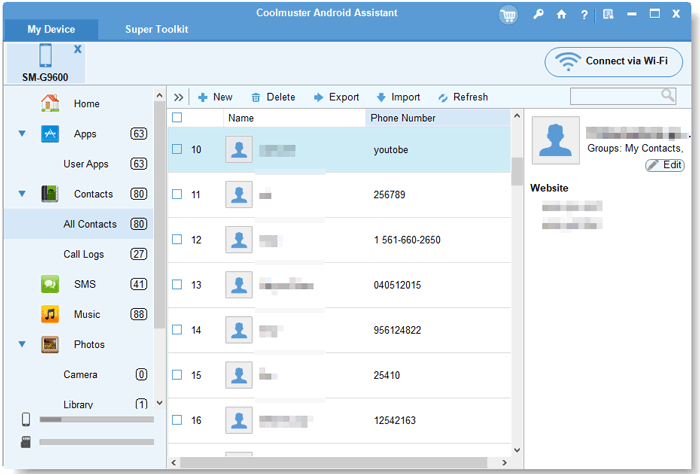
As you can see, all transferable file types are listed on the left side menu. Just choose the data type you want to transfer and click the option of "Export" from the top menu. Then you'll be able to specify an output location on your computer and save all the transferred data here.

Once these steps have been completed, the user does not have to be concerned about files being lost, out of sync, and or encountering any othetechnicalal problems when being done. So, it is a great way to make transfers without experiencing issues that interrupt the successfulness of these transfers.
Related Articles:
How to Print Contacts from Android Phone
Backup Android Call Logs to Computer


