
Android Backup to SD Card: How to Back Up Android Phone/Tablet to SD Card

Android phones would set part of the body memory to the built-in SD card by default, with a separate storage directory deployed to it. Many folks may consider making a local copy of their Android phone before firmware upgrade, system update, phone rooting, or perhaps factory reset. Or some of you might intend to back up Android to SD card because your computer is not around.
Well, what's the best way to make Android backup to an SD card? Today, we'll figure it out by presenting 4 most reliable solutions below.
Method 1: How to Back Up Android Phone to SD Card in a Direct Manner
Method 2: How to Back Up Android Tablet and Phone to SD Card via USB Cable Only
Method 3: How to Back Up Android to SD Card via Coolmuster Android Backup Manager
Method 4: How to Back Up Android Phone to SD Card with Android File Transfer
Most of the Contacts app on Android phones come with the feature to import contacts into the phone's SD card. This is pretty simple, but it is very trivial and monotonous if you have many contents to move.
Now, let take contact backup as an example to show you how to back up an Android tablet/phone to an SD card directly?
Step 1. On your Android device, start the Contacts app and tap on the "Contacts" section to see all the phone numbers and the related info on your phone.
Step 2. Click on the button on the left of the menu to choose "Import/Export".
Step 3. From here, if you select "Export to USB storage", the files will be moved to the internal SD card. While choosing "Export to SD card", you'll get the content to the external SD card, if any.
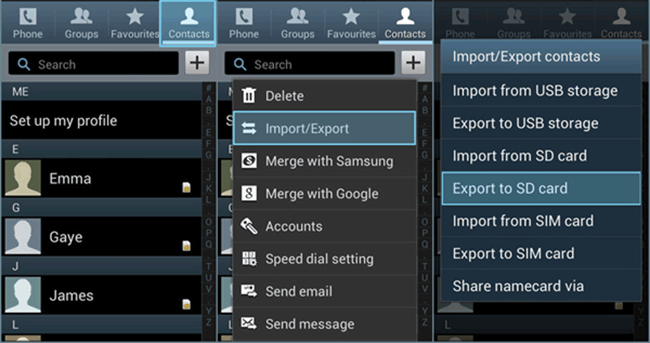
Once done, all the contacts on your Android phone will be saved as a .vcf file on the SD card.
Want to do Android backup to SD card for other data like media files? File Manager or My Files, serving as an Android SD card manager, can help you do this as well. Yet if there's no such app on your phone, you can skip this method.
Here, to explain how to back up phone to SD card with File Manager/My Files, let's take Android document for example:
Step 1. Open File Manager/My Files from your Android device. Then touch the "Documents" folder from the different file categories.
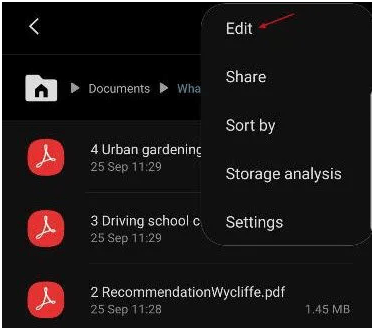
Step 2. Tap the "Menu" icon from the upper-right corner of the screen. Next, click "Edit" > choose the contents you'd like to move before tapping the "Move" option.
Step 3. Go back to "Home" and tap "My Files" again, followed by choosing SD Card. Next, select your desired location on this SD card and opt for "Move Here".
Step 4. Now, your Android phone will begin moving the stuff to the SD card.
People Also Read:
2 Safe Ways to Move WhatsApp Data to SD Card
How to Get Back GIF Images from SD Card Easily?
To back up phone to SD card, you ought to connect your Android device and a computer with a USB cord and select the transfer mode. Then choose the wanted files like pictures to transfer photos from Android to laptop or desktop, and then to the card.
This way only plays functions on backing up multimedia files. And you need to spend time looking for the desired items before the backup.
To do Android phone backup to SD card with a USB cable:
Step 1. Connect your Android device to your desktop/laptop with a USB cable. Select "Transfer files" from the notification bar as prompted. Then, open Windows Explorer on this computer to see the device's name displayed under "Computer".
Step 2. Tap on the device to see two storage options - "Card" and "Phone". Double-click on the latter to open it. To back up all the files on the device to the SD card, you can choose "Organize" > "Select All". This will select all the items you want.
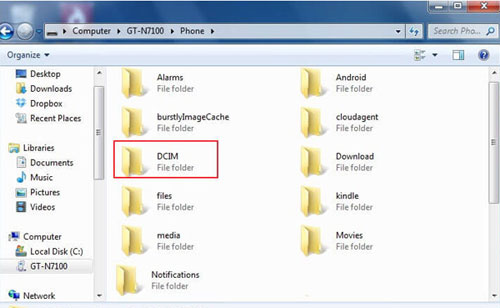
Step 3. After that, right-click to choose "Copy". Next, go back to the previous window by hitting the backspace button on your keyboard. Double-click on "Card" to open the SD card then.
Step 4. Tap "Organize" and choose "Paste" to copy all of the files on your device's storage to the SD card.
Tips:
As you can see clearly from the screenshot above, you're also allowed to choose any "File folder" like DCIM before copying and pasting them to the SD card.
Besides, if needed, you can unlock Huawei mobile phones without passcode in these ways.
It is not efficient to perform Android backup to SD card with traditional methods. Let's say that they are time-consuming, only take effect on some data types, or the data restoration is not guaranteed to work. As such, you now need a top-notch program like Coolmuster Android Backup Manager (Win and Mac), which can be utilized to easily back up the data types you need from your phone to the computer and then move them to your SD card.
Major features of Coolmuster Android Backup Manager:
> One-tap to back up all the Android data to PC/Mac.
> Enable you to choose any backup file from the backup list for restoring.
> Assist to add previous backup files in the non-program default directory to restore.
> Risk-free, no adware, easy to operate, and maintaining the original data quality.
> Fully compatible with 6000+ Android phones and tablets, containing Samsung, Huawei, Sony, Google, OPPO, Vivo, LG, Motorola, DELL, Nokia, Blackberry, Lenovo, HTC, etc.
> It never tracks any of its users' privacy.
How to back up Android to SD card with Coolmuster Android Backup Manager?
Step 1. Download Android Backup Manager and then open it on your computer. You're now required to plug your Android phone into the computer via a USB cable.
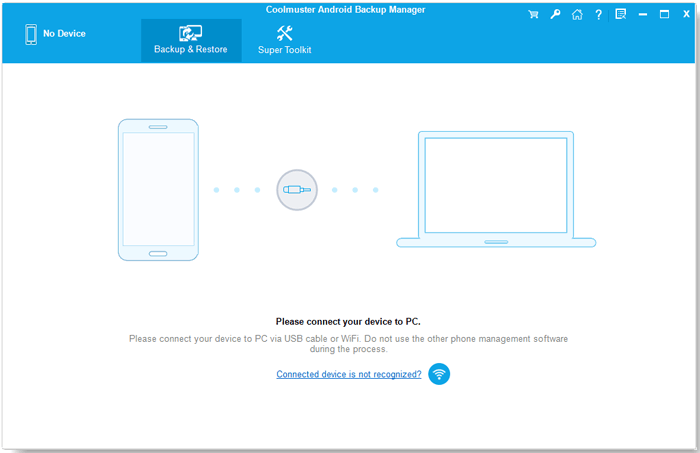
Note: You're also allowed to connect your Android device to computer via WiFi.
Step 2. Subsequently, you need to go with the on-screen instruction to get your phone detected by the software. Then you'll get the main interface as below.
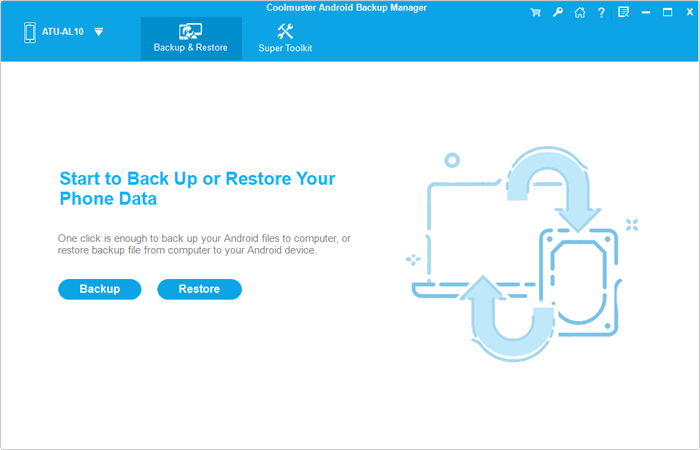
Step 3. Tap on "Backup" > select the data types you want to back up > choose a folder on your computer to save the backup files > tap on "Back Up".
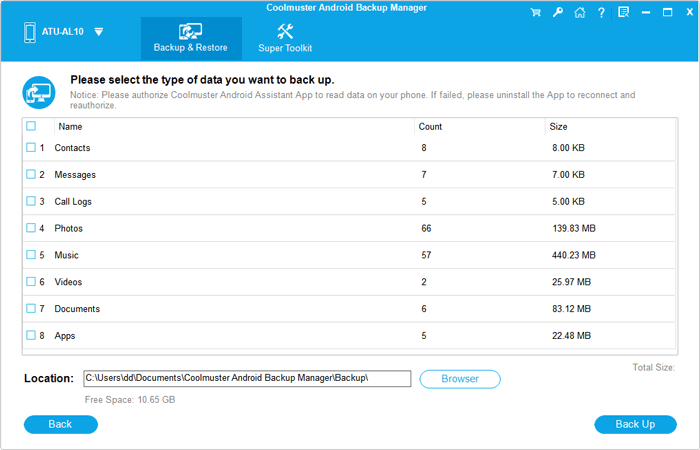
Step 4. After that, your chosen files will be stored on your computer. You can now go to the corresponding folder of the items and move them to the Android SD card with ease.
You Might Also Like:
How to Recover Deleted Photos from SD Card on Android
Top-Chosen Worthwhile Methods to Back Up Contacts from Android
Android File Transfer is a tool developed by Google. You can drag and drop files from your Android device to a Mac computer after attaching the devices using a USB cable. Then you'll get these files to the SD card without any trouble. Currently, it only supports Mac computer with macOS 10.7 and higher.
How do I back up Android to SD card using Android File Transfer?
Step 1. Download and install this program on your Mac computer. Launch it and link your Android phone to the Mac via a USB cable.
Step 2. Android File Transfer will detect your Android device automatically and open the SD card folder for you soon. Afterward, you'll have the freedom to back up your wanted content to your Mac.
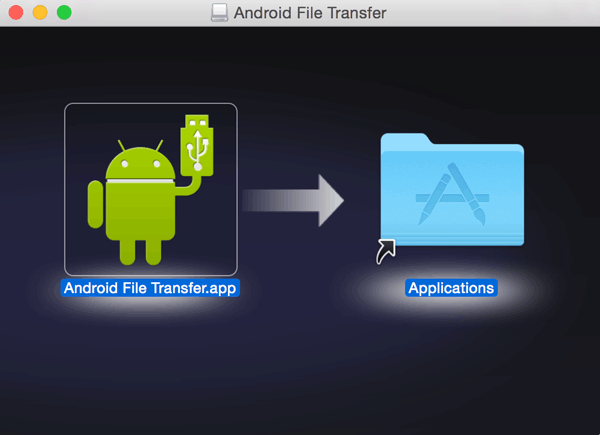
Step 3. To back up an Android phone to an SD card from the Mac, just tap on the SD card icon from the "Finder" menu. You'll then find a window displaying content on the SD card. Simply drag the files you want to drop to the window of the SD card.
To sum up, it should be pointed out that for those who are used to making Android backup to SD card, it is not the best choice to take precautions in this way in case something goes awry.
You're advised to take a backup of your Android device to a computer, the independent physical storage, to give the Android content all-round preservation. In this regard, Coolmuster Android Backup Manager, a competent Android management expert, can be the go-to solution. And if you insist on backing up your data to the SD card, Coolmuster can also give you a near-perfect operating experience.
Related Articles:
How to Back up SD Card on Android Phone and Tablet?
How to Realize SD Card Recovery for Android (Recommended)
10 Best MOV Editor Options - Edit MOV Files Easily
How to Move WeChat to SD Card?