
Out with the Old: A Step-by-Step Guide on How to Empty Trash on Android

Android phones are currently among the most popular smartphones, boasting powerful features and a rich array of applications. However, over time, Android phones can accumulate a lot of unnecessary files, such as cache data, downloaded files, and files in the recycle bin. These files consume phone storage space, which hinders the device's performance and efficiency.
As a result, it is critical to perform normal garbage file removal on an Android device. This article will show six methods on how to empty the trash on Android, along with an additional tip for recovering accidentally deleted files.
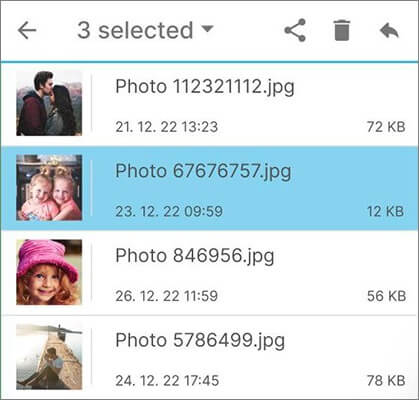
Many users are unaware that Android devices come equipped with a built-in recycle bin, similar to the one on desktop computers. However, accessing and emptying this bin requires a dedicated app. Numerous applications can be found on the Google Play Store, such as Dumpster and Recycle Master, that provide a convenient interface for managing deleted files. Here's a step-by-step guide on how to empty the recycle bin on Android using the Dumpster app:
Step 1. Install and launch the Dumpster app. Allow necessary permissions for storage access.
Step 2. Within the Dumpster app, you will find a list of deleted files categorized by file type (e.g., images, videos, documents). Tap on the "Recycle Bin" or the specific file type you want to empty.
Step 3. Dumpster allows you to review deleted files before permanently removing them. Peruse the roster of deleted files and choose the ones you want to permanently delete.
Step 4. After selecting the files, tap the "trash" icon to empty the recycle bin or permanently delete the chosen files.
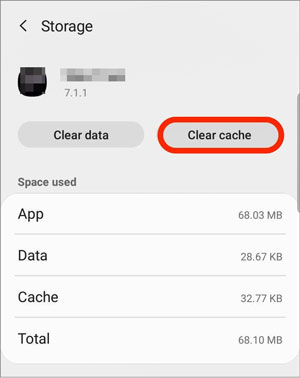
Cache data refers to the temporary storage of certain app-related information on Android phones. This is done to enhance operational speed and user experience, including the caching of images, videos, audio, web pages, and more. While cache data enables quick access to frequently used content, it can also occupy storage space on your phone. Clearing cached data on your Android device can help free up storage space. Here are the specific steps to how to empty trash on Android:
Step 1. To open the settings on your Android phone, locate the option for "Apps" or "App Management".
Step 2. Choose the app for which you want to clear the cache data.
Step 3. Tap on the "Storage" or "Storage Space" option, and then click on the "Clear cache" or "Clear data" button, confirming your action.
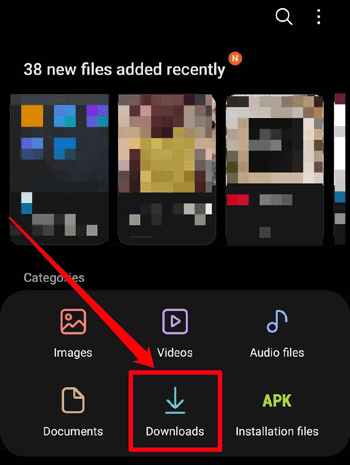
Downloading files is the process by which specific apps or browsers on an Android phone retrieve and save files so that you can save or view various types of material. So, if you want to get rid of files that you don't need, you should check your device's Downloads area. Below, you'll find a comprehensive guide on how to delete trash on Android:
Step 1. Access your phone's File Manager and navigate to either the "Downloads" or "Download History" folders.
Step 2. Upon reviewing your downloads, you can then access the downloaded files and uninstall any that are unnecessary.
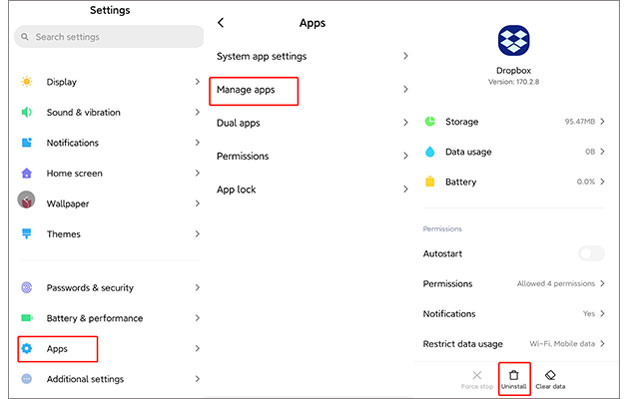
There are times when we may download apps on our phones just for some reason and then never use them again. These apps can still take up space on our phones, though. To get rid of Android's trash, we can remove these unused apps. Here are the specific steps:
Step 1. Access "Settings" on your Android device. Tap "Apps" in the Settings menu.
Step 2. In the Apps section, choose "Manage apps" and find the app you want to uninstall from the list of installed applications.
Step 3. Tap the desired app to open its details page. Locate the "Uninstall" or "Remove" button and tap to uninstall the app.
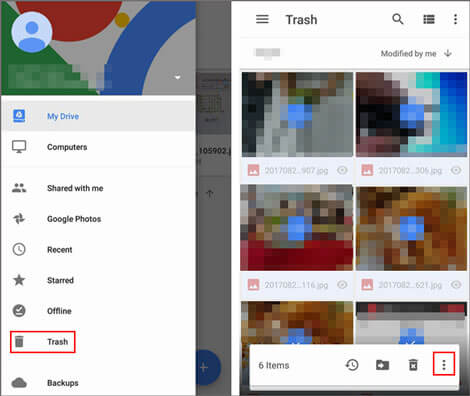
You can also clean trash on your Android device by clearing Google trash. Google trash refers to the files that you have deleted from various Google apps, such as Google Photos, Gmail, and Google Drive. These files are not permanently removed from your device until you empty the trash in each app. The following provides a step-by-step guide on how to delete trash from Android:
Step 1. Open Google Drive on your Android phone and locate the "Trash" option.
Step 2. Here, you will find the deleted files. Select them, click the "three-dot" icon, and choose "Delete" to complete the process.
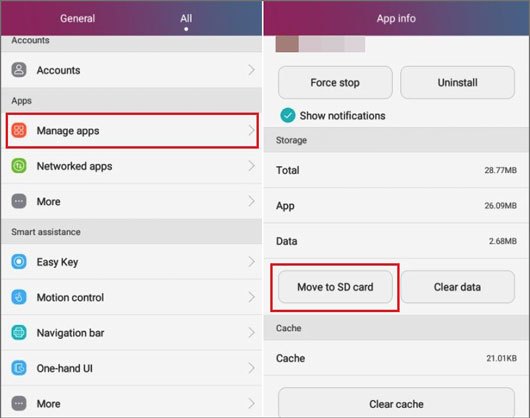
You can move these files to an SD card if you don't want to delete them from your phone but still want to empty the Android trash. An SD card is a removable storage device that can give an Android phone more place for files. You can keep the files on the SD card and free up room on the Android with this method. Below are the steps you need to take to transfer files to an SD card:
Step 1. Open the "Settings" app on your Android device, then select "Apps and notifications" > "Manage apps" to view a list of all installed applications.
Step 2. Choose an application and click on "Storage" > "Move to SD card" to transfer the app and its data to your external storage.
If you are looking for a more professional and efficient method to transfer data to an SD card, we recommend using Coolmuster Android Assistant. In addition to transferring data to an SD card, it also offers one-click back up and restore for all Android phone data, as well as selective data transfer between Android and the computer.
While regularly emptying trash on Android is highly beneficial, there may be instances where you accidentally delete some crucial files. If so, you can use a professional recovery tool - Coolmuster Lab.Fone for Android, to get your deleted files back. This program can retrieve deleted contacts, text messages, videos, photos, documents, and more from most Android devices.
Here's the video guide:
This article introduces six methods of how to empty trash on Android and an additional tip for recovering accidentally deleted files - Coolmuster Lab.Fone for Android. These tips can help you get more storage room on your phone, improve your phone's efficiency and speed, and protect your important data. At last, please back up your important data first, which can effectively avoid data loss.
Related Articles:
How to Delete Files on Android? Never Miss the Top 3 Ways
How to Clean Junk Files on Android Easily? 5 Ways You Never Think of
How to Delete Call History on Android Easily? Use These Methods to Make It


