
6 Simple Ways to Fast Connect Android to Mac (Proven & Effective)

"Trying to connect my Android to my Mac for file transfers, but nothing works. Keeps saying it can't connect to the phone. Anybody faced this? Any fixes or cool alternatives you know of how to connect Android to Mac?"
- from Reddit
Commonly, It's easy to connect Android devices to Windows PC. However, what if you own an Android phone and a Mac computer? Connecting Android to Mac is not that easy compared with Android to Windows PC or iOS to Mac connection due to their totally different operating systems, let alone transferring data from Android to Mac. To meet the demands of specific users, we have explored 6 methods to achieve it. Read more to learn how to connect quickly.
Yes, you can connect your Android phone to a Mac, although the process might be slightly more complicated than connecting to a Windows computer. You can still achieve Android phone connected to Mac via USB or wirelessly. Next, we will introduce various feasible connection methods in detail.
Coolmuster Android Assistant is one of the best Android file transfer apps for Mac to connect Android to Mac. It offers two connection options: USB and Wi-Fi, allowing you to choose according to your own needs. Moreover, it is compatible with Mac OS X 10.9 or later versions and almost all Android devices running at least Android 6.0, including Samsung, HTC, LG, Sony, Motorola, Google, ZTE, Huawei, and more.
Key Features:
How to connect Android to Mac with Coolmuster Android Assistant?
01Install and launch Coolmuster Android Assistant on your Mac.
02Connect Android to Mac via a USB cable. Then, enable USB debugging on an Android device. After a successful connection, you will see Android's main information on Mac. Of course, you can also click "Connect via WIFI" to connect through Wi-Fi, according to the prompts.
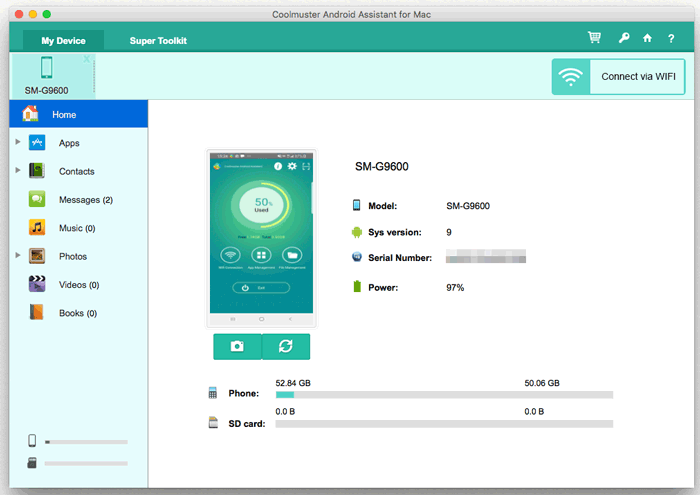
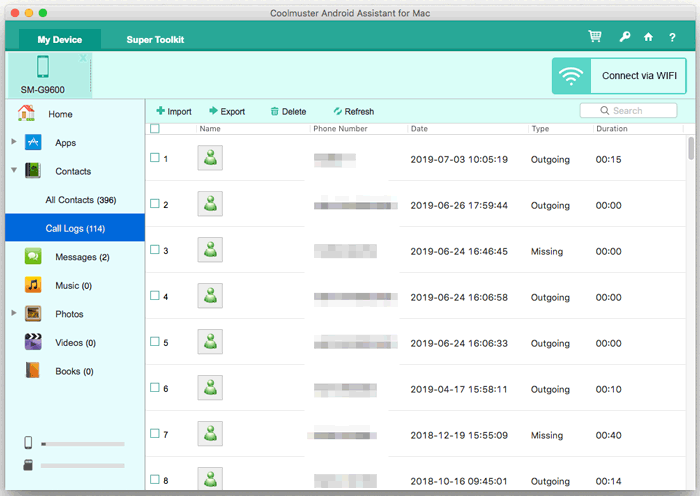
03Now, you can transfer files on a Mac. Choose wanted file folder from left window of this interface, check detailed items in right window, and tap "Export" to transfer files from Android to Mac. (You can also tap "Import" to transfer data from Mac to Android after checking detailed items.)
If you want to connect your Android device to a Mac via USB, you can achieve this through two methods: direct USB connection and using Android File Transfer.
USB is the most traditional method to connect computers and phones, and Mac and Android are no exception. How to connect Android phone to MacBook via USB?
Step 1. Use a USB cable to connect your Android phone to your Mac.
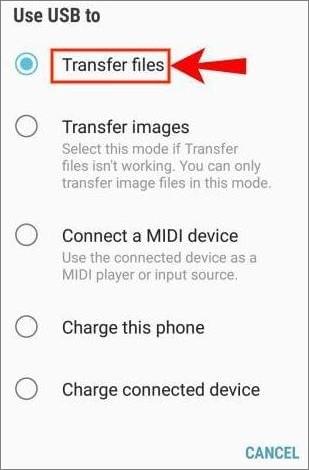
Step 2. A notification will appear on your Android phone, prompting you to select a connection mode. Choose the "Transfer files" mode.
Step 3. Open the "Finder" app on your Mac, locate and click on your Android device in the sidebar.
Step 4. Now, you can view, copy, and transfer files from your Android phone to your Mac.
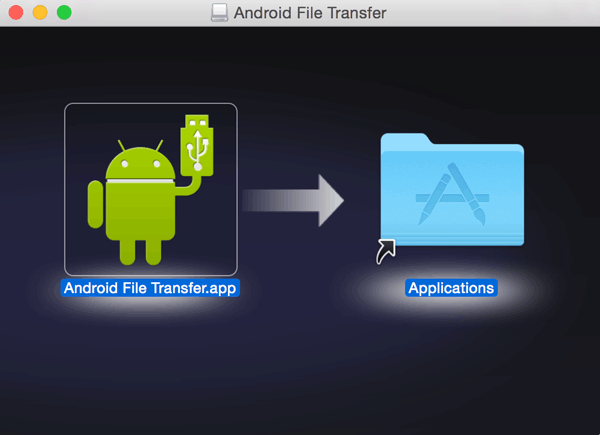
Many people may be familiar with Android File Transfer, a tool developed by Google to conveniently connect Android phone to Mac. Well, Android File Transfer indeed is very nice to transfer several files between Android and Mac.
How to connect an Android phone with a MacBook?
Step 1. Install Android File Transfer on your Mac.
Step 2. Connect Android to Mac.
At first, unlock your phone. Then, connect Android to Mac via USB and this will automatically launch Android File Transfer, if not, launch it manually. You may need to allow USB debugging on Android. Just click "Allow" when a window pops up asking for USB debugging and choose "File Transfer" under Use USB for window on Android.
Step 3. Browse Android files, select the files you wish to transfer and drag them to your desktop or your preferred folder.
If you don't have a data cable but still want to connect your Android phone to your Mac, you might want to try the following three methods: Bluetooth, AirDroid, and cloud services.
If you do not want to install any apps or create any account, then Bluetooth may be a very good choice for you. Bluetooth can transfer several MB files between devices within 10 meters for personal use. Below are the steps:
Step 1. Turn on Bluetooth on both devices.
On Mac, go to "System Preferences" > "Bluetooth" to toggle Bluetooth on;
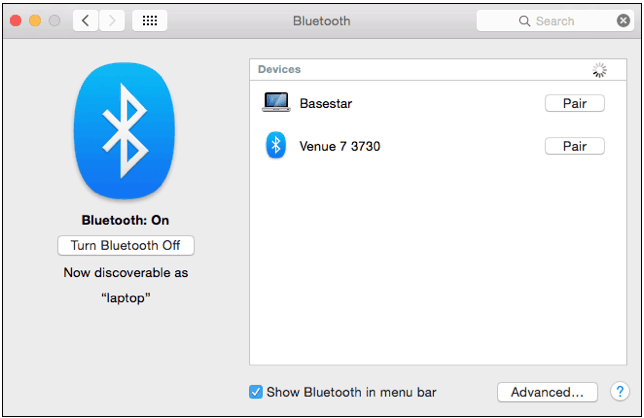
On Android, go to "Settings > "Bluetooth" to turn on Bluetooth. Select your Mac's name in Available devices below and pair two devices.
Step 2. After pairing, click the "Bluetooth icon" from your Mac's menu bar > Tap on your Android's name > Select "Send file to device", in this way you can transfer files to Android device.
Step 3. Click "Accept files" on your Android device.
Note: If you want to transfer files from Android to Mac, you need to go to "System Preferences" > "Sharing" > Check "Bluetooth Sharing" to turn on Bluetooth Sharing on Mac. Then, you can select files on Android and share them via Bluetooth to Mac.
AirDroid can connect Android to Mac over the same Wi-Fi so that you can manage Android files from any computer and transfer files between any devices. However, many users dislike too many ads inside this app, and as it can remote control your Android, the remote camera control may be easily prone to falling into the wrong hands. Follow the guide to connect Android to Macbook with AirDroid:
Step 1. Install the AirDroid Android version on your phone.

Step 2. Browse the AirDroid website on your Mac and create an account on the website.
Step 3. Connect Android to Mac. Sign in to both devices using the same email or Facebook/Twitter/Google account, or use Android to scan the QR code on Mac.
Step 4. On your Mac, tap "Photos" or your wanted file folder > select "files" > click "Download" to transfer Android files to your Mac.
You can also use cloud services like Google Drive to connect your Android device to your Mac. This method is simple, fast, and reliable. However, you must be connected to the internet. If the network conditions are poor, the transfer process between Android and Mac can be very slow. Here is how to work it:
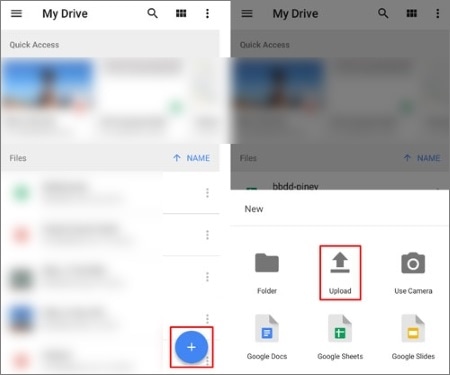
Step 1. On your Android device, open and sign in to Google Drive, tap the "+" button on the home screen, and select "Upload" to transfer files from your Android to Google Drive.
Step 2. On your Mac, download Google Drive or open a browser to access the Google Drive website, then sign in using the same account.
Step 3. Look for the uploaded files in Google Drive on your Mac and download them to save to your Mac.
To help you compare the pros and cons of 6 different methods in this article, here's a detailed comparison table:
| Method | File Transfer | Manage Phone on Mac | Connection Type | Speed |
| Coolmuster Android Assistant | Yes | Yes | USB and Wi-Fi | Fast |
| USB Directly | Yes | No | Wired | Fast |
| Android File Transfer | Yes | No | Wired | Moderate |
| Bluetooth | Yes | No | Wireless | Slow |
| AirDroid | Yes | Yes | Wireless | Moderate |
| Cloud Services | Yes | No | Wireless | Depends on Internet speed |
In summary, each method has its own pros and cons. If you need an efficient and comprehensive way to manage your phone's data, we highly recommend using Coolmuster Android Assistant. It supports both USB and Wi-Fi connections, allowing you to manage and back up your Android data directly on your Mac. Compared to other methods, Coolmuster Android Assistant offers more functionality and flexibility, especially for users who frequently need to transfer and manage data.
If you encounter any problem during use or if you have something to say about any one method, feel free to leave a comment below.
Related Articles:
3 Ways on How to Transfer Messages from Android to Mac Effortlessly? (Proven)
7 Viable Ways on How to Transfer Photos from Mac to Android
How to Transfer Files from OnePlus to Mac? (3 Easy Solutions)
How to Transfer Music from Mac to Android Effortlessly? Solved in 4 Ways


