
How to Move Photos from Google Photos to Gallery on Android/iPhone/Computer

Have you ever wanted to save space on your device by transferring images to cloud storage like Google Photos? But now, you want to download photos from Google Photos to Gallery. So, how to move photos from Google Photos to a gallery? This article will guide you on how to do this on both your phone and computer, as well as provide an additional method for transferring photos between different devices.
How to transfer multiple photos from Google Photos to the gallery? In this section, we will show you how to save pictures to the gallery on Android and iPhone.
Downloading photos from Google Photos to Android gallery is simple. Follow these steps to learn how to sync Google Photos with Samsung Gallery:
Step 1. On your Samsung phone, open the Google Photos app.
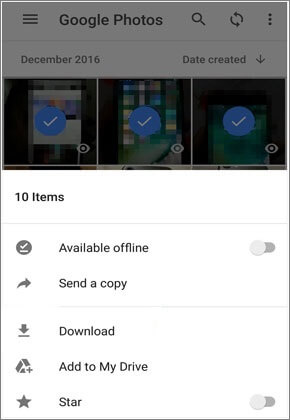
Step 2. Select the photos you want to move to the gallery. Click the "share" button in the upper right corner (usually a three-point icon).
Step 3. Choose the "Download" option from the menu that pops up. The photos will be downloaded to your device's default download folder, which is usually the Samsung Gallery.
Read more: Google Photos not showing all photos? Don't worry. Click the link to fix it easily.
If you are an iPhone user, you can also do this with ease. Here is how to transfer all photos from Google Photos to the gallery on iPhone:
Step 1. Launch the Google Photos app on your iPhone.
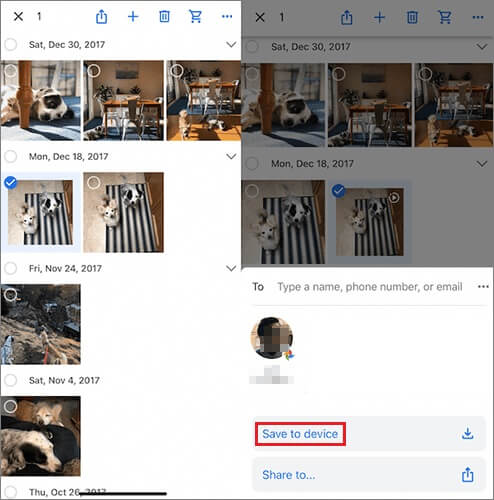
Step 2. After selecting the photo to move, click on the three points in the upper right corner.
Step 3. Choose the "Save to device" option from the pop-up menu. Then, these images will be saved on your iPhone gallery.
Downloading photos on a mobile phone is a common way, but if you want to download them on a computer, there are also very simple methods. Next, we will introduce how to move photos from Google Photos to the gallery on a computer.
You can directly download pictures from Google Photos to your computer by these steps, but this requires checking one by one.
Step 1. Open the Google Photos web version and log in to your Google account.
Step 2. Once you've successfully logged in, you will see all your pictures. Tap the checkmark icon in the upper left corner of each image to select the images you want to download.
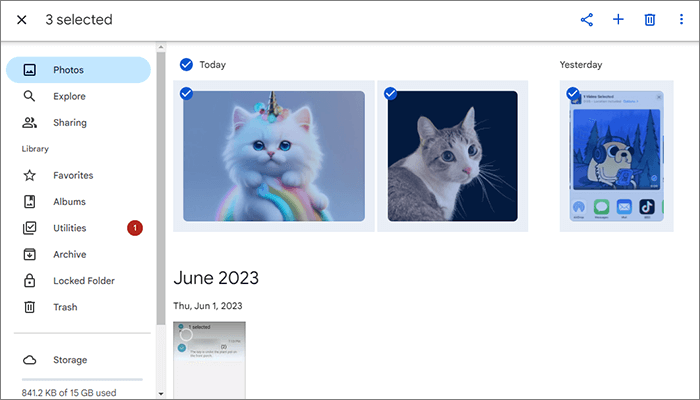
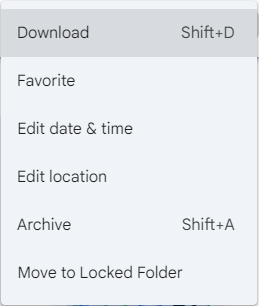
Step 3. After selecting the photo, click on the menu symbol and select "Download" to download photos from Google Photos to the computer gallery.
If you want to move all the photos from your Google Photos to your computer at once, you might want to try Google Takeout. Below is the step-by-step guide on how to move Google Photos to the gallery on a computer:
Step 1. Visit the Google Takeout website and sign in to your Google account.
Step 2. In the list of available data to export, scroll down and click on "Google Photos".
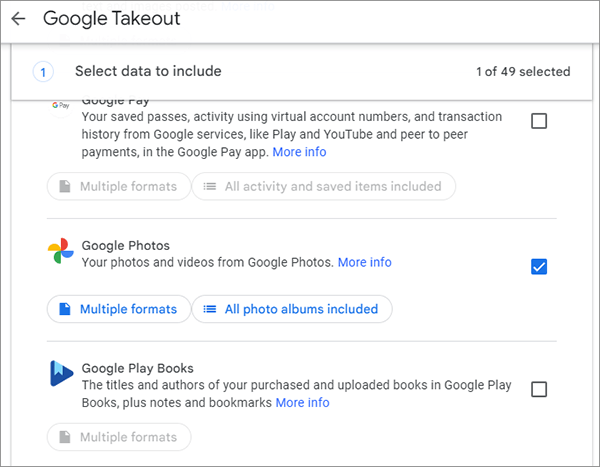
Step 3. Choose the export options you prefer (e.g., select all photos or specific albums).
Step 4. Click "OK" > "Next step", and choose the file type, frequency, and destination. After that, press "Create export".
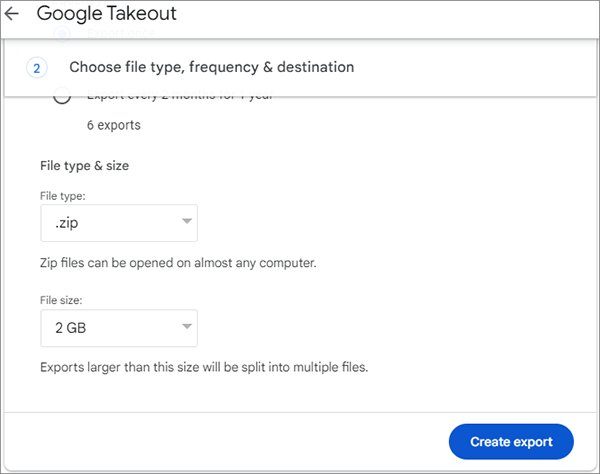
Step 5. Once the download is complete, unzip the file and import the photos into your photo library or album software.
Tip: Want to recover permanently deleted photos from Google Photos? This article can help you.
If you want to quickly and conveniently move a large number of photos between different devices, you can consider using third-party software such as Coolmuster Mobile Transfer. Coolmuster Mobile Transfer is a highly practical and powerful tool for transferring mobile data. It can help you easily, quickly, and safely transfer data between different devices, including various file types such as photos, videos, music, contacts, and more.
Key features of Coolmuster Mobile Transfer
Coolmuster Mobile Transfer supports data transfer between various different phones. Here, we take how to transfer photos between Android phones as an example:
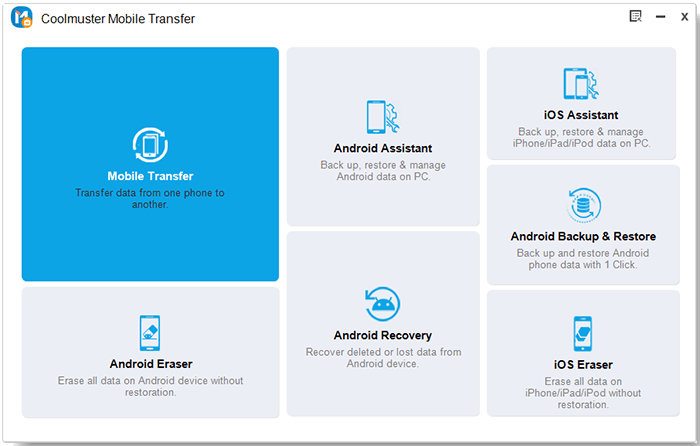
01Firstly, download and launch this software on your computer. Then, choose the "Mobile Transfer" mode from the screen to move on.
02Connect both Android phones to your computer using USB cables. Make sure to enable USB debugging on each device. Meanwhile, ensure that the old phone is selected as the "Source" device. If needed, you can use the "Flip" button to switch their positions.
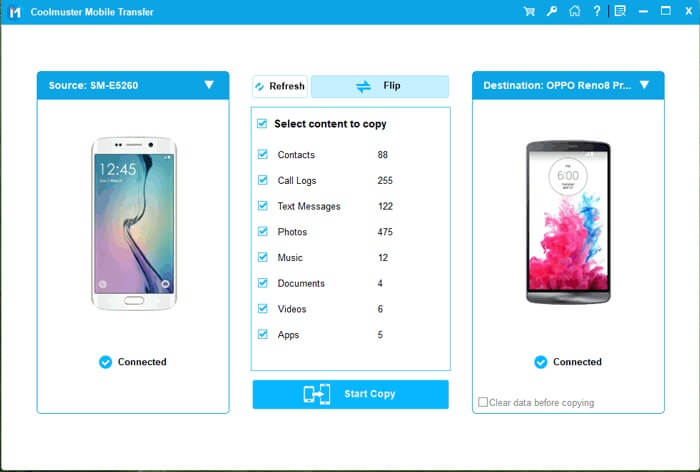
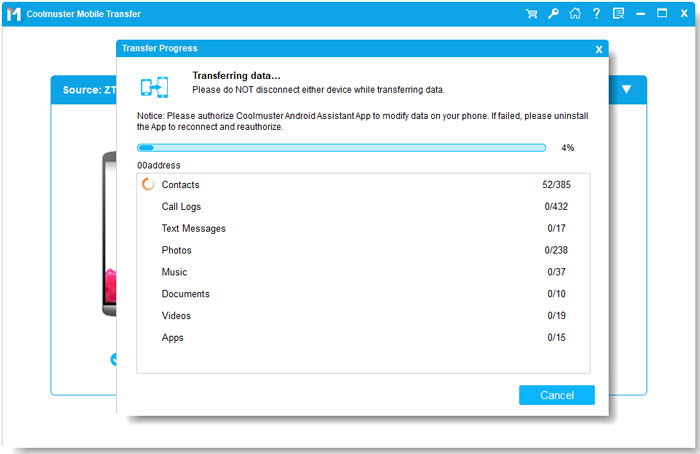
03Choose the "Photos" option in the list, and then click the "Start Copy" button to begin transferring the data.
Video Guide
You should have no trouble moving photos from Google Photos to the local gallery on your device by following the instructions provided in this article. Whether you are operating on your phone or computer, there are multiple methods to choose from. If you need to move a large number of photos across devices, Coolmuster Mobile Transfer may be a better choice. If you have additional questions or need further assistance with this topic, please don't hesitate to leave a message below. We are here to help!
Related Articles:
Top 11 Alternatives to Google Photos (Free & Paid)
Google Photos vs iCloud: Is Google Photos or iCloud Better?
Resolving Common Issues - Google Photos Not Backing Up? [Troubleshooting]
Easily Transfer Google Photos to iCloud with Original Quality


