Today, smartphones and tablets hold a bunch of personal data and information more than what laptops have. The issue is not about space but convenience as one is always seen with their smartphone and tablet at hand. When something occurs, and you delete your data by mistake, you will need to recover it. On the other hand, Android devices allow users to add SD cards in order to improve and increase storage as well. You may delete data or format an SD card only to realize that you have deleted/formatted important information. When you get your precious data, such as photos, videos and more lost on your Android device, such as the Google Nexus 7 tablet, don't panic! You can retrieve lost data using a data recovery tool with ease.
If you own a Google Nexus 7 and are looking for a secure application that will enable you to recover lost data and information, look no further than the Coolmuster Lab.Fone for Android. This is a data recovery application that is developed to help Android users especially those with Google Nexus 7 tablets to recover lost or deleted photos, videos and songs from both internal and external storage. The application is designed to be compatible with Windows and Mac OS. Lost text messages, deleted contacts, photos, videos, music and other documents on your Android phone or tablet are some of the files that can be recovered with the application.
Not only Google Nexus 10/9/7/6/5/4/3, Pixel Fold/Pixel 7a/Pixel Tablet/Pixel 7 Pro/7/6 Pro/6/6a/5a/5/Pixel 4a/4 XL/4/3a XL/3a/3/2, it also supports other Android devices like Samsung, HTC, LG, Motorola, Sony, etc. The following is the step by step guide to conduct Google Nexus 7 data recovery using the Coolmuster Lab.Fone for Android application. Please choose to free download the right version of the application first.
Step 1. Connect device and launch application
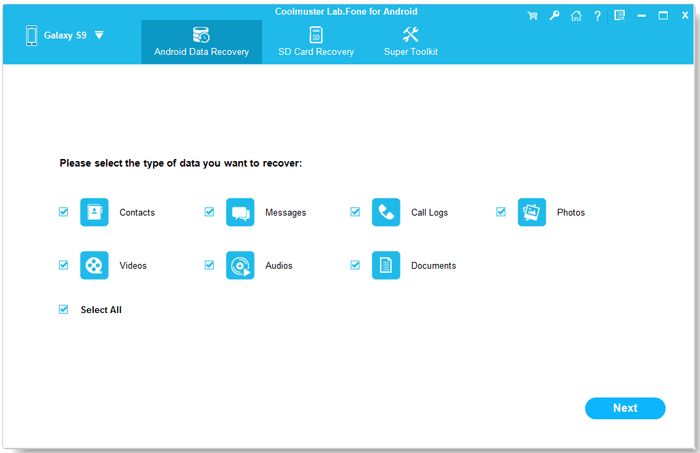
The first step you need to do is to connect your Google Nexus 7 device to the computer via a USB cable. Ensure that USB debugging is enabled to make a smooth connection. If not, you have to follow the instructions below to open the USB debugging first. Launch the Coolmuster Lab.Fone application from the desktop after you installed it.

Tips: if you haven't enabled the USB debugging on your Samsung phone, the Android data recovery tool will be failed to detect your phone. Therefore, you have to follow the instructions below to open USB debugging on your phone.
For Android 2.3 or older, Go: "Settings" < Click "Applications" < Click "Development" < Check "USB debugging".
For Android 3.0 to 4.1: Enter "Settings" < Click "Developer options" < Check "USB debugging".
For Android 4.2 or newer: Enter "Settings" < Click "About Phone" < Tap "Build number" for several times until getting a note "You are under developer mode" < Back to "Settings" < Click "Developer options" < Check "USB debugging"
Step 2. Scan your Nexus 7 for lost data
When the connection is successful, the application should detect and display your device stats on the panel. The application can perform deep scanning tasks on your Nexus 7 therefore revealing to you all lost data and files. The scanning will be conducted on both existing and deleted files.

Step 3. Start to perform the Nexus 7 data recovery
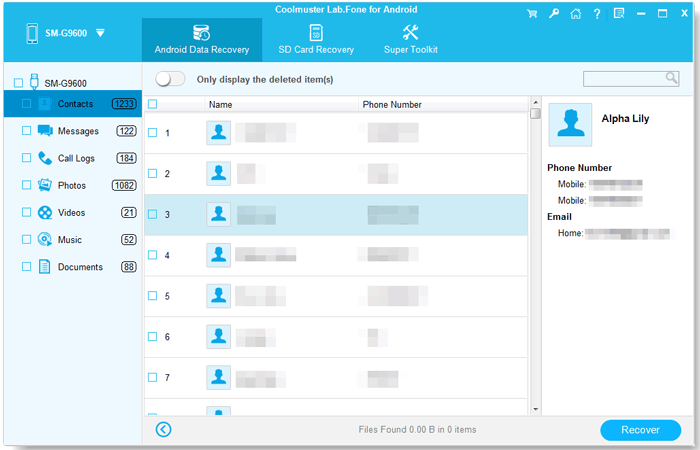
Once the application is done with deep scanning, it will display all files discovered. You can preview each file by selecting it. Once you are done selecting and previewing, you can click on "Recover", select an output folder on your computer and begin the recovery process.
Video Tutorial
Related Articles:
How to Recover Text Messages from Broken Samsung Phones
How to Remove Duplicate Contacts from Android Phone
Simple Ways of How to Read WhatsApp Backup from Google Drive on PC


