
How to Take a Screenshot on Android with 5 Ways [100% Useful]

When it comes to smartphones, Android is the most popular platform. It may not be considered a premium platform as iOS, but it definitely offers excellent functionality. For example, being able to take a screenshot on Android means you can easily share lots of content with your friends. That includes content such as photos, "memos", quotes, and other forms of communication you receive exactly as you see it. If you have no idea on how to take a screenshot on Android, or you want to know about additional methods, then read on.
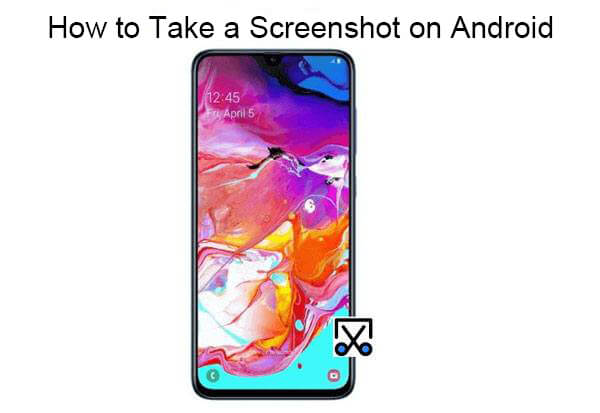
The most common method for taking screenshots involves pressing the phone's hardware buttons. This approach is virtually applicable to all smartphones running Android 4.0 Ice Cream Sandwich and later versions, offering simplicity and requiring no special settings. Imagine you're holding your phone and want to quickly capture the current screen content; all you have to do is press a specific button combination, and the screenshot will be successfully taken. So, how do you take a screenshot using buttons? Let's take a look at the specific steps:
Step 1. First, you need to make sure that you are viewing the screen you wish to capture. So if you wish to capture a message in your inbox, navigate to your inbox and tap to display it.
Step 2. While the screen is still ON and the message is displayed, press the "Power" and "Volume-down" buttons at the same time. You should be able to hear a clicking sound or animation of the captured screen image fading away. It may take a few trials and errors before you get it right.
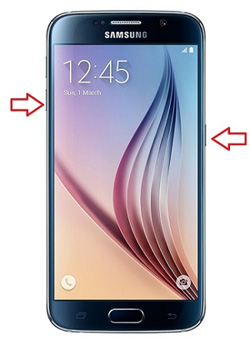
Step 3. Make sure that you hold down the "Power" and "Volume-down" buttons until you hear a click or see the animation. Otherwise, you will see your phone shutting down, or volume getting reduced if you press the buttons briefly.
Step 4. Once the screenshot is taken successfully, you can view it in your photo gallery's screenshot folder.
For many Android phones that support gesture control, users can take screenshots with a simple finger swipe. This method eliminates the need to press any physical buttons, allowing you to quickly capture content by touching the screen. It's particularly suitable for one-handed operation or when you need to quickly take a screenshot in a hurry. If you're already accustomed to gesture navigation, using your fingers to take screenshots will be even more convenient.
How to take a screenshot on an Android tablet with your fingers?
Step 1. Make sure that the gesture screenshot function is enabled on your Android phone (most modern Android devices support this).
Step 2. Gently swipe three fingers simultaneously from the bottom of the screen to the top (this may vary slightly across different devices).
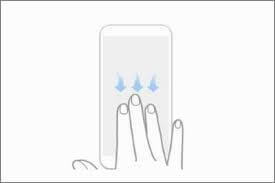
Step 3. The screen will flash quickly or display a screenshot preview, indicating that the screenshot has been successfully taken. The screenshot will be saved to the gallery or screenshot folder.
In addition to physical buttons and gestures, many Android phones offer the functionality to take screenshots via a quick settings menu. This method allows you to quickly access the screenshot option without having to search for a button or remember a gesture, making it very convenient, especially for users who prefer customizing shortcuts. Here are the detailed steps:
Step 1. Swipe down from the top of the screen to open the notification shade.
Step 2. Look for the "Screenshot" or "Screen Capture" icon. This button may appear in the frequently used quick settings, or you may need to add it as a quick menu option in your settings.
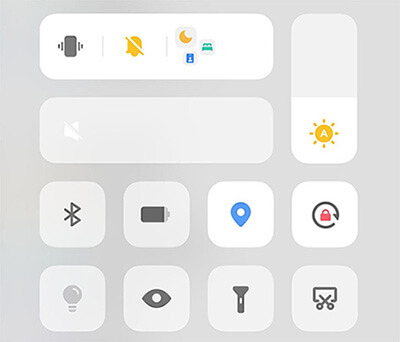
Step 3. Once you tap the "Screenshot" button, the phone will automatically capture the current screen. The screenshot will be saved to your photo album or screenshots folder.
If you wish to take screenshots on your phone via voice commands, Android's voice assistants (such as Google Assistant or Bixby) can offer you this convenience. Voice-controlled screenshots not only simplify the operation but also come in handy when your hands are occupied or it's inconvenient to touch your phone. Follow these steps to enable taking a screenshot through voice commands:
Step 1. Activate your voice assistant. For Google Assistant, simply say "Hey Google" or long-press the home button; for Samsung devices, you can say "Hi Bixby". (It varies from phone models in terms of the specific voice assistant name and the corresponding commands.)
Step 2. Tell the voice assistant: "Take a screenshot" or "Capture the screen". Your phone will automatically take and save the screenshot.
Step 3. You can view the screenshot through notifications, and it will also be automatically saved to your gallery.
Apart from the screenshot methods that come with the system, third-party apps can also provide you with more screenshot functionalities, such as Coolmuster Android Assistant, which offers a more flexible solution. Android Assistant is a powerful Android data management tool that, beyond helping you manage contacts, messages, photos, apps, and other data, supports capturing screenshots directly from your Android phone to your computer. This method is especially suitable for users who need to view phone content on a larger screen and capture it, such as during screen tutorial recordings or presentations.
Compared to traditional screenshot methods, Android Assistant captures screenshots via a computer, resulting in clearer images and allowing for the simultaneous saving and management of other phone data, making it ideal for users with data backup needs.
Main features of Coolmuster Android Assistant
Click on the following buttons to download the Android Assistant and keep on reading to see how to use it to take screenshots on your Android phone or tablet.
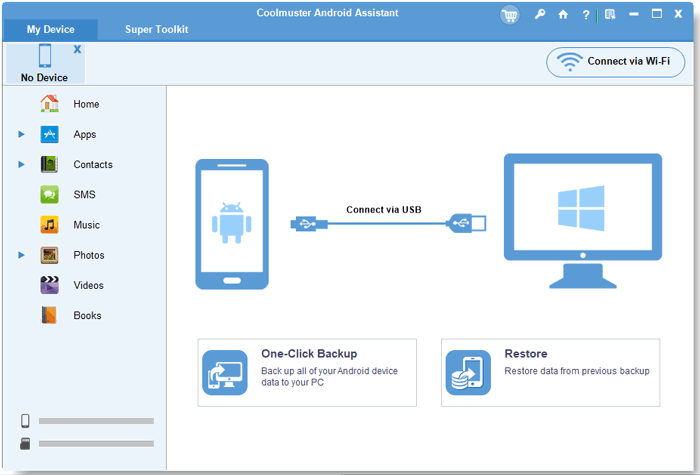
01Run the Android Assistant after you have downloaded and installed the program on your computer. Then, you will get the primary interface of the program like below:
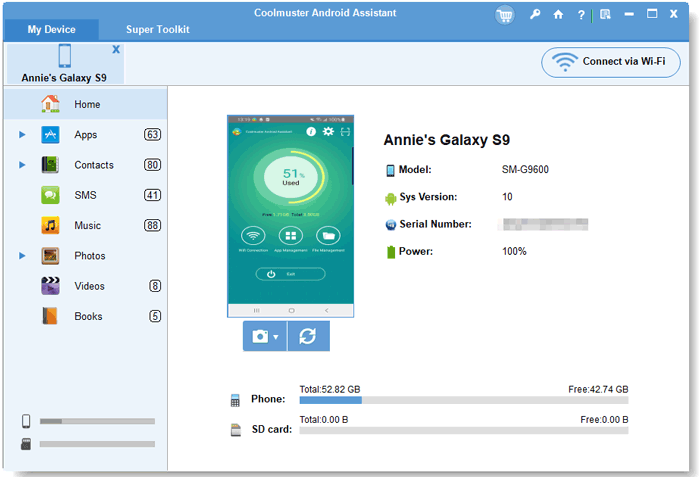
02Link your Android device to your computer via a USB cable or Wi-Fi. Turn on USB debugging on your Android phone if required. Then, the connected Android device will be detected by the Android Assistant automatically.
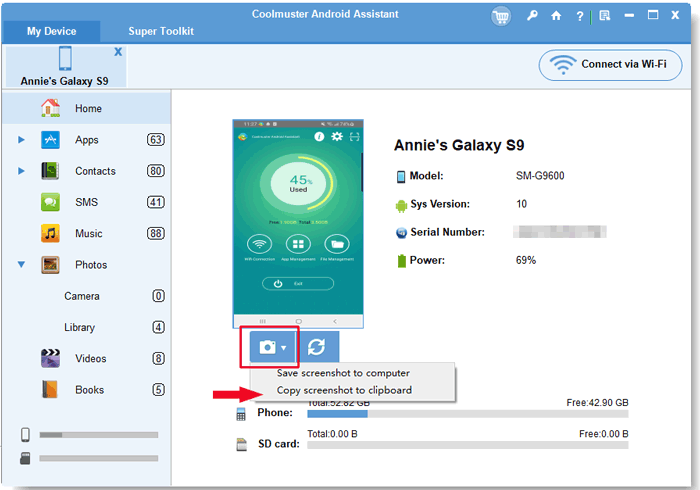
03On the home screen of the program, you can click the camera-liked icon to take a screenshot of your Android phone. After that, you can choose "Save screenshot to computer" or "Copy screenshot to clipboard".
In summary, Android phones offer a variety of screenshot methods, whether through physical buttons, gestures, quick menus, voice assistants, or third-party tools like Coolmuster Android Assistant. Each method has its unique advantages. You can choose the most suitable screenshot method based on your needs and usage habits. Especially, one-stop tools like Coolmuster Android Assistant not only allow you to take screenshots easily but also manage your phone data on your computer, enhancing work efficiency. We hope the methods provided in this article can help you take screenshots more efficiently. If you have other screenshot tips, please do share them with us, and remember to share these methods with your friends as well.
Related Articles:
Capturing Moments: How to Take a Screenshot on a Motorola
How to Take Screenshots on Samsung? 6 Easy & Quick Ways
How to Recover Deleted Screenshots from Android Phone Successfully? (Proven)
Back Up Photos for Android: Top 8 Straight-to-the-Point Methods


