
How to Transfer Photos from Android to Mac Hassle-Free? [10 Ways]

Are you struggling with how to transfer photos from your Android phone to your Mac? Due to Apple's compatibility protocols, sharing any type of data with Apple devices can be challenging. Therefore, moving photos from an Android device to a Mac may seem inconvenient and difficult. Don't worry; there are still some methods that can accomplish this task. In this article, we will introduce ten effective ways to help you easily transfer photos from Android to Mac. Keep reading to learn how to overcome this challenge.

You may know that the easiest way to transfer pictures from Android to Mac is using a USB cable. In this part, we concluded a total of six ways concerning how to transfer photos from Android to Mac using a USB cable. You can choose the most convenient way for you from the following possibilities.
The best way to transfer photos from Android to MacBook is using Coolmuster Android Assistant - the most popular app to transfer photos from Android to Mac on the Google platform. With this super photos transfer app, you can quickly transfer pictures from Android to Mac with original quality and manage Android albums on Mac (add albums and delete, copy, or move photos).
Besides photos, this powerful app also supports other file types, like contacts, SMS, call logs, music, videos, user apps, photos, documents, and books. You can back up and restore those files with one click or selectively according to your demand.
Key Features of Coolmuster Android Assistant:
How do I transfer pictures from Android to Mac using Coolmuster Android Assistant?
01Download, install, and launch Coolmuster Android Assistant on your Mac computer. Then, enter the "Android Assistant" module from the toolbox.
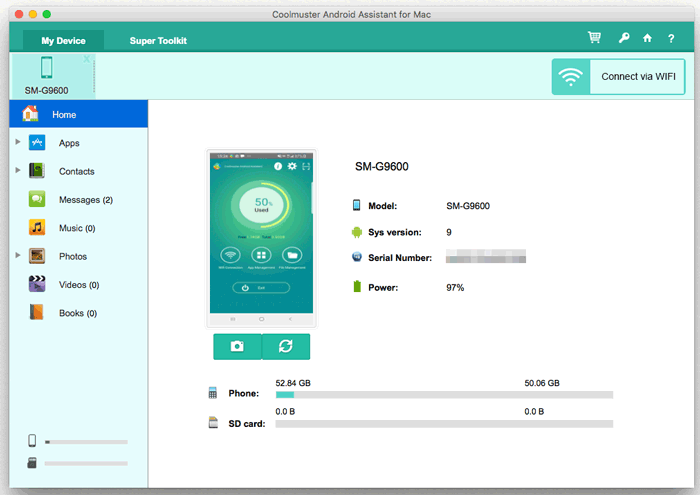
02Connect your Android device to your Mac via a USB cable, enable USB debugging, and grant permission on Android by tapping "Allow" or "OK" when pop-up windows ask you. After a successful connection, you will see this main interface with Android information as below.
03Select "Photos" from the left window. You can preview thumbnails which are under different albums in the right window. Then check wanted items and hit "Export" above to conduct Android to MacBook photos transfer.
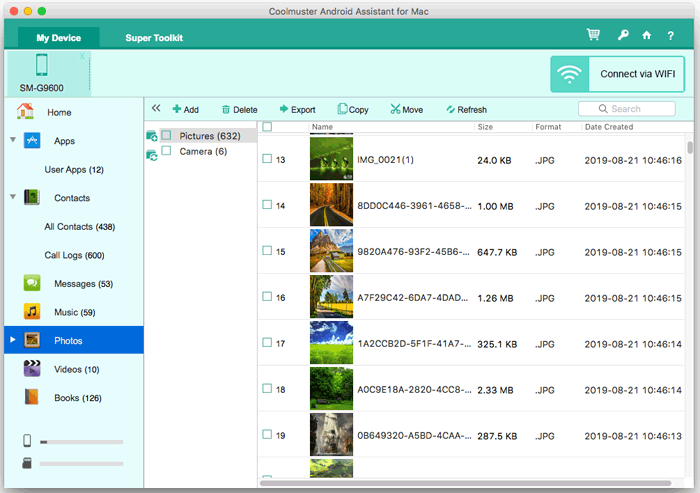
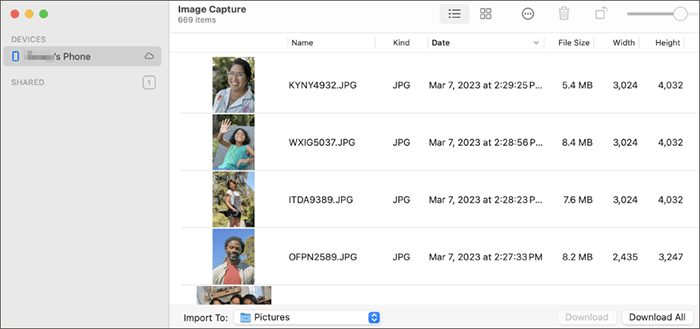
Image Capture is a native program on macOS that provides a simple and user-friendly interface for importing photos and videos from digital cameras, iPhones, and other connected devices. This tool allows users to quickly transfer pictures from Android to Mac. Here is how to do it:
Step 1. Use a USB cable to connect your Android device to your Mac. Then, launch the Image Capture app on your Mac.
Step 2. Click on your connected Android device in the left sidebar.
Step 3. Set the destination folder on your Mac for the downloaded photos.
Sep 4. Tick the images you wish to transfer or opt for "Select All" for a comprehensive transfer.
Step 5. Click either "Download" (for selected images) or "Download All" (to transfer all photos) at the bottom of the screen to commence the transfer from your Android phone to your Mac.
Android File Transfer is an app to transfer files between Android and Mac, which was developed by Google company. However, Android File Transfer can be challenging at times. Here is how to transfer photos from Android to MacBook using Android File Transfer:
Step 1. Download and install Android File Transfer on your Mac. Please be aware that this software is compatible with macOS 10.7 and later.
Step 2. Once the installation is complete, launch the software on your Mac and establish a connection with your Android phone using the USB cable.
Step 3. Access the files on your Android device and navigate to the "Pictures" folder. Images captured using your Android camera are typically stored within the "DCIM" folder.
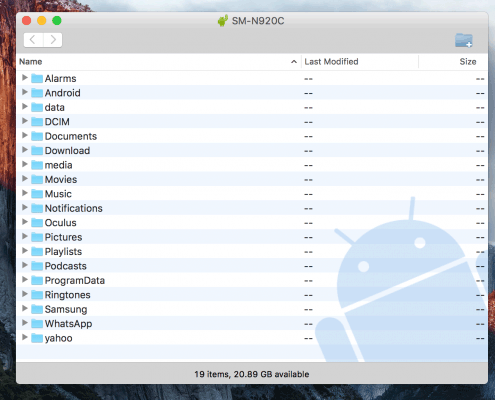
Step 4. Find the desired photos, then move them to either your desktop or a preferred folder on your Mac by dragging and dropping them.
Preview, a commonly used application on Mac, isn't just limited to viewing images and PDFs. It can also serve as a convenient tool for transferring photos from your Android device to your Mac. Follow these steps to efficiently transfer photos from Android to Mac using this familiar and built-in tool:
Step 1. Link your Android device to your Mac using a USB cable and open the Preview application on your Mac.
Step 2. Go to the "File" menu and select "Import from [Your Android Device's Name]". Preview will automatically detect your connected Android device.

Step 3. A window will appear displaying the photos on your Android device. Browse through the images and select the ones you want to transfer to your Mac.
Step 4. After selecting the photos, choose a destination folder on your Mac where you want to save the transferred images.
Step 5. Click the "Import" button to start the transfer process. Preview will copy the selected photos from your Android device to the specified folder on your Mac.
For MacBook users, leveraging the built-in Photos app can also be an intuitive way to transfer photos. Here is how to use it to transfer photos from Android to Mac:
Step 1. Use a USB cable to connect your Android device to your MacBook and open the Photos app.
Step 2. In the Photos app, click on the "Import" tab. It might be located at the top of the Photos app window. Your Android device should appear in the list of available devices. Click on it.
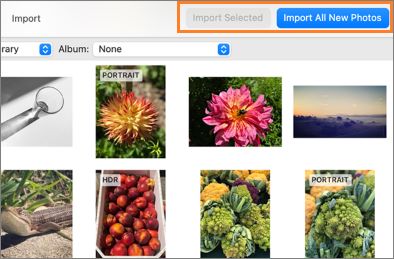
Step 3. Select the photos you want to import to your MacBook. After selecting the photos, click the "Import Selected" button to import only the selected photos. Alternatively, you can click "Import All New Photos" to import all the photos.
If you are a Samsung user, you can easily import Samsung photos to Mac using the Samsung Smart Switch. It aids in the transfer of photos, videos, contacts, and additional files from Samsung devices. What's more, it offers the capability to create backups of your valuable data. Follow the steps below to get photos from Samsung to Mac:
Step 1. Download Smart Switch for free onto your computer and follow the provided instructions to install the application.
Step 2. Connect your Samsung device to your PC using its cable and open the Smart Switch application. Allow access to your Samsung phone once the connection is established.
Step 3. Within the Smart Switch interface, click on "More", located at the top right corner. Then, choose "Preferences" and select "Backup items".
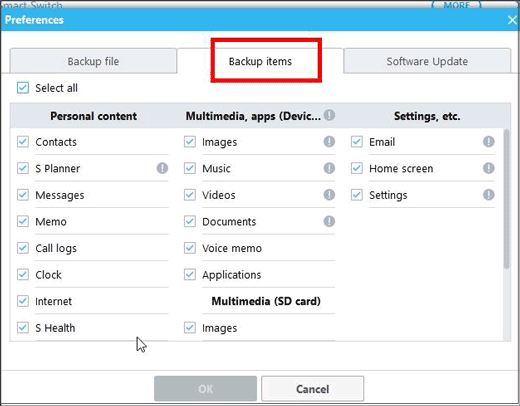
Step 4. Among the available options, designate "Photos" as the desired data for transfer.
Step 5. Click on "Backup", and when prompted, choose "Allow" to grant the necessary permissions.
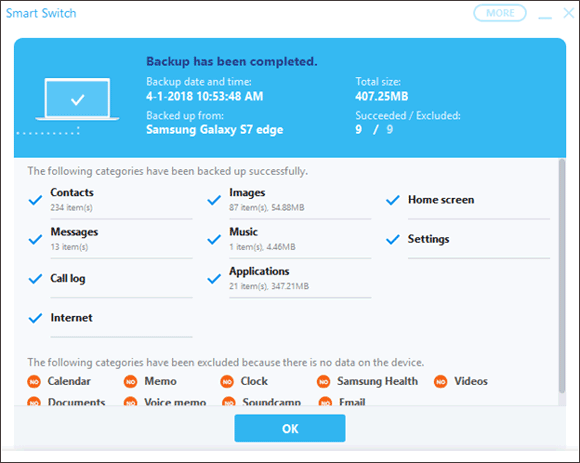
Step 6. Initiate the backup process, which might take some time to complete. Once done, click "OK" to confirm the successful transfer of your photos to the PC.
The above methods are all about how to transfer photos from Android to Mac using a USB cable; well, if you do not want to use a USB cable, you can transfer photos from Android to Mac wirelessly.
Apple's iCloud service provides 5 GB of free storage, commonly used by users on their macOS and iOS devices to expand their data storage. However, it might surprise you to learn that you can also leverage iCloud to transfer photos from Android to Mac. Here is how to get photos from Android to Mac via iCloud:
Step 1. Sign in to the iCloud website using the correct Apple ID and password via your Android device's browser.
Step 2. On the iCloud homepage, click on the "Photos" icon and then select "Upload". Choose the photos you wish to bring to your Mac and click "Upload".
Step 3. After configuring iCloud on your MacBook, any photos uploaded to iCloud from your Android device will automatically synchronize and become accessible on your Mac. If you haven't configured iCloud Photos, you'll need to log in to the iCloud website via your browser to access the photos.
If your iCloud strorage is not enough, what should you do? Check this guide to find the answer.
Facing the problem that iCloud photos not syncing on your Mac? Click here to find the solution.
Google Photos presents another wireless method to transfer photos from your Android device to your Mac. This built-in app for all Android devices effortlessly stores your photos and albums in the Google Cloud without compromising quality. Subsequently, you can conveniently access them from various devices and browsers. Here is how to import photos from Android to Mac with Google Photos:
Step 1. Download and install the Google Photos app from the Google Play Store. Open the Google Photos app on your Android device and sign in with your Google account.
Step 2. Tap the "three dots" in the upper-left corner and select "Settings", and enable "Back up & sync".
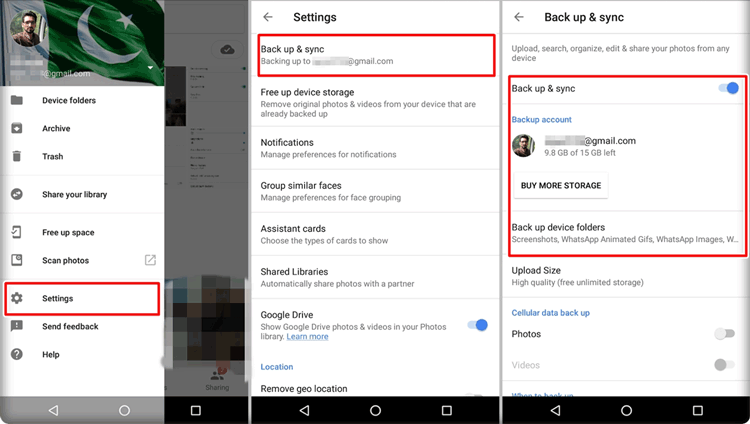
Step 3. Access Google Photos' official website on your Mac's browser, sign in with the corresponding account and password and select the desired photos for saving.
Step 4. Beside each photo, click "More" and then choose "Download" to store the selected photo on your Mac.
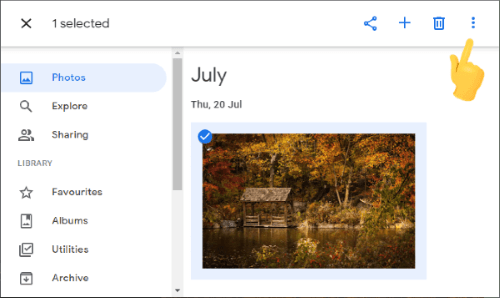
Note: It's essential to note that the initial backup of photos and videos up to 15 GB is complimentary, and you have the option to acquire unlimited storage once the free capacity is exhausted.
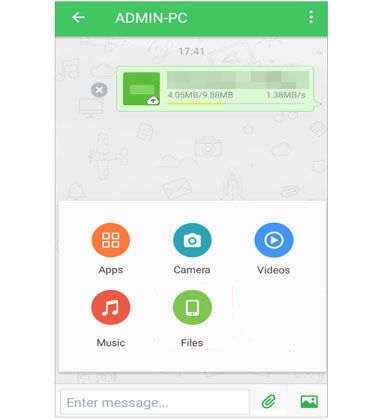
AirDroid serves as a powerful wireless file transfer tool connecting your Android device and Mac computer seamlessly. It facilitates the transfer of photos from your Android to your Mac as long as they are on the same network. In addition to this functionality, AirDroid allows remote control of your phone, even when you're at a distance, and provides reminders to check messages and other notifications. Here is how to use it to download Android photos to Mac:
Step 1. Download and install AirDroid on both your Mac computer and your Android phone. Ensure that both devices are connected to the same Wi-Fi network.
Step 2. Sign in with the same personal account on both your Android device and Mac. If necessary, you can also create a new account.
Step 3. Click on your Mac device, choose the pictures you want from your Android phone, and select the "Send" icon to transfer the chosen images to your Mac.
Step 4. Finally, remember to check and save them to a location on your Mac.
In certain situations, using email can be the most straightforward method to transfer photos between devices. While this approach is effective, it may not be the optimal choice for larger files, as the email service might compress them. Furthermore, there is a limitation on the number of files you can send at once, potentially making the process time-consuming. Here is how to use it to move photos from Android to Mac:
Step 1. On your Android device, open your email application. Then, create a new email by tapping on the "Compose" or "New Email" option.
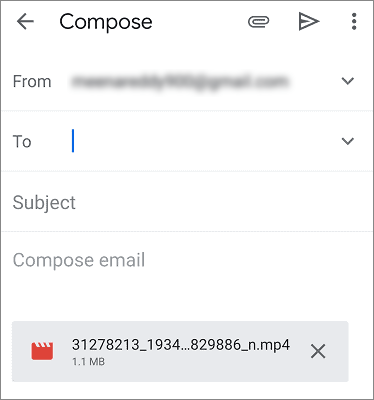
Step 2. Look for an option like "Attach" or a paperclip icon, which allows you to add attachments, then choose the photos you want to send.
Step 3. Enter your own email address in the recipient field and send the email.
Step 4. Open the email application on your Mac. Locate the email you sent and download the attached photos.
There are numerous ways to transfer photos from Android to Mac, of which we have introduced ten. Honestly speaking, we highly recommend you to transfer photos from Android to Mac via Coolmuster Android Assistant, which is rapid, easy to operate, highly secure (without any damage to Android data) and worth a try.
Of course, if you have other tricks about how to transfer photos from Android to Mac or if you encounter any problem during use, welcome to share your opinions by leaving a comment below.
Related Articles:
7 Viable Ways on How to Transfer Photos from Mac to Android
Top-Rated Approaches in Transferring Files from Android to Mac Effectively
How to Transfer Videos from Android to Mac Without Struggles


