If you have the necessary skills and techniques, the process of transferring images from Android phone to laptop is a walk in the park. Here is how to move photos from Android to laptop:
Method 1: How to Transfer Photos from Android to Laptop ac via Android Assistant
Method 2: How to Transfer Pictures from Android to Laptop with File Explorer
Method 3: How to Transfer Pictures from Android Phone to Laptop with Google Photos
Method 4: How to Move Pictures from Android to Laptop with Google Drive
Method 1: How to Transfer Photos from Android to Laptop ac via Android Assistant
When it comes to transferring photos from your phone to laptop, Coolmuster Android Assistant (Windows/Mac) is the best application to use. The primary features of the application are as discussed below:
Key Features
* With a single click, you can back up and restore the whole data on your Android device.
* The backed up, or restored data retains its 100% quality.
* It transfers photos, videos, contacts, and call logs among others between your laptop and phone.
* It can install and uninstall applications.
* It can edit, delete or add a contact on a laptop.
* It enables one to send and reply to texts directly from a laptop.
* It supports all Android phones from Android , including Samsung Galaxy S23/S22/S21/S20/S20+/S20 Ultra/S10/S10+/S10e/S9/S9+/S8/S8+, Huawei P80/P60/P50/P40/P40 Pro/P30/Mate X/Mate 20/Mate 10 Pro/Mate 10/V20/V10 and more.
3 Steps on How to Transfer Photos from Android to A Laptop:
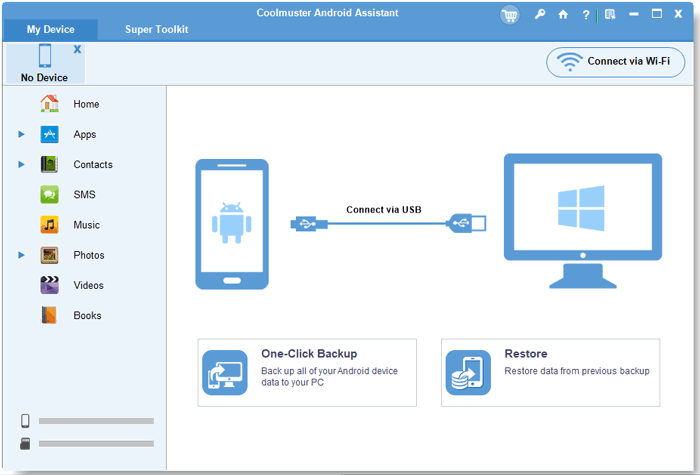
-> Firstly, after opening the program, please connect your Android phone to Laptop with a USB cable or connect via Wi-Fi.
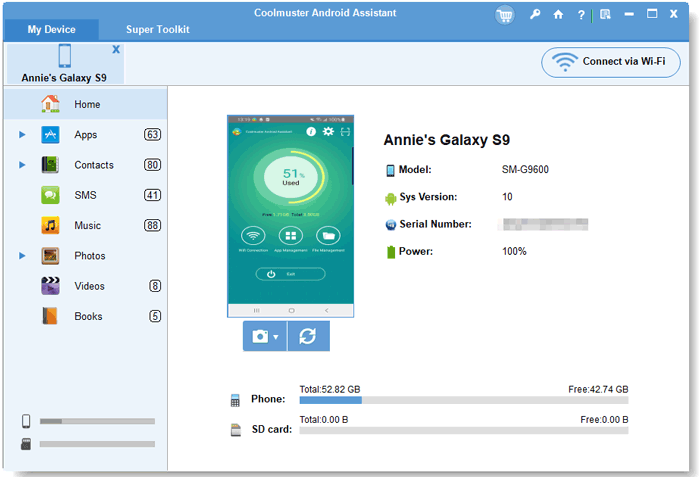
-> To transfer photos from your phone to laptop, you can click on "Photos" icon on the left menu, preview the images on your Android phone. All the photos on your phone will show up.
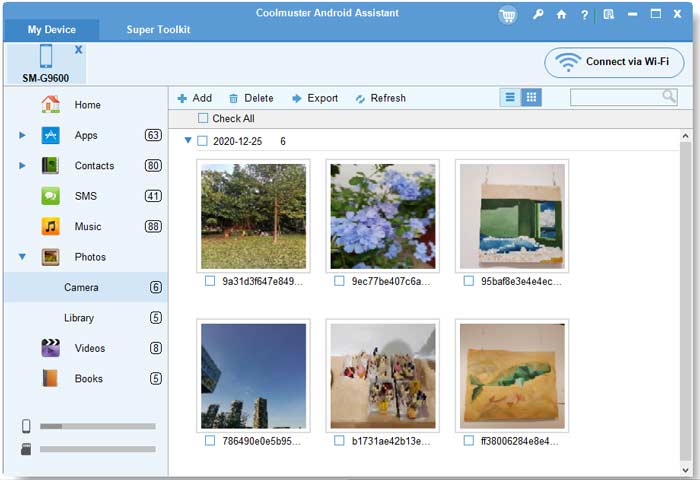
-> Select the image files you want to transfer and then tap the "Export" button to move them to your laptop immediately.
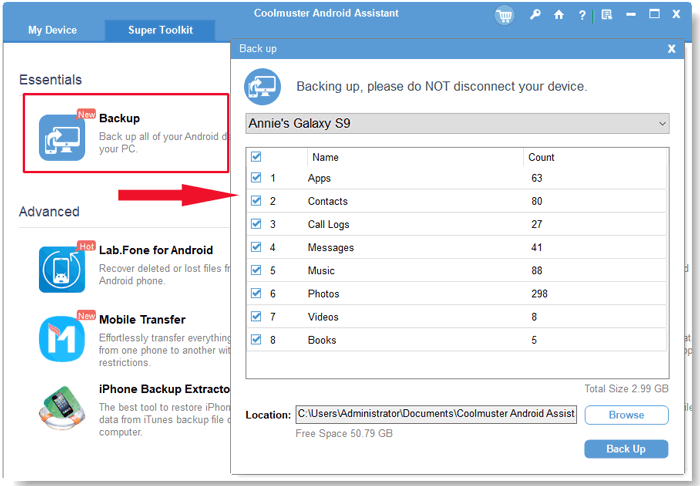
Alternatively, you can take full advantage of the One-click Backup & Restore feature of the Coolmuster Android Assistant to back up all Android photos to laptop with one simple click. Simply go to "Super Toolkit" > "Backup" > "Photos" > "Back Up". Done!
You may like:
How to Transfer Photos from Android to Mac
10 Best MOV Editor Options - Edit MOV Files Easily [Updated Guide]
Method 2: How to Transfer Pictures from Android to Laptop with File Explorer
If you are still worrying about how to move photos from Android phone to laptop, worry no more! You can still use file explorer. This is the leading method to use if you fancy having as much control as possible over how your pictures are organized. The process allows you to import everything manually. To transfer photos using this method, follow the following steps:
-> Connect your phone to laptop via a working USB. Open windows explorer and go to 'My Computer' or 'This PC.'
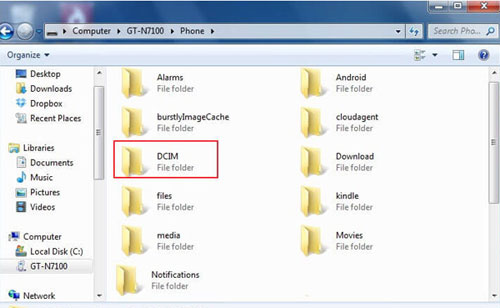
-> Your Android phone should be listed as a device on the window that opens. On the basis of how USB transfer is set, the icon may appear as a portable media player, a camera, or just another drive. The icon is not essentially important, thus pay attention to the name.
-> After opening the device, you will see a drive labeled 'phone.' Open that drive.
-> Look for a folder named 'DCIM' to find your photos.
-> Open the 'camera' folder in the 'DCIM' folder.
-> Select the entire photos you would like to move. You can also select all if you want to move all the files.
-> After selecting the desired photos, right click on the chosen images and then chose the 'copy' command. You can also choose the 'cut' command if you want to remove them permanently from your phone.
-> On your laptop, go to the folder where you want to transfer the photos. Right-click any empty space inside the folder, and then select the 'paste' command.
-> Wait for the process to finish.
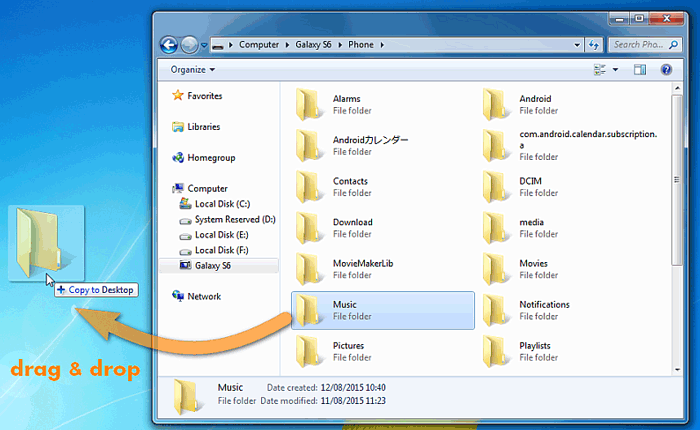
-> Besides, instead of following the commands outlined above, you can simply 'drag and drop' your photos from the phone to the laptop.
Method 3: How to Transfer Pictures from Android Phone to Laptop with Google Photos
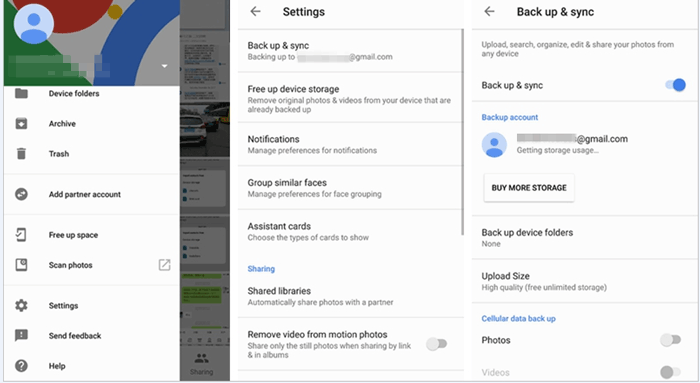
-> On your Android phone, open Google photos. By opening this application, you will get access to your photos stored in Google Photos. You may be forced to sign in to the app if you haven't done so yet.
-> Click on the 'three bar 'icon on the left menu.
-> Click 'Settings' on the popup window that appears.
-> On the top of 'Settings' menu, click 'backup and sync.'
-> Ensure that the switch is set to 'ON' to make sure that your Android photos are uploaded to Google Photos.
-> From your laptop, open the official Google Photos site (https://photos.google.com/). The site will open a page that has your back up phone's photos.
-> You may be needed to sign in with your Gmail Account if it's your first time accessing Google Photos.
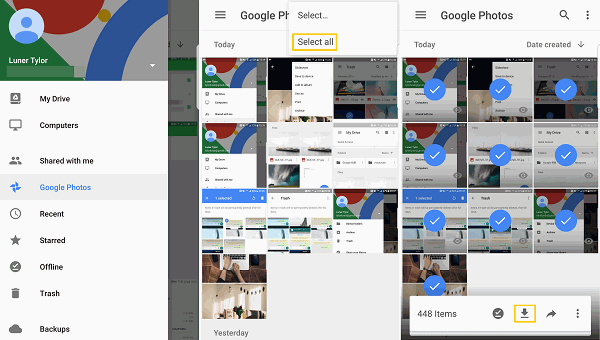
-> Select the pictures to download. You can tap the checkmark in the top-left corner of every image you wish to choose, or tap an individual image if you only want to download one.
-> Click the 'Download' button to transfer the images to your laptop.
-> Wait for the photos to download.
Method 4: How to Move Pictures from Android to Laptop with Google Drive
Google Drive is another method to use when transferring photos from Android to laptop. Google Drive is simply the best when it comes to backing up your pictures and consequently removing them from your phone. The application uploads the photos to the Drive for easy access on other platforms. The synced photos are stored in a private location, and thus cannot be accessed by unauthorized personnel.
You need to first backup your photos on Google Drive in order to download them on your laptop.
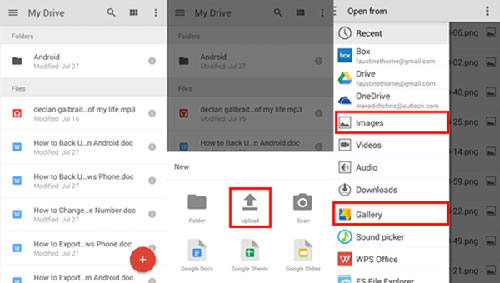
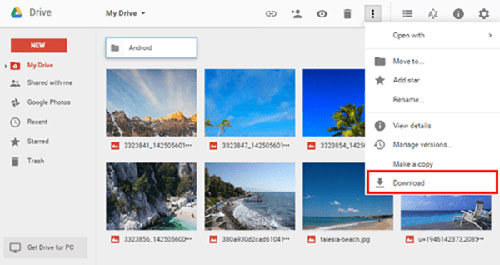
After uploading the photos to Google Drive, download and install the Google Drive desktop version on your laptop. Besides, you can access Google Drive from the browser. Go to the folder where your images are stored and download them on your laptop.
Related Articles:
How to Recover Deleted Photos from iPhone 14
The Favorite Methods to Transfer Videos from Android to Mac, without Struggles
Top 8 Ways on How to Transfer Photos from Android to PC


 Download for PC
 Download for Mac
