
How to Transfer Photos from Computer to Android/iPhone in 8 Ways

Discovering how to transfer photos from a computer to an Android or iPhone can be a difficult challenge if you want an error-free transfer. Indeed, there are more than a handful of approaches available to transfer photos from a computer to a phone and vice versa, but not all of them are reliable. Adequate methods to download photos to phones vary for Android users and iPhone users. The following information will come in handy to ensure you choose an adequate approach.
Here, we will show you 3 methods of how to transfer photos from a computer to an Android.
Coolmuster Android Assistant is often referred to as the best Android photo transfer tool to effectively transfer photos from a computer to an Android device. It has already garnered an abundant number of positive reviews from Android users because of its convenience and compatibility. Above all, you can view your Android pictures on the interface and then pick the images you plan to transfer, which provides flexibility for picture transfer.
Key features of Coolmuster Android Assistant
How to import photos from a computer to Android with Android Assistant?
01Download and launch Android Assistant on your PC. The downloading process is quick. Once it has been completed, launch it.
02You will now connect your Android device to your computer with a USB cable. The interface of Android Assistant will recognize it and it will become visible on your screen.
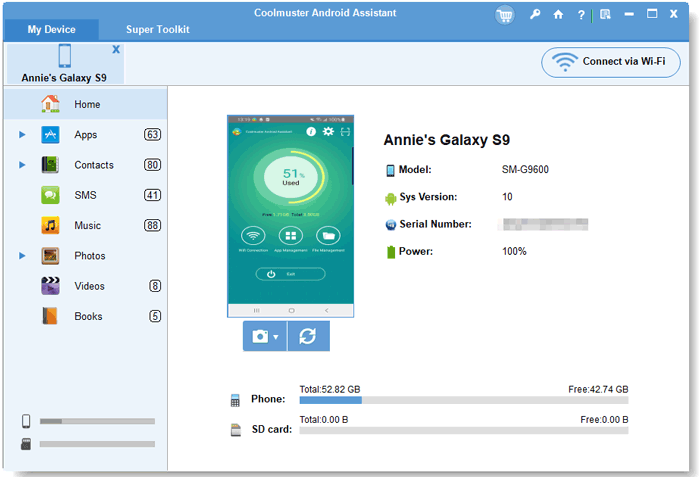
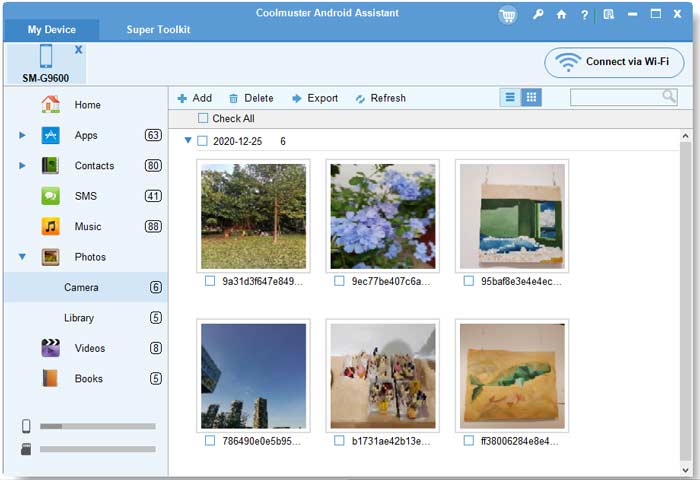
03Click on "Photos" in the left menu. Then, proceed to click on the "Add" button to choose the photos you want to transfer from your PC and import them to your Android device immediately. It is that simple. By the way, you can also click "Export" to transfer photos from your Android device to the PC.
Video guide
Android File Transfer has been considered a great app to discover how to send pics from your computer to your phone if you have a Mac. There are only a few steps that need to be undertaken to begin a photo transfer with the help of it.
How to transfer photos from a computer to an Android for free?
Step 1. Connect Android device to Mac and download Android File Transfer.
Step 2. Click on the blue-faced icon present in your computer's dock.
Step 3. Select the location of the photos. In the left-hand section, proceed to click on the "Picture" folder for it to open in the finder window.
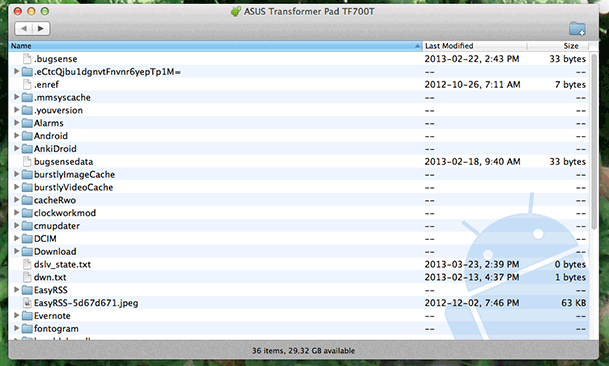
Step 4. Click and drag across a collection of photos you want to choose. (Click on the "Edit" menu and then click "Copy" in the drop-down menu. If Android File Transfer does not instantly open, you should click on the Launchpad spaceship icon. Then, click on the icon reflecting Android File Transfer.)
Step 5. Double-click the SD card or internal storage.
Step 6. Double-click on the "DCIM" folder. Then, double-click on the "Camera" folder. You will now paste your photos into this folder. Click the folder, and then in the drop-down menu, click "Edit" and then click "Paste Items". This will prompt the transfer to begin. Once it is completed, photos will be able to be viewed on the Android's Photos app.
If you want to transfer photos wirelessly, Bluetooth is a convenient option. However, this method can be quite slow.
How to transfer photos from a PC to an Android without USB?
Step 1. First, enable the Bluetooth function on both your computer and Android device and pair them.
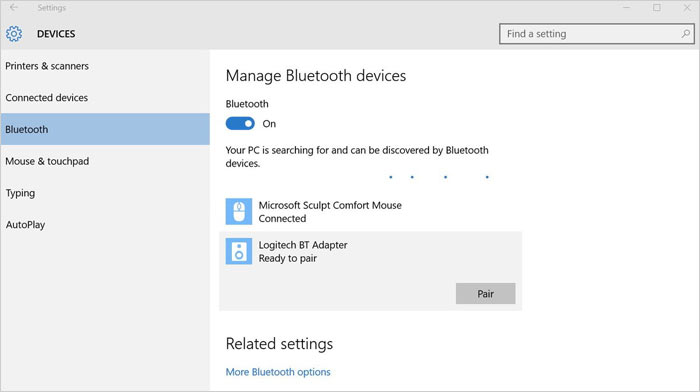
Step 2. Once connected, select the photos you wish to transfer on your computer and choose to send them via Bluetooth.
Step 3. At this point, a prompt will appear on your phone. Tap "Accept", and the photos will be sent to your phone.
iPhone users can find exclusive methods in this part to upload photos from their computers to their iPhones.
For those familiar with iTunes, this application allows you to transfer photos from your computer to your iPhone. Simply connect your device and perform a quick sync setup to easily transfer photos from your computer to your iPhone. The following are the steps:
Step 1. Connect the iPhone device to the computer with the aid of a USB cable. Once you do that, open iTunes.
Step 2. Click on the iPhone icon and then click "Photos", which is present in the left-hand sidebar.
Step 3. Check "Sync Photos", which is at the very top of the "Sync Photos" page. Then, click on "Copy Photos From". A drop menu will become apparent. On this menu, click "Choose Folder".
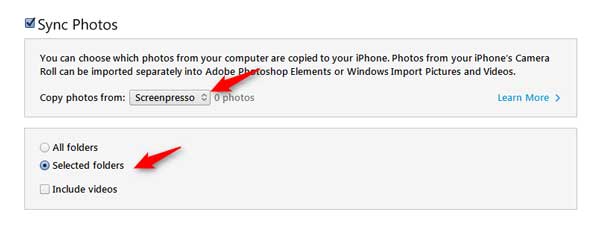
Step 4. Select the folder from which photos will be uploaded.
Step 5. Click on "Apply" for the transferring of photos to begin. Once every photo has finished uploading, it will become visible on iPhone.
If you prefer to transfer photos through cloud services, iCloud is a great option. Just upload your photos to iCloud on your computer, and by logging into the same account on your iPhone, you can access the photos seamlessly across devices. Here is how it works:
Step 1. On your computer, go to icloud.com. On it, log in with your Apple ID and password.
Step 2. Click on "Photos" to open the iCloud Photos application.
Step 3. Click on "Uploads" and then click the folder in which photos are stored.
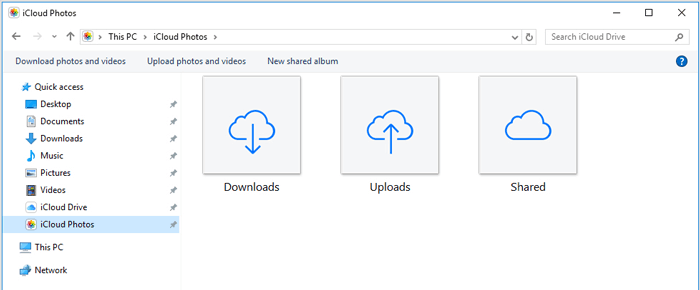
Step 4. You will now select the photos you want to upload. Click and drag the group of photos you want to choose. In the bottom-right corner, click "Open" for photos to upload to iCloud. Depending on the number of photos, the time for the upload completion varies.
Step 5. Log into the same account on your iPhone and enable "Photos" to access them.
In Part 3, we'll cover universal transfer methods that work for both Android and iPhone, including direct USB transfers, Google Photos cloud storage, and email photo attachments. These options give you flexible ways to move photos between phones with different operating systems.
This is considered one of the easiest approaches to undertake to learn how to put pictures from your phone on your computer; nonetheless, it has been noted that there are times when the quality of photos could be diminished to some extent.
How to transfer photos from a computer to an Android via USB?
Step 1. Connect your Android device to your computer. Once you do, open it to view the files present in it.
Step 2. On the bottom-left corner, click on the Windows icon to then proceed to click on the folder that contains the photos you want to transfer.
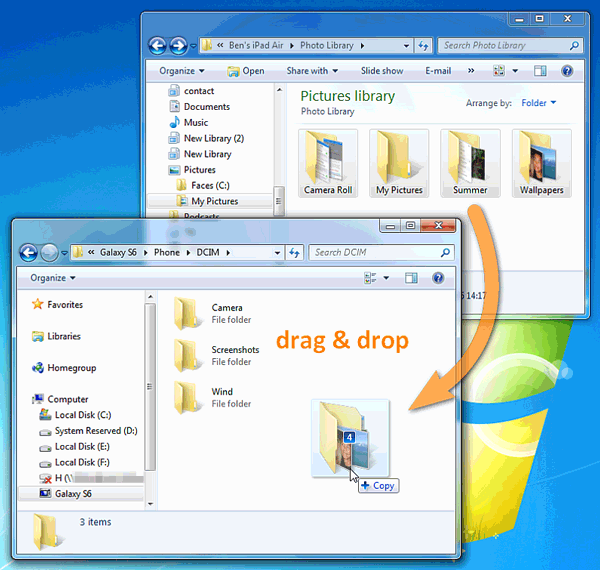
Step 3. Ensure that you have both folders side by side - the Android photo folder and the computer photo folder. Begin to drag photos from the photo folder to the Android photo folder. That is all there is to it. It is very easy to discover how to get photos from your computer to your phone with this option.
Google Photos is another great approach to discovering how to download photos to a computer from a phone. It provides different ways in which one can share photos. It is a great application that permits putting pictures on a computer from the phone in an easy manner. You need to download the Google Photos application on your computer. Once it is completed downloading, launch it to begin the backup of photos. It will be a fun process organizing your photos in any way you want.
How to import photos from a computer to an Android? (The operations for iPhones are quite similar.)
Step 1. On your computer, go to photos.google.com and login to your Google account in order to access any photo that you want.
Step 2. Click "Upload" and then click photos location. You will then select photos to upload by clicking and dragging.
Step 3. In the bottom-right corner, click "Open" and then choose upload quality. Click "Continue" in the bottom-right corner for photos to begin uploading.
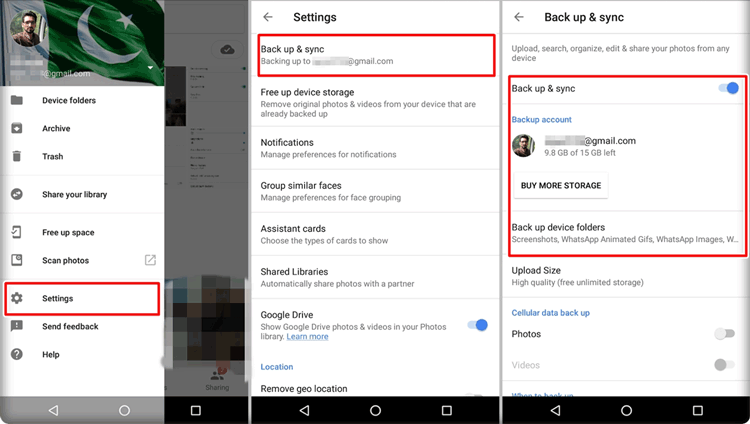
Step 4. On your Android device, open Google Photos. Click on the symbol present in the top-left corner in order for a pop-out menu to appear. Click on "Settings" on this menu. Proceed to click on the "Back up & sync" option.
Ensure that the switch is on to allow synchronization between the Google Photos application and the Google Photos account, which will integrate photos uploaded to Google Photos on an Android device.
This is another very easy approach; nonetheless, it should only be considered if you have less than a handful of photos you want to transfer, as it can become quite a challenging process if there are a lot of photos that require the transfer.
Follow the guide to transfer photos from PC to Android/iPhone wirelessly.
Step 1. On your computer, log in to your email service provider and click on "New Message". Then, click on the attachment to upload the photos you want to have on your phone. Enter your email in the recipient section and then click send.
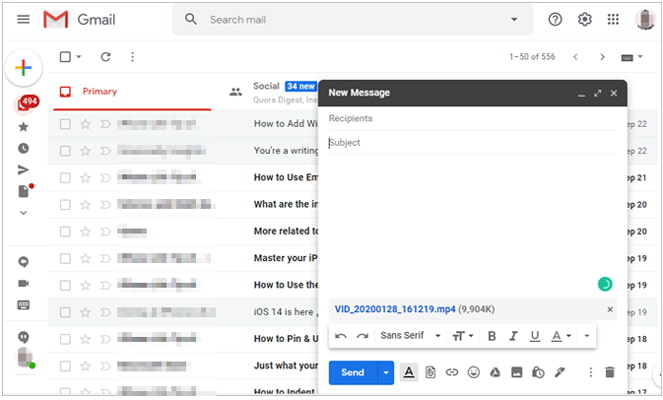
Step 2. On your phone, log in to your email and click on the email that you just sent to yourself in order to download the photos.
Make every photo transfer you conduct a piece of cake by considering any of the aforementioned approaches. Of course, depending on the number of photos you need to transfer, one method might work better for you than another one; thus, take this into account before choosing. For Android users, you can totally rely on the Coolmuster Android Assistant to transfer photos from a computer to an Android phone, which is quite effective and safe.
Related Articles:
Top 7 Ways on How to Transfer Photos from Android to Android
Learn How to Transfer Photos from Phone to Computer Like Pro
How to Transfer Photos from Android Phone to Chromebook Computer in 4 Ways
How to Transfer Photos from Pixel to Computer [A Practical Guide]


