
Learn How to Transfer Photos from Phone to Computer Like Pro

Have you ever found yourself with a phone full of amazing photos but no idea how to get them onto your computer, or which is the best method for phone to computer photo transfer? Maybe you just got back from a fantastic vacation, and you want to edit and share your best shots. Or perhaps your phone storage is bursting at the seams, and you need to make some space on your phone. Whatever the reason, transferring photos from your phone to your computer can seem like a daunting task. But don't worry – we're here to help.
In this guide, we'll walk you through simple, step-by-step methods to easily transfer your precious memories from your phone to your computer, making sure they stay safe and organized. Let's discover how to transfer photos from phone to computer, getting those photos where they need to be.
Transferring photos from your Android phone to your computer not only provides a secure backup but also offers convenience for organizing, editing, and sharing your images. In this section, we will guide you through simple and effective methods to transfer photos from your Android phone to a computer.
A third-party software tool can help you move pictures from a phone to a computer fast and effectively. Coolmuster Android Assistant is a software tool that helps users manage their Android devices from computers. It allows easy data transfer, back up, and restore operations.
Features of Coolmuster Android Assistant:
Follow these steps to transfer photos from phone to computer via Coolmuster Android Assistant:
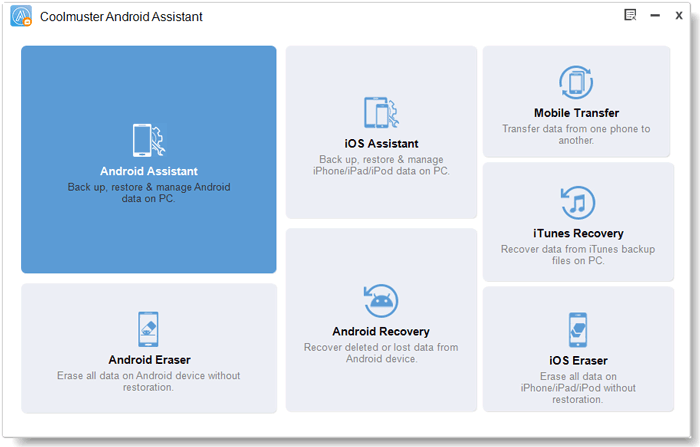
01Download, install, and run Coolmuster Android Assistant on your phone. Click "Android Assistant" on the software's interface.
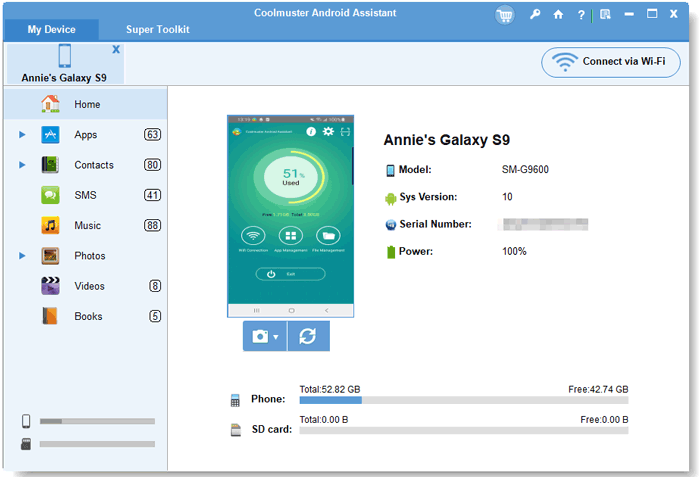
02Connect your phone to your computer via a USB cable. Follow the onscreen prompts to allow USB debugging on your phone.
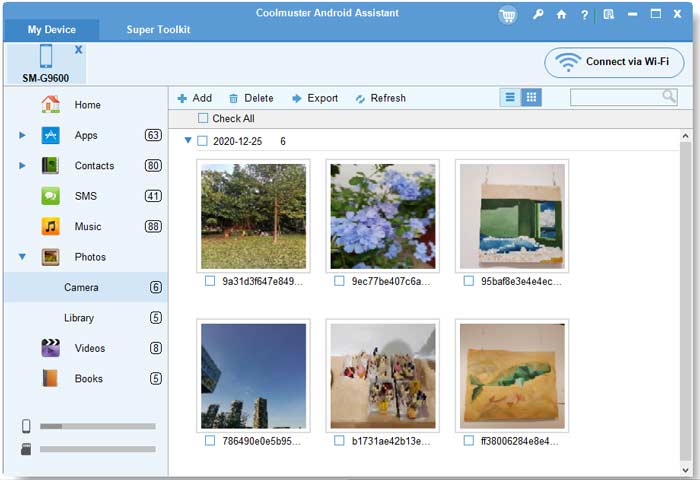
03Click on "Photos" from the menu section. Choose the pictures you wish to transfer, then click "Export" to transfer from your Android device to your PC.
The Windows Photo app allows you to import photos from your phone. Here is how to upload photos from phone to computer using the Windows Photo App.
Step 1. Run the application on your computer. Click the "Import" button, then select "From a connected device".
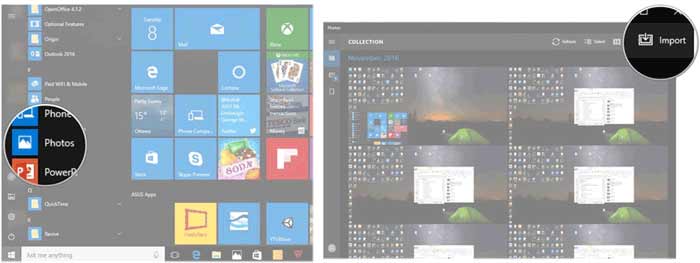
Step 2. Select "your phone" then allow the app to generate all your images. Click the drop-down menu for "Select", then click "All items".
Step 3. Tick the "Delete original items after import" box to remove the pictures from your phone, then click the "Import" button.
For your reference, you may want to learn more info about Android photo transfer:
In this part, we'll provide a step-by-step guide on how to transfer your iPhone photos to your computer, preserving and conveniently accessing your precious memories.
If you're using an iDevice, you can use Coolmuster iOS Assistant to save pictures from phone to computer. Coolmuster iOS Assistant is a versatile software tool designed to facilitate iOS device management and data transfer tasks. It offers a range of key features to help users effectively manage their iPhone, iPad, or iPod touch devices from their computers.
Features of Coolmuster iOS Assistant:
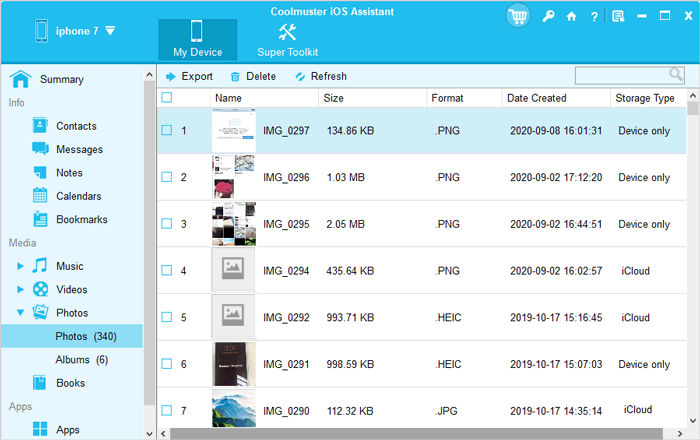
Here is how to transfer photos from phone to computer using Coolmuster iOS Assistant:
01Download, install, and launch Coolmuster iOS Assistant on your PC. Connect your phone to the computer and ensure the software detects your phone.

02Click "Photos" from the left panel. Preview and select the photos you wish to transfer to your PC. Press the "Export" button to start the transfer.
If you use iDevice, you can leverage AirDrop to facilitate a phone to computer photo transfer. Here is how to transfer photos from your iPhone to your Mac computer.
Step 1. Start by ensuring you've enabled AirDrop on your phone. Go to "Settings" > "General", then "AirDrop" to turn it on.
Step 2. Open the Photos app on your iPhone, then select the "All Photos" album collection, then tap "Select". Select the photos you wish to send to a computer.
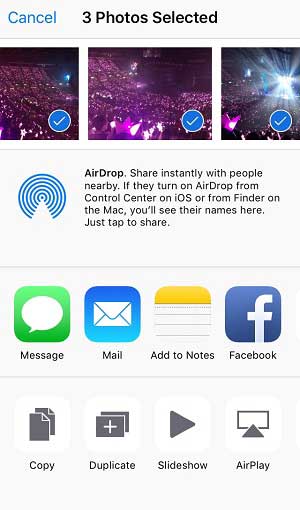
Step 3. Select the "Share" icon. Select your Mac's name from the Share menu's top row. Check your Mac's Download folder for the photos.
For your reference, you may also like:
If none of the above methods work, then you can try the following methods.
The USB cable is a popular tool that smartphone users utilize to transfer media from their phones to computers and vice versa. Generally, it is used to charge smartphones. Here is how you can transfer photos from your phone to computer using a USB cable.
Step 1. Connect your phone to your computer using a USB cable. Ensure you use the appropriate cable for your phone model.
Step 2. Choose the correct USB connection option on your phone. These options typically include "File Transfer", "Media Device", or "MTP" mode. Select the option that allows you to transfer files between your phone and computer.
Step 3. Access your phone's storage once the connection is established. Open the "File Explorer" or "Finder" on your computer and locate your phone. It is usually displayed under "Devices" or "This PC" (Windows) or "Devices" (Mac).
Step 4. Navigate to the photos folder within your phone's storage. Open the folder to access your photos.
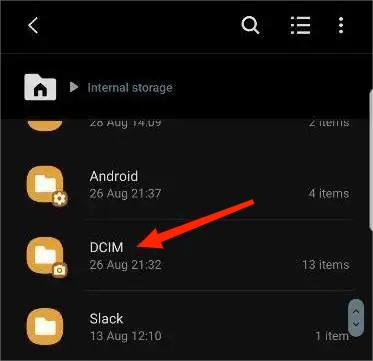
Step 5. Select and copy the photos you want to transfer. You can either copy individual photos or select multiple photos by holding down the "Ctrl" key (Windows) or the "Command" key (Mac) while clicking on each photo. Right-click and choose "Copy" from the context menu.
Step 6. Navigate to the desired location on your computer where you want to store the transferred photos. Right-click in the destination folder and select "Paste" from the context menu. Alternatively, you can use the "Ctrl" + "V" (Windows) or "Command" + "V" (Mac) keyboard shortcut to paste the photos.
Ensure that you don't disconnect the phone or interrupt the transfer until it is complete. A progress bar or indicator may appear, giving you an estimate of the transfer time.
Photos from your phone can be automatically uploaded to cloud storage, making them easy to retrieve. Here is how to upload pictures from phone to computer.
Step 1. Open Google Photos on your phone and sign in your account.
Step 2. Enable back up and sync in the app's settings. To do this, select "Settings" and tap "Back up & sync".
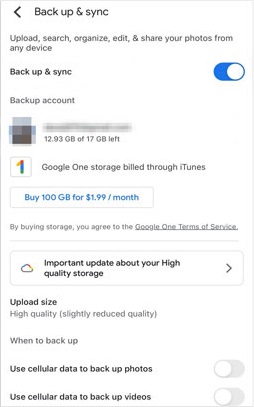
Step 3. Open your favorite browser on your computer and navigate to "Google Photos". Choose the pictures you'd like to download, then click "Download" from the overflow menu in the upper right corner.
Despite most of its amazing capabilities being replaced by Wi-Fi, Bluetooth can still come in handy if you want to transfer photos from your phone to a computer. Note that not all computers have in-built Bluetooth technology. In such a case, you may need to invest in a Bluetooth dongle.
Here is how to transfer photos from a phone to a Mac computer using Bluetooth.
Step 1. Open "System Preferences", then click "Sharing".
Step 2. Click "Bluetooth Sharing".
Step 3. Head back to the System Preference page, then click "Bluetooth". Ensure your Mac computer is set as "discoverable". Open Bluetooth on your phone, ensure there is a connection, then select the photos you wish to send to your computer and share via Bluetooth.
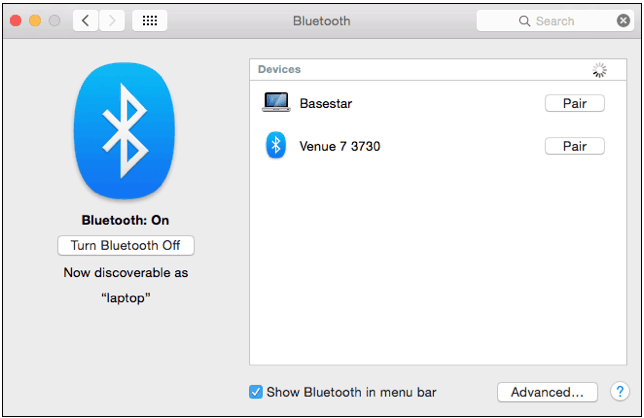
The process of sharing files over Bluetooth slightly differs on Windows than on MacOS, though not widely. Here is how to transfer pictures from a phone to a Windows PC.
Step 1. Open Windows "Settings", then click "Bluetooth & devices".
Step 2. Click "Bluetooth", then under the "Related settings" sections, click "Send or receive files over Bluetooth".
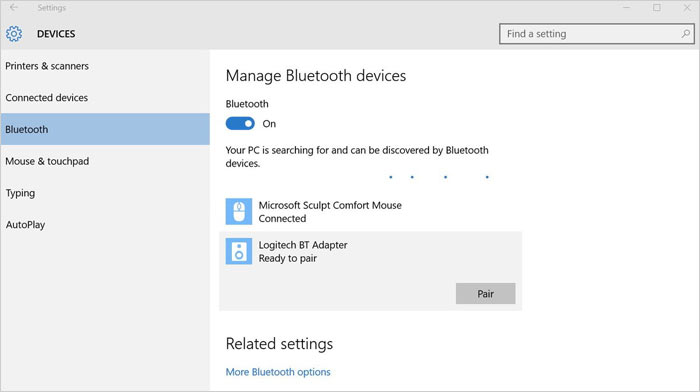
Step 3. Click "Receive files" and share photos from a Bluetooth connected phone.
OneDrive is a cloud storage service provided by Microsoft. Most users are familiar with it, especially those keen on storing their photos, videos, and files in the cloud. Did you know you can also use Microsoft OneDrive for a phone to computer photo transfer? Here is how.
Step 1. Install the OneDrive app on your smartphone and run it, then sign in with your Microsoft account.
Step 2. Tap the "Photos" icon at the bottom and tap the option for "Camera upload". Tap the "Turn On" button, then toggle on the "Camera upload" button. This will sync the photos to your OneDrive account.
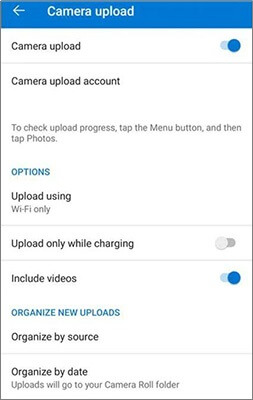
Step 3. Run the OneDrive folder on your PC to access the photos. You can choose to save them in a different location on your computer.
Are you struggling with how to transfer photos from phone to computer? Whether you're using an Android or iOS device, having a USB cable, an internet connection, or an inbuilt tool such as Bluetooth can help you transfer photos from your phone to PC.
If you want a fast, safe, and efficient way to transfer photos from your phone to a computer, Coolmuster offers the best choices for both Android and iOS devices. Coolmuster Android Assistant can help you transfer pictures from an Android device to a PC. On the other hand, Coolmuster iOS Assistant can help transfer pictures from an iDevice to your computer fast. Browse and download Coolmuster assistant apps to help transfer photos from phone to computer hassle-free.
Related Articles:
7 Quick Ways to Transfer Photos from PC to iPad (With or Without iTunes)
How to Transfer Photos from iPad to Computer [Solved with 6 Methods]
How to Transfer Photos from iPhone to Android? [Solved]
How to Transfer Videos from Phone to Computer? (9 Ways for Android/iPhone)


