
Vivo Cloud Backup and Restore: Easily Transfer Your Vivo Data

Vivo is a renowned mobile brand that has revolutionized the industry with its innovative smartphone devices and software. Taking their success beyond smartphones, the company offers a secure storage facility through Vivo cloud services that are only accessible to those who register for a Vivo account. So, how can you utilize Vivo cloud backup and restoration on your Vivo phone? Today we'll explain it step by step. Now, read on to learn about it.
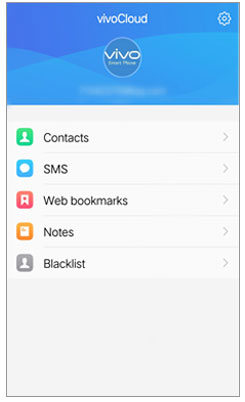
Vivo Cloud account offers you the ultimate peace of mind with safeguarded information, including your Web bookmarks, contact list, SMS, Notes, and blacklist. Moreover, it connects all your other Vivo apps to store their data in the cloud. No matter what happens to your device, you will never have to worry about losing essential memories or documents. Vivo Cloud is the optimal solution for everyone due to its remarkable features.
Below are some of the Vivo Cloud's features:
1. Utilizing advanced encryption technology, Vivo Cloud safeguards user data from breaches, ensuring security and reliability.
2. Users can easily store photos, videos, and other files without worrying about insufficient space.
3. It supports data synchronization across multiple devices, making it convenient for users to access files on different devices.
4. Regularly backs up user data to prevent data loss or corruption.
5. Intelligent classification and recognition features help users manage their data more efficiently.
To make data backup and restoration effortless, Vivo provides a comprehensive cloud-based service known as vivoCloud. For those using a Vivo phone, the free storage for every account is an ideal start. With this app, you can easily back up your contacts, messages, bookmarks, blacklists, and notes on any Vivo device. You can also use other cloud servers to back up your Vivo photos, videos, and other files.
Here is an overview of using the vivoCloud app to back up and restore your data.
Here are 2 functional methods for Vivo cloud backup.
Unlock the power of Vivo Cloud backup and start safeguarding your contacts, messages, web bookmarks, notes, and blacklist with this step-by-step guide:
Step 1: Get the vivoCloud app onto your phone if you haven't already. It's free and can be downloaded from App Store. To back up your data, sign in with your Vivo account, or sign up for one.
Step 2: Then choose a file category on the screen, and click the "Backup" option. Then it will transfer your local data to the Vivo cloud storage space. Please keep your network stable during the whole backup process.
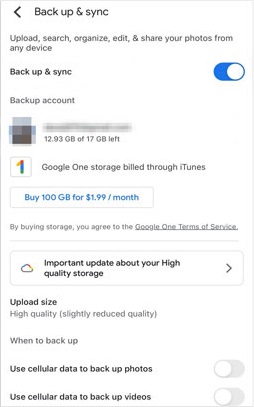
Vivo photo backup is not difficult because you can utilize Google Photos. Also, this app can back up your videos with ease.
Step 1: Install Google Photos on your Vivo phone, and open it to log in with your Gmail account.
Step 2: Click the "Menu" button on the left top corner, and choose "Settings". Then enable "Back up & sync". The app will back up your photos automatically.
Besides, if you want to back up your documents and other files on your Vivo smartphone, you can download Google Drive. It supports more data types than Google Photos.
Read More: You can also back up your Android data to Mac with this comprehensive tutorial.
If you have lost your data or acquired a new Vivo phone, recovering your precious data again is a straightforward process, especially if you have a backup. Follow the below simple steps to restore your data.
Step 1: Launch the vivoCloud application and log in.
Step 2: You can now access your Vivo SMS backup, Vivo notes backup, and more from your account using any Vivo device and anywhere. Select the data you want to recover and click the "Restore" button. Then the app will transfer the data to your Vivo phone.
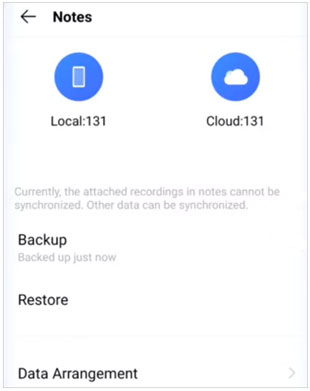
Note: Even though Vivo Cloud is a great service for data backup and restoration, it has some downsides. First, it can only sync essential data types like contacts, messages, blacklists, web bookmarks, and notes. Additionally, its backup-and-restore process is also time-consuming and solely supports Vivo devices (no other smartphone model).
Also, you can restore your backup data from your Google account to a new Vivo phone while setting up the phone.
Step 1: Turn on your new phone, and select a language. When you see the "Copy apps and data" screen, please click the Next icon.
Step 2: Tap "Can't use the old device?" to log in to your Google account. Then choose a backup file, and hit "Next".
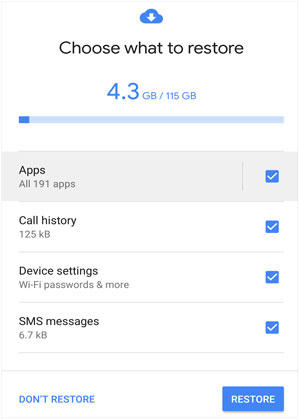
Step 3: Now, select the content you want on the "Choose what to restore" screen. Finally, click the "RESTORE" icon to start it. Once done, your data will be retrieved on your Vivo phone.
May Like: Want to back up and restore your Vivo phone? Then you can use these 4 ways.
At times Vivo cloud or other cloud services may fail to meet your expectations. As a result, using an alternative way of backing up your Vivo phone's data becomes necessary. Coolmuster Android Backup Manager is an ideal backup alternative. It helps you carry out data backup and restoration on Android devices.
Moreover, this software covers a wide range of data types, like messages, documents, music, videos, apps, pictures, etc. And it supports most popular Android brands, such as Vivo, Samsung, HTC, Huawei, Sony, and the like. Thus, you can use it to back up and restore data for many Android phones and tablets. Below are some of Coolmuster Android Backup Manager's features that make it outstanding:
Download this software to back up and restore Vivo data.
Below are some simple steps on how to use this backup software to back up and restore your Vivo phone's data:
01Install the Application on Your PC
Begin the backing-up process by downloading and installing Coolmuster Android Backup Manager on your computer. Then connect your Vivo phone to the computer via a USB cable, and enable the USB debugging mode on the phone.
02Back Up Vivo Data to the Computer
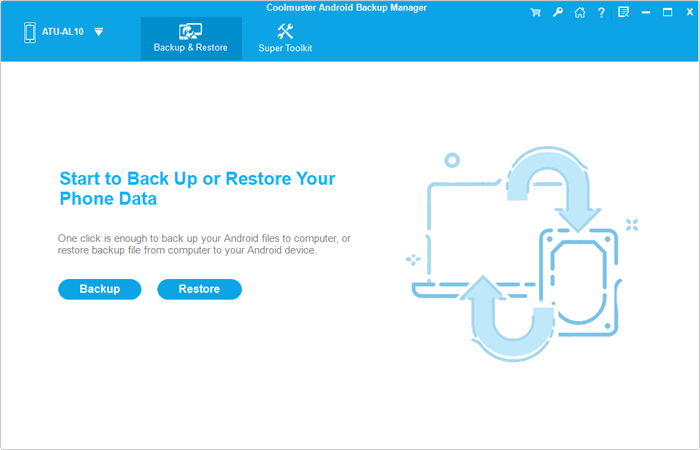
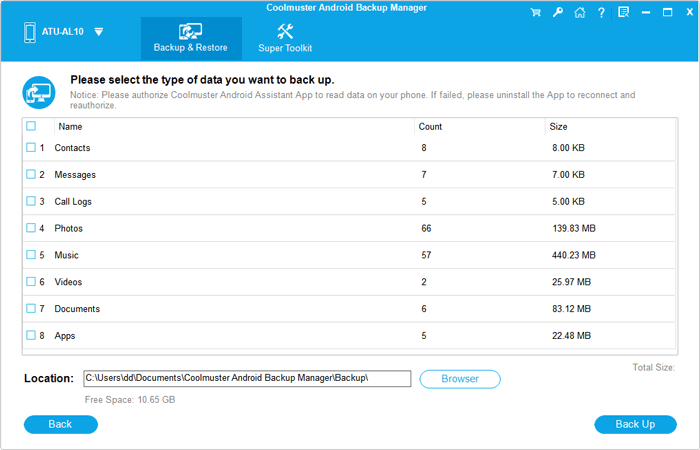
Click the "Backup" option, and select the file types on the interface. Then hit the "Browser" icon to choose a folder you like to store your data, and tap "Back Up" to start transferring your data to the computer.
03Restore Data to Smartphone
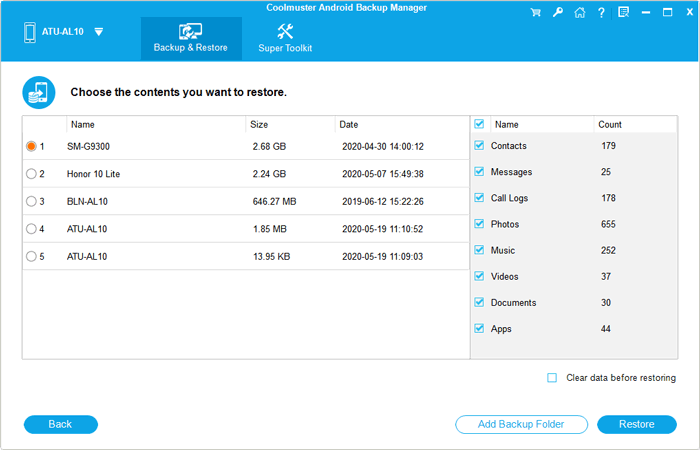
If you want to get your backup data onto an Android device, please click the "Restore" feature, and opt for a backup file. Next, pick the content you want to restore on the right panel. At last, hit "Restore" to begin the process. After finishing, you can access your data on the phone.
Q1. Is vivoCloud safe or not?
Safeguarding your information is non-negotiable, and the vivoCloud backup provides the ultimate security suite. When you store data through the Vivo Cloud backup, rest assured that all your precious memories will remain secure.
Q2. How do I access my vivoCloud?
In general, you can open the vivoCloud app on your Vivo phone, and log in with your Vivo account. However, you cannot access your backup data on it.
Q3. Is the storage space on vivoCloud sufficient?
For most users, the 5GB of free storage space provided by vivoCloud should be adequate. However, if you need to store more data, you can choose to upgrade your storage space. You can check the specific upgrade methods and fees in the vivoCloud app or on the official vivo website.
Vivo Cloud is an excellent way to back up your data and keep it secure. Like all the other cloud platforms, Vivo Cloud has some limitations. As such, it is prudent to use an alternative way of backing up your Vivo phone's data, such as Coolmuster Android Backup Manager, in case the Vivo Cloud fails to meet your expectations. It allows you to back up and restore your data to and from a PC. More importantly, this software is not only easy to use but also fast and secure.
Related Articles:
Step-by-Step Tutorial: How to Recover Deleted Photos from File Safe in Vivo
How to Export Contacts from Vivo Phone [Quick and Simple Steps]
Step-by-Step Guide: Vivo to Vivo Data Transfer [Top 5 Methods]


