
[7 Methods] How to Batch Convert HEIC to JPG on Windows/Mac/iPhone

"Has anyone found a decent open-source program to batch convert HEIC image format to JPG/PNG? My old go-to Faststone has not kept up so far. Any suggestions would be great, thanks!"
- Bonobo from Reddit.com
High Efficiency Image Format, shorted as HEIC, is a standard photo format on iOS 11 and macOS High Sierra or above. While it is high-definition with a small size, it isn't compatible with Windows PCs. Therefore, many people want to batch convert HEIC to JPG for broader usage.
There are many HEIC-to-JPG converters that can mass convert HEIC to JPG. If you are desperate for it but know nothing, you can refer to the top solutions below to get the job done effortlessly.
Coolmuster HEIC Converter is a professional tool that enables you to batch convert HEIC to JPEG/JPG or PNG on Windows computers without compression. Besides, you can also keep the Exif data during the conversion. The powerful conversion and acceleration technology allows you to upload unlimited photos for conversion simultaneously, which is much more time-saving than many other HEIC to JPG batch converters.
Highlights of Coolmuster HEIC Converter:
Here are the steps for converting HEIC to JPG on Windows using Coolmuster HEIC Converter (The following steps also apply to Mac.):
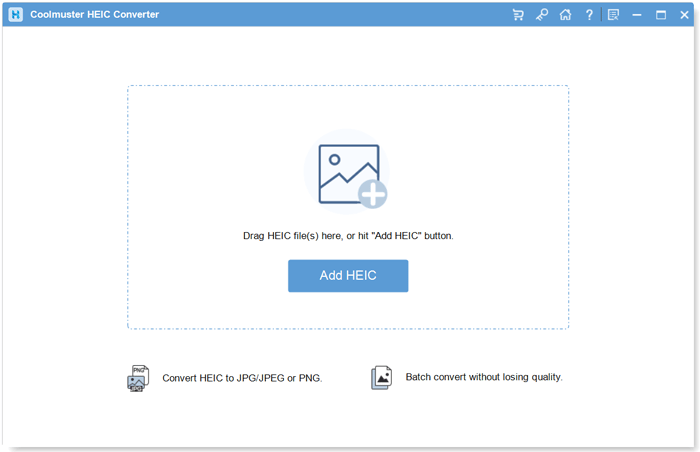
01Download and install the program on your PC. Click the "Add HEIC" button on the interface (or drag the HEIC files to the program) to add HEIC photos to the program.
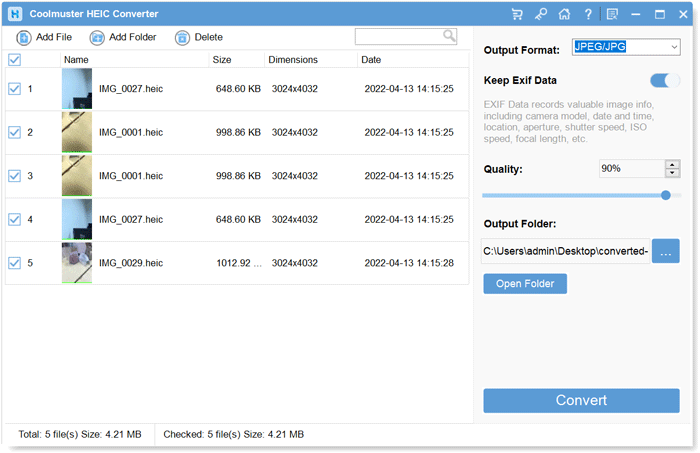
02After importing the HEIC photos, select the images you want to convert, then choose either "JPEG/JPG" or "PNG" as the output format. If necessary, you can tick the "Keep Exif Data" option.
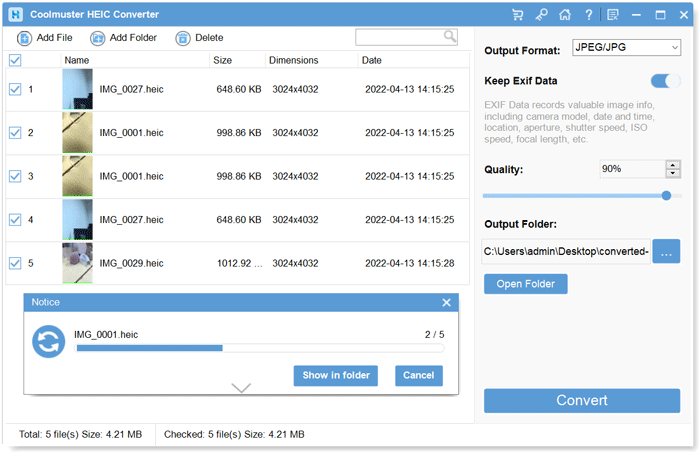
03Hit the "Convert" button to start the converting process. When converted, tap the "Show in folder" button to view the JPG photos on the computer.
Video Tutorial:
iMazing HEIC Converter is a user-friendly desktop application designed for both Windows and Mac operating systems, providing a simple solution for converting HEIC images to either JPG or PNG formats. The application is available for free use.
This is how to convert HEIC to JPG in bulk using iMazing:
1. Visit the official iMazing website at https://imazing.com/heic and download the software suitable for your computer's operating system. Run the installer and follow the on-screen instructions for a seamless installation on your Windows computer. Once installed, launch iMazing.
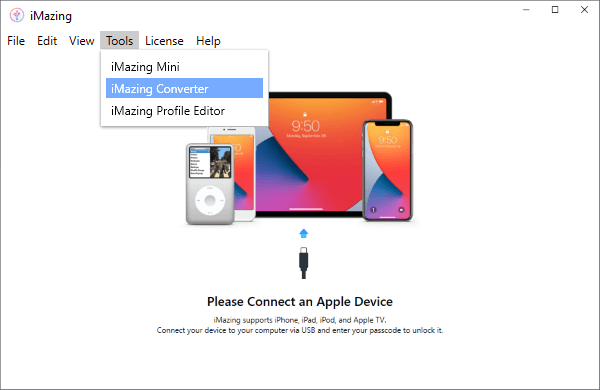
2. In the "Tools" section, find and select "iMazing Converter".
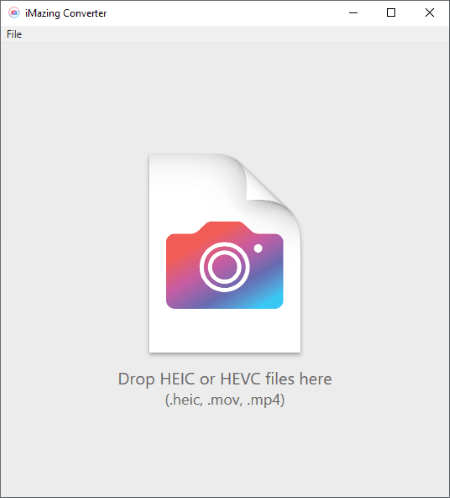
3. Drag and drop your HEIC images into the program to import them.
4. Choose the desired output format for your converted files, such as JPEG or PNG.
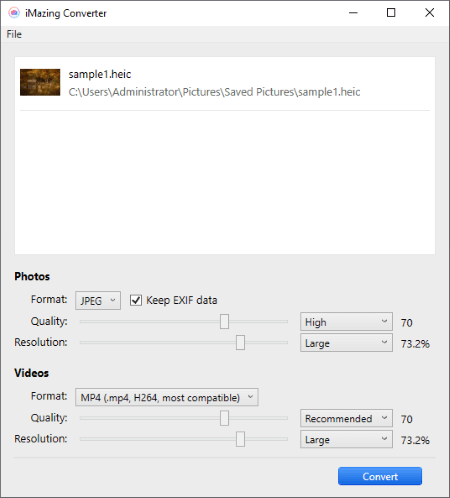
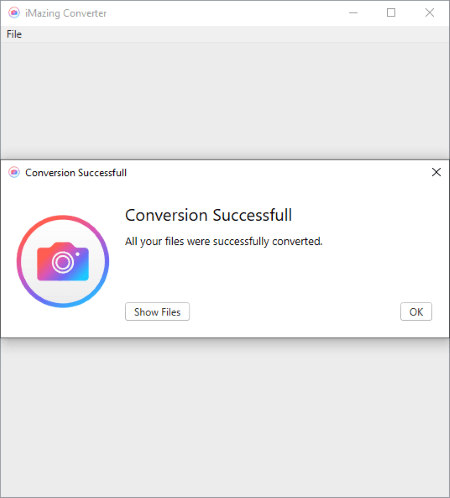
5. Initiate the conversion process by clicking the "Convert" button.
For Mac users, why download additional software to perform a single function when you can leverage the features already available on your Mac? Below are the steps for using Preview on a Mac to convert multiple HEIC files to JPG format:
1. Locate the HEIC files you want to convert and select all the HEIC files you want to convert.
2. Right-click on one of the selected HEIC files. From the context menu, choose "Open With" and then select "Preview".
3. Select all the images you opened in Preview and go to the "File" menu at the top of the screen. Choose "Export Selected Images".
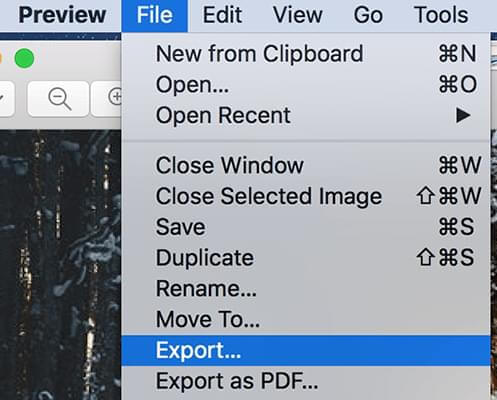
4. In the export window, select a destination for the converted files and choose "JPEG" from the "Format" drop-down menu.
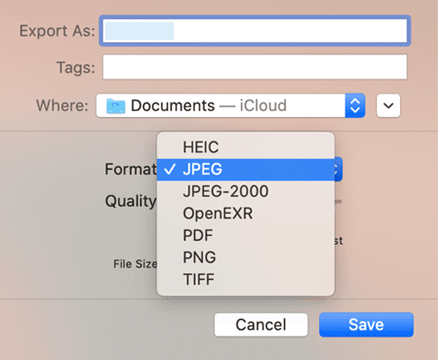
5. Click the "Options" button if you want to make additional adjustments. Finally, click the "Save" button to start the conversion.
6. Preview will then export each selected HEIC file as a separate JPEG file to the specified location. The converted files will be in JPEG format and can be found in the destination folder you selected.
Tips: If you want to know how to open HEIC files on your Mac computer, you can read this article.
Mac users still get another option to batch convert HEIC to JPG, that is, using Photos. As the channel to view and manage photos, Photos can read HEIC pictures and export them in JPEG format. Nevertheless, the only defect is that the conversion process is not highly efficient.
How to convert HEIC to JPG on Mac?
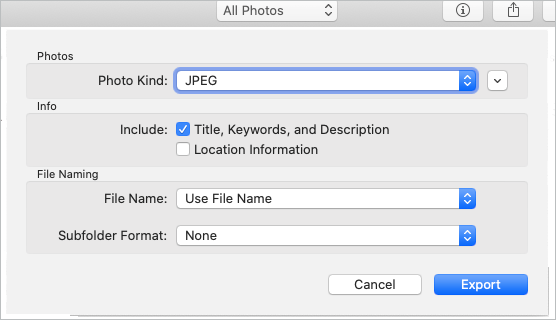
1. Drag and drop all HEIC images into the Photos app, choose all of them in the Photos window, and tap "Files" on the Apple menu; choose "Export" > "Export...Photos".
2. Set the output photo format as "JPEG" and hit the "Export" button to batch convert HEIC to JPG on Mac.
Adobe Photoshop is one of the professional image processing software known all over the world. It is not specially designed for format conversion, but it now allows you to quickly convert HEIC to JPG in Photoshop CC 2022 and later versions.
To batch convert HEIC to JPG via Photoshop:
1. Open Adobe Photoshop on your computer and import your HEIC files in it.
2. If a pop-up window saying "Additional non-Adobe software is needed to open .HEIC files..". shows up, download the necessary plugin by clicking "Learn More" and visiting the plugin page. Then, follow the provided steps to download both HEIF and HEVC extensions.

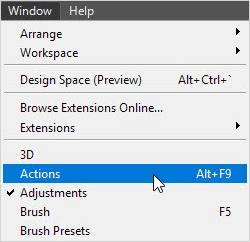
3. Restart Photoshop and re-import a HEIC image. Navigate to "Window" > "Actions" options. Create a new set and name it "HEIC to JPG".
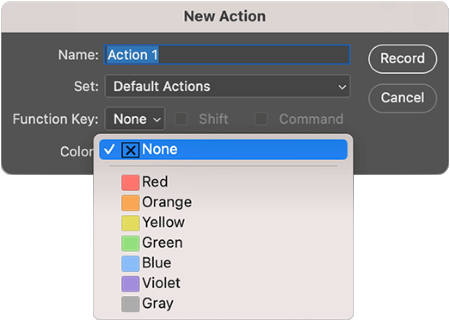
4. Within the set, create a new action and name it (e.g., HEIC to JPG). Click "Record" to begin recording actions for automating multiple HEIC files.
5. Open the HEIC files in Photoshop, go to "File" > "Save As", and choose "JPEG" as the output format.
6. Click the "stop" button to conclude the recording of the automated action.
7. Navigate to "File" > "Automate" > "Batch" options and select the set & action you just created.
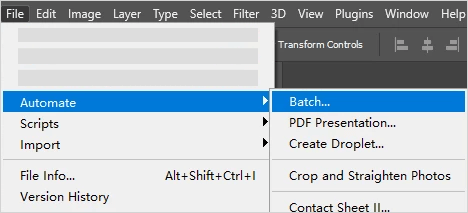
8. Choose the source and output folders for your conversions. Photoshop will automatically open all HEIC images and save them as JPG files in bulk.
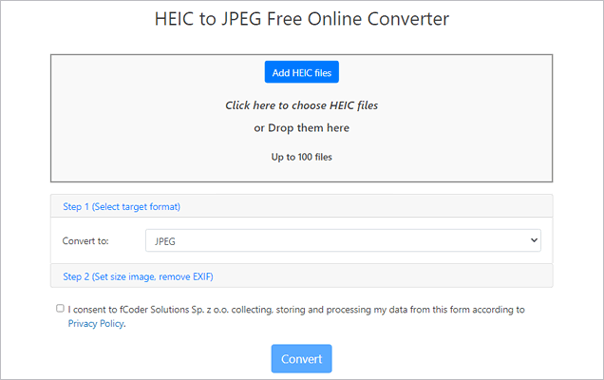
Some free batch HEIC to JPG converters let you batch convert HEIC to JPG online, like heic.online, freetoolonline.com/heic-to-jpg.html, etc. You can drag and drop the HEIC files onto the web converter and convert them into JPEG format. For example, heic.online allows you to convert up to 100 HEIC files simultaneously. If you have more than 100 files, you have to operate several times.
Now, let's check how to do with heic.online.
1. Visit heic.online on your computer browser.
2. Tap "Add HEIC files" button to upload the HEIC images or drop the pictures in the window.
3. Choose "JPEG" next to the "Convert to" option, consent to the "Privacy Policy", and tap the "Convert" button to start the process.
4. Download the converted photos to your computer or save them to your Google Drive or Dropbox. You can also scan the QR code to save them to your mobile phone.
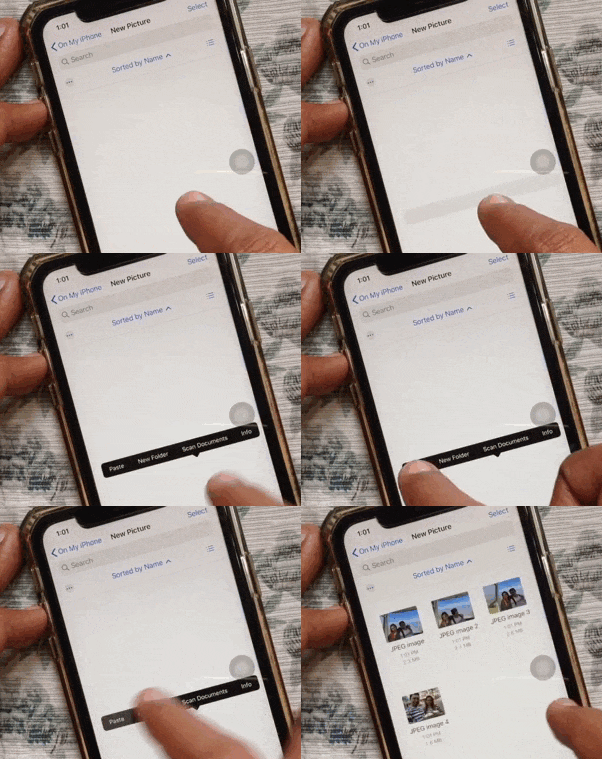
For iPhone users, you can also directly use the Files app to save HEIC files as JPG images. Here is a brief guide on how to convert photos from HEIC to JPG on iPhone:
1. Launch the Files app on your iPhone. Long-press on an empty area, select "New Folder", to create a new folder and name it.
2. Open the Photos app. Tap "Select" to choose the HEIC photos for conversion. Tap the "Share" icon and select "Copy Photo".
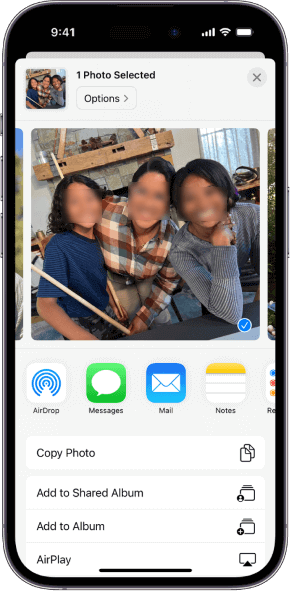
3. Now, navigate to the Files app and locate the newly created folder. Press on an empty space until the "Paste" option appears. Tap to paste the photos, and they will be automatically saved in JPEG format.
It is easy to batch convert HEIC to JPG format. If you want to convert HEIC to JPG without limitation and data compression, I highly recommend you try Coolmuster HEIC Converter. Compared with other methods, it is more time-saving and efficient to use. Undoubtedly, it is worth a try.
Anyway, if you encounter any problem during use, please tell us in the comments.
Related Articles:
[Step-by-Step Guide] How to Convert HEIC to JPG Without Losing Quality
How to Convert HEIC to JPG on Google Drive? [3 Effective Ways]
[Solved] 5 Ways to Convert HEIC to JPG in Google Photos
How to Convert HEIC to PNG Online or Offline? (7 Simple Methods)


