
How to Upload HEIC Photos to iCloud from iPhone or Windows PC

"I have a lot of photos in my Google Photos app but I want to upload all of them to iCloud. I exported all of them into a .zip file in my PC and some pictures (taken by my iPhone) won't upload to iCloud because 'only JPEG formats can be uploaded'. Let me see if I get this straight: iPhone takes photos in HEIC format but Apple won't allow me to upload the photos I took with the iPhone itself to iCloud? Why would this make sense? Can someone help me?"
- from Reddit
HEIC is an efficient image format that can store high-quality image files in a smaller file size. Photos taken on iPhone and iPad are saved in this format by default. Through iCloud, users can back up HEIC photos to the cloud, enabling synchronization and secure storage across devices. If you're experiencing issues uploading HEIC format photos to iCloud, this article is tailored for you. It will provide a detailed guide on how to upload HEIC photos to iCloud, so let's take a look together!
Uploading HEIC photos to iCloud from your iPhone or iPad is relatively simple; just make sure that your iCloud settings are enabled and properly synced.
Here is how to upload HEIC photos to iCloud from your iPhone or iPad:
Step 1. Open the "Settings" on your iPhone/iPad.
Step 2. Tap on "Apple ID" (at the top), then select "iCloud".
Step 3. Tap on "Photos", and then turn on the "iCloud Photos" switch. This will automatically sync all your photos, including HEIC format photos, to iCloud. (iCloud photos not syncing?)
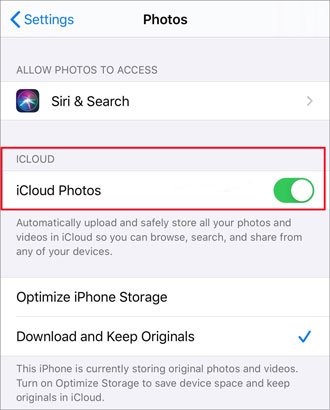
Step 4. Make sure your device is connected to Wi-Fi and wait for the HEIC photos to finish uploading.
On a PC, iCloud does not directly support uploading HEIC format files, so you can first convert HEIC files to JPEG format to ensure compatibility before uploading to iCloud.
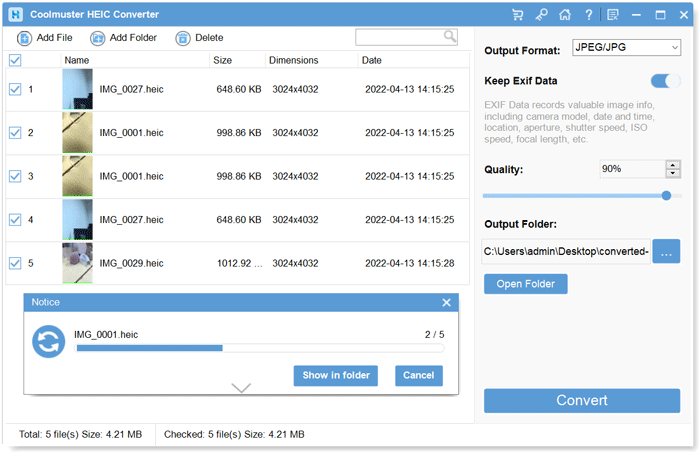
Coolmuster HEIC Converter is a simple and practical HEIC converter that quickly converts HEIC photos to more common JPEG or PNG formats. It supports batch conversion without affecting image quality.
Key features of Coolmuster HEIC Converter:
Here is how to use Coolmuster HEIC Converter to convert HEIC photos:
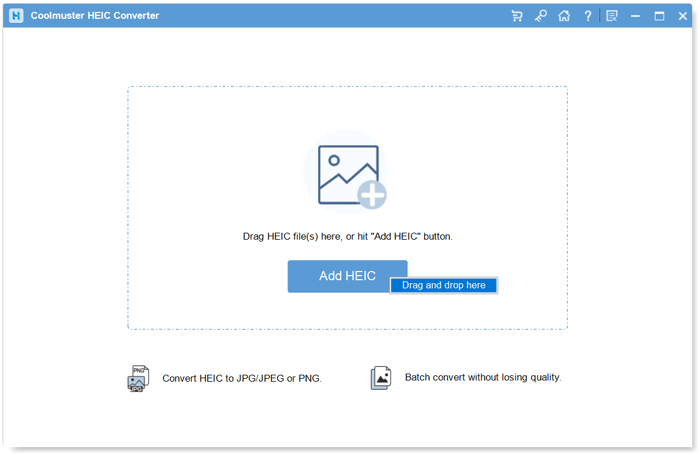
01Download, install, and launch this tool on your Windows PC. Then, click the "Add HEIC" button, or drag your images into the dotted frame and tap the "Drop and drop here" icon to add your HEIC photos.
02After importing the HEIC photos, select the images you want to convert and choose "JPEG/JPG" or "PNG" as the Output Format. If needed, enable the "Keep Exif Data" option to retain the image's original information.
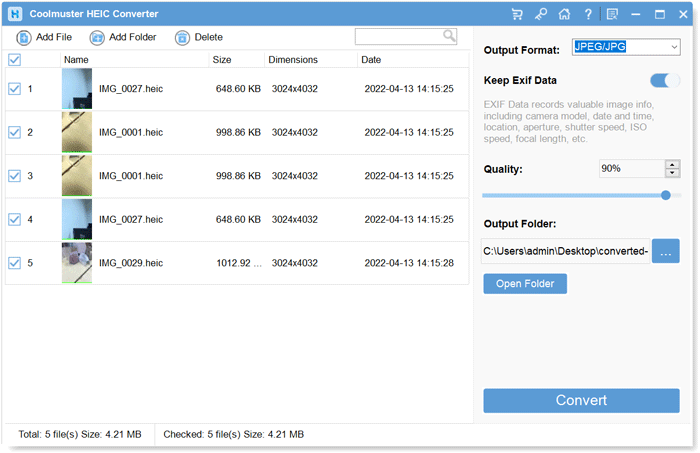
03Adjust the Quality settings and specify an output folder on your computer to save the converted files. Then, click the "Convert" button to transform HEIC to JPG or PNG.
Video Tutorial:
Once you've converted the HEIC format to JPG, you can upload the photos directly to iCloud using iCloud.com or iCloud for Windows.
For iCloud for Windows:
Step 1. Download and install iCloud for Windows from the Apple website or the Microsoft Store, then launch it. Sign in to your iCloud account using your Apple ID.
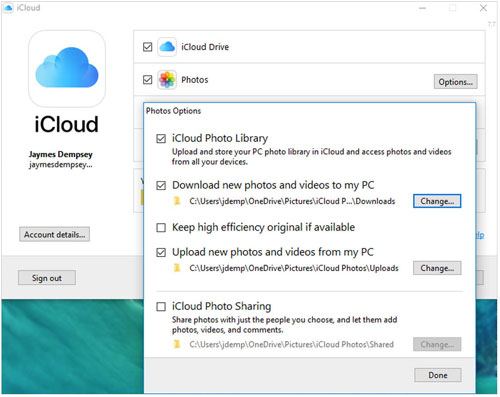
Step 2. In the iCloud application, check the box for "Photos", then click on the "Options" button next to it. Ensure "iCloud Photo Library" is enabled, then click "Done" and "Apply".
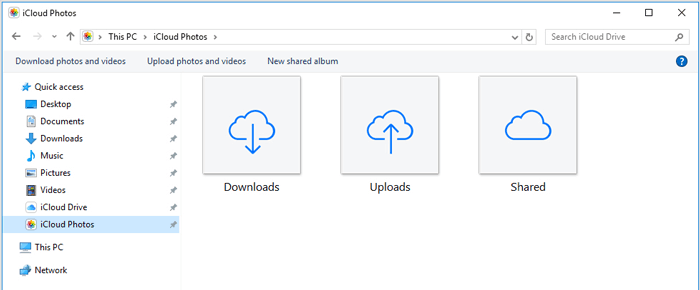
Step 2. Launch File Explorer on your Windows PC. In the Navigation Pane, find and select "iCloud Photos".
Step 3. To upload photos, drag and drop your JPG or PNG files into the "iCloud Photos" folder. Alternatively, you can click on the "Upload" button at the top and select the photos you wish to upload.
For iCloud.com
Step 1. Launch your preferred web browser on your PC and go to iCloud.com. Then, log in with your Apple ID and password.
Step 2. Click on the "Photos" icon once you're logged in.
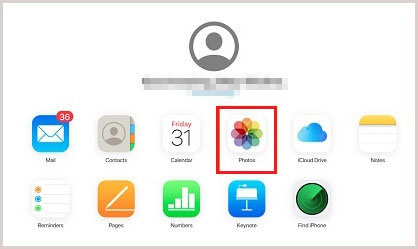
Step 3. Click the "Upload" icon (a cloud with an upward arrow) located at the top right corner. Select the photos or folders you want to upload from your computer.
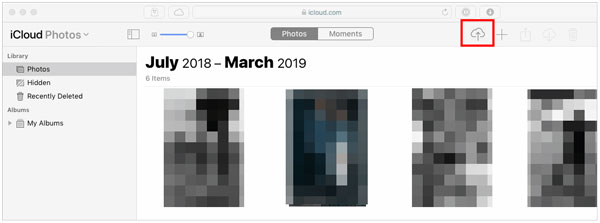
Step 4. Once you've selected your files, click "Open" to start the upload process.
If you want to download iCloud photos from your computer, you can read this step-by-step guide.
[2024] Top 3 Ways to Download Photos from iCloud to PCSometimes, users encounter obstacles when trying to upload HEIC photos to iCloud. Here are some possible reasons and their corresponding solutions:
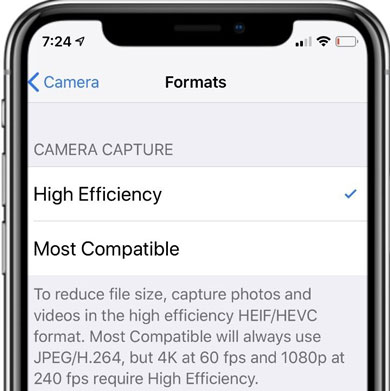
If you want to take photos directly and store them in JPEG format to avoid compatibility issues with HEIC, you can change the settings as follows:
Step 1. Open "Settings" and go to "Camera".
Step 2. Tap on the "Formats" option.
Step 3. Here, select "Most Compatible", which will save your photos in JPEG format instead of HEIC.
That's all about how to upload HEIC photos to iCloud. Uploading HEIC photos to iCloud can help us efficiently back up and manage our images, but compatibility issues may occasionally arise, especially on PCs. With Coolmuster HEIC Converter, you can easily convert HEIC files to JPEG or PNG format, ensuring a smooth upload process. Whether uploading from an iPhone, iPad, or PC, the steps outlined in this article will help you find a suitable solution, making photo management easier and more convenient.
Related Articles:
[Solved] 5 Ways to Convert HEIC to JPG in Google Photos
How to Transfer HEIC from iPhone to PC with Ease? (4 Tested Ways)


