Wondering how to add iTunes U to iPad? However, you might be worried that syncing the downloaded iTunes U to your iPad will remove the exiting files on your device. Therefore, here this article is going to show you how to copy iTunes U to iPad without syncing with iTunes. Just keep reading to check it out.
Part 1. What You Need to Know about iTunes U
Part 2. Guide to Add iTunes U to iPad without Syncing to iTunes
What is iTunes U?
iTunes U is regarded as an Apple University where you can get numbers of free courses from the world's top educational institution. Besides, you can use iTunes U to deal with your learning task directly on iPad, such as handing in home work, creating and learning a course, sharing information with users instantaneously, watching videos and photos to learn new knowledge and etc.You can download iTunes U courses from iTunes on computer if you like.
How to Get Free Course from iTunes U?
With iTunes U, you can get plenty of learning resource like lectures, videos, books and etc. from world's famous university. To get these resource, you can follow the instructions as below:
1. Download and install the latest iTunes on your computer and launch it.
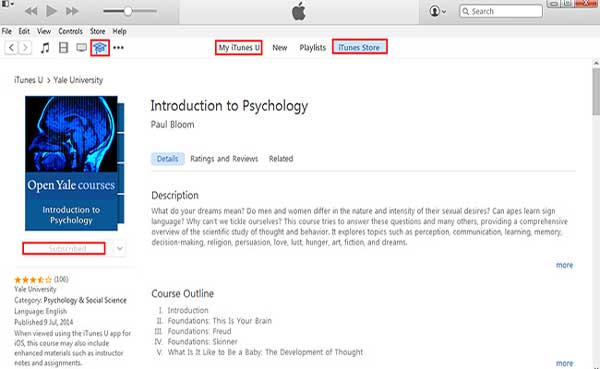
2. Click iTunes U icon on the top of iTunes window, then go to iTunes Store section.
3. Search for a series that you like and click Subscribe option to download it. After downloading, you can find it on My iTunes U section.

See Also: Things You Should Know About iTunes U and iTunes U for Android
In order to sync iTunes U to iPad without syncing to iTunes, you can totally rely on a professional 3rd-party tool - iTunes U Data Transfer. With it, you can freely edit or import iTunes U to iPad without any hassle.
Besides, you can use this tool to manage (export, import, delete or edit) the other files on iPad, including photos, music, playlists, books, contacts, text message (SMS) and etc. And this software supports to work with all models of iOS device, including iPad mini, iPad air, iPad 2, the New iPad, iPhone X/8 Plus/8/7 Plus/7/6s Plus/6s/SE, iPod touch and etc.
Below are the free trial of the software in Mac and Windows version, you can download the right version on your computer and add iTunes U to iPad with the guide as below.
Here is how:
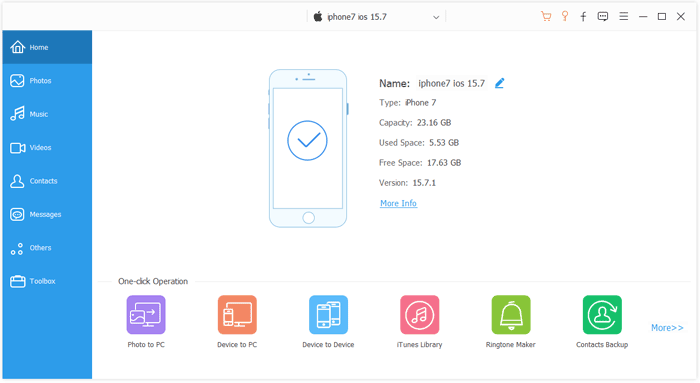
Step 1. Launch the installed program on your computer and connect iPad to PC with a USB cable. This program will detect all the files on your iPad and display them in different file folders on the interface.

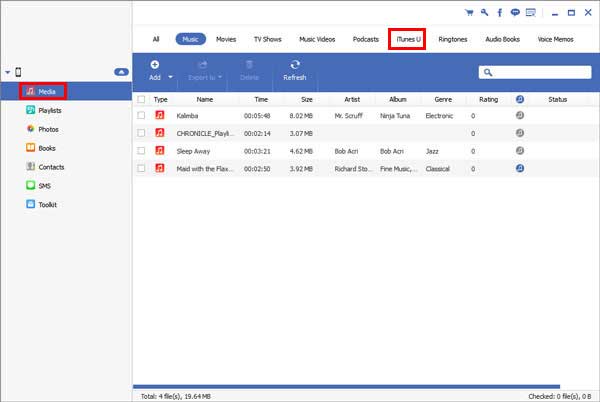
Step 2. Visit Media section on the left, then you will get a list of different file folders on the top of right panel, such as Music, Movies, TV Shows, Music Videos, Podcasts, iTunes U and etc.
Click iTunes U and then Add option to select iTunes U files from computer to import into iPad immediately.

Now you should know how to add iTunes U to iPad. This simple guide not only provides detailed steps to sync iTunes U to iPad, but also everything else you need to know about iTunes U. Bookmark this article in case you need it.
Related Articles:
3 Methods Teach You How to Add Music to iPad Easily
2 Methods Show You How to Sync iPhone to iTunes
How to Fix iTunes Backup & Restore Problems
How to Transfer iBooks from iPad to Computer with or without iTunes?
Ultimate Guide on Transferring Files from iPhone to PC without iTunes
How to Transfer Photo from iPhone to Computer/PC without iTunes


