
Can You AirDrop from PC to iPhone? How to Transfer Between Them?

AirDrop is an amazing Apple feature that enables its users to share data between iPhones, Macs, and iPads wirelessly. However, only a few people use Mac computers. How can you transfer files from an iPhone to your Windows computer or vice versa? Can you AirDrop files between an iPhone and Windows? In this article, we have created a detailed guide on whether you can AirDrop from PC to iPhone or vice versa and the available alternatives. Read on to learn more!

No. AirDrop is a free iOS service that provides a flawless way of sharing data between two devices. Unfortunately, Apple retains its services exclusively for its devices, such as iPhones, iPads, and Macs. You can only use AirDrop to share files between Apple devices. As such, you can't AirDrop from a Windows computer to an iPhone via the traditional method.
However, does that mean you cannot transfer files from an iPhone to a Windows computer or vice versa? No, there are various ways. Move to the next part and learn more.
There are various methods of transferring files between Windows Computers and iPhones. Below are some of them.
The easiest and quickest way of sharing data from your Windows computer to an iPhone device or vice versa is using Coolmuster iOS Assistant. This application is primarily designed for transferring data between iOS devices and between iOS and Windows/Mac computers. With this software, you can transfer contacts, calendars and bookmarks from PC to iPhone. You can also transfer messages, photos, contacts, videos, and more from iPhone to PC.
Highlights of Coolmuster iOS Assistant:
Below is a step-by-step guide on how to transfer data from PC to iPhone using Coolmuster iOS Assistant:
01Download the right application for your Windows or Mac computer, and install and launch the application on your computer.
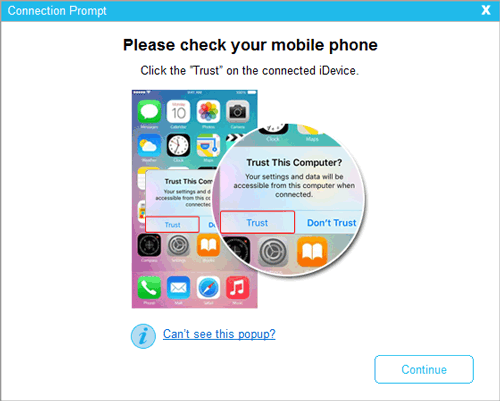
02Use a working USB cord to link the iPhone to the computer and tap the Trust button below the Trust This Computer pop-up messages.
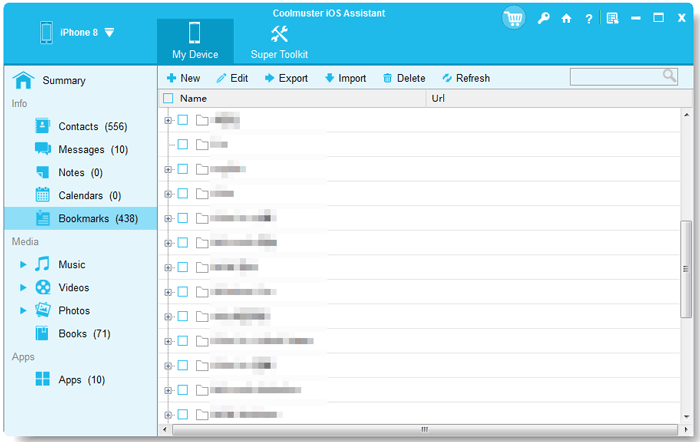
03Select the data type you want to transfer on the left panel. For example, click on the Bookmarks folder, select the Import option, and locate the files you wish to transfer to your iDevice. Proceed by tapping OK to initiate the process.
Video Tutorial:
iTunes is a free iOS application suitable for sharing data between Windows and iPhone devices via a wired connection. Additionally, iTunes supports powerful capabilities, such as backing up iPhone data to computer, restoring iPhones, updating iOS devices, playing iPhone music on a PC, and more.
Below is how to share data between an iPhone and Windows computer:
Step 1. Download and install the latest version of iTunes. If it has been installed already, ensure you have updated it. Afterward, launch the iTunes application and move to the next step.
Step 2. Use a lighting cord to link your iPhone to the computer. Accept the connections pop-ups on your iPhone to establish a working connection.
Step 3. Click the iPhone button on the top left corner of the iTunes interface. Choose the content you want to sync on the left sidebar.
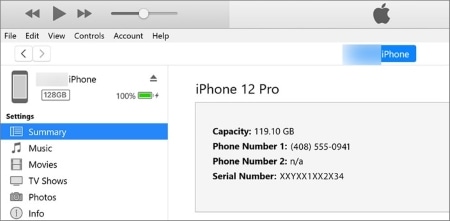
Step 4. Checkmark the sync checkbox button and choose the items you wish to sync. Repeat Step 3 and 4 for every data you wish to sync. You can check the free space at the bottom of your device's windows bar.
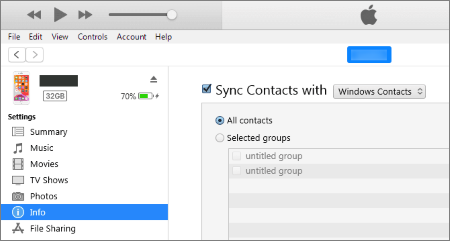
Step 5. iTunes will sync your device automatically whenever you connect it to a computer.
Step 6. Click on the Apply button when you are ready to sync.
You can also get your files on an iPhone from a Windows computer using cloud services. We'll use iCloud, for example. You can use other services such as Google Drive or Dropbox.
Here's how to use iCloud to share files between Windows and iPhone:
Step 1. Head to iCloud.com on your PC and log into your iCloud account using your Apple ID. Select the iCloud Drive option.
Step 2. Tap the Upload icon, then select the files to be transferred from PC to iPhone.

Step 3. Open Settings on your iPhone and press on [your name] and the iCloud option. Choose iCloud Drive.
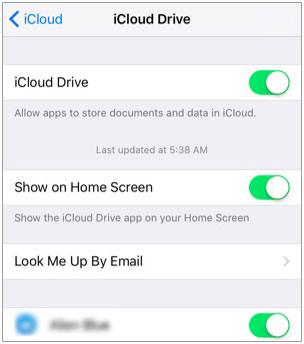
Step 4. Open the Files app, click on Browse, then the iCloud Drive option. All your data will be transferred from your PC to your iPhone.
It is easy to AirDrop from Mac to iPhone since both devices are Apple products. Here's how to do it:
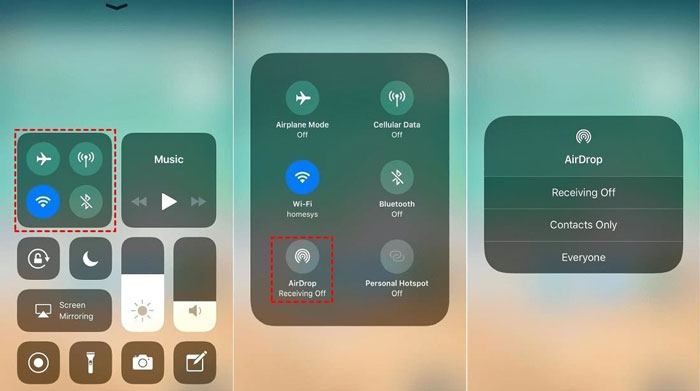
Step 1. Set up AirDrop on both Mac and iPhone.
On iPhone:
On Mac:
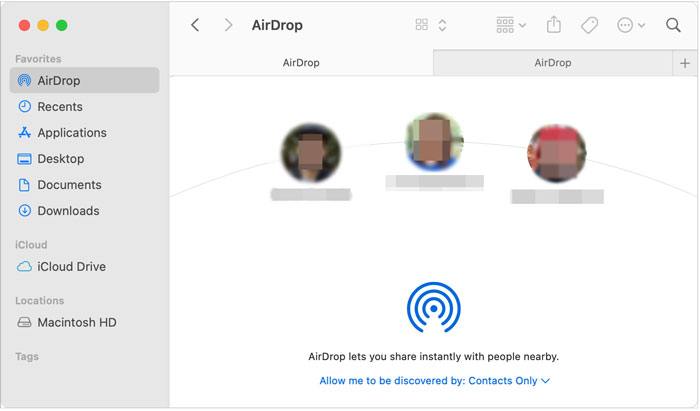
Step 2. Locate the file(s) you want to share on your Mac. Right-click on the file(s) and select Share from the context menu. Choose AirDrop from the sharing options.
Step 3. Your iPhone should appear in the AirDrop window on your Mac. Click on your iPhone's icon to select it.
Step 4. On your iPhone, you'll receive a prompt asking if you want to accept the file. Tap Accept to begin the transfer.
Tips: If you want to learn more about how to to AirDrop from iPhone to Mac, you can read this article.
You now understand AirDrop from Windows to iPhone is impossible. However, we have introduced three alternative ways to help you transfer files from PC to iPhone. Choose one of the above methods that you like. However, we recommend you use the Coolmuster iOS Assistant as it is fast, reliable, and secure.
Related Articles:
How to AirDrop from iPhone to PC Windows 11/10/8/7 in Six Practical Ways?
12 Fixes for AirDrop Stuck on Waiting or Stopped Working