Videos in your iPhone's camera app can quickly fill up storage space, especially when recording 4K video. Before deleting large video files, it's best to back up videos from iPhone or transfer them to another device for safekeeping. This way, your videos will be safe even if your iPhone malfunctions.
Now, follow the steps in this guide to choose the best method for backing up your iPhone videos. By the way, if you accidentally delete any videos from the Photos app, you can still click here to recover deleted videos on iPhone.
If you want to quickly and safely back up iPhone videos to your computer without the limitations of iTunes, Coolmuster iOS Assistant is an ideal choice. It allows you to transfer videos from your iPhone to your computer with just one click, without any loss of quality, and it also helps you easily manage all the iPhone data on your computer.
Incredible features of iOS Assistant:
Here's an easy guide to quickly back up videos from your iPhone onto a computer with iOS Assistant:
01Download and launch the software on the computer and establish a connection with an iPhone using a data cable.
02Click the "Trust" button from the pop-up window. Once you've successfully connected, you will be presented with an interface with all your files displayed on the left panel.

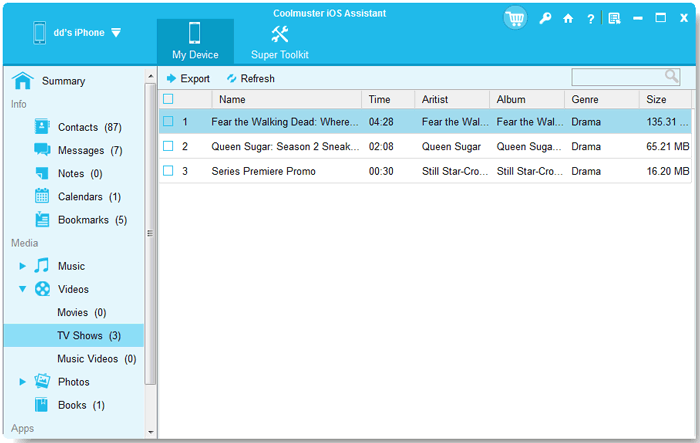
03Choose the "Videos" option from the side panel. Then, pick a folder you want to transfer and preview its details. When ready, select which items you'd like to transfer by ticking them off your list. Finally, press the "Export" button on the top of your menu to transfer the videos to the computer.
Video Tutorial:
If you are using a Windows PC, here are three ways you can use to transfer videos from iPhone to PC.
iTunes is the official data management tool provided by Apple for iPhones. It can back up the entire device's data, but it cannot back up videos separately. If you want to back up all iPhone data, you can use this method.
How do I back up all my videos on my iPhone? Follow these steps:
Step 1. Download and install the latest version of iTunes on your Windows computer.
Step 2. Use a USB cable to connect your iPhone to the computer, and select "Trust This Computer" on the device.
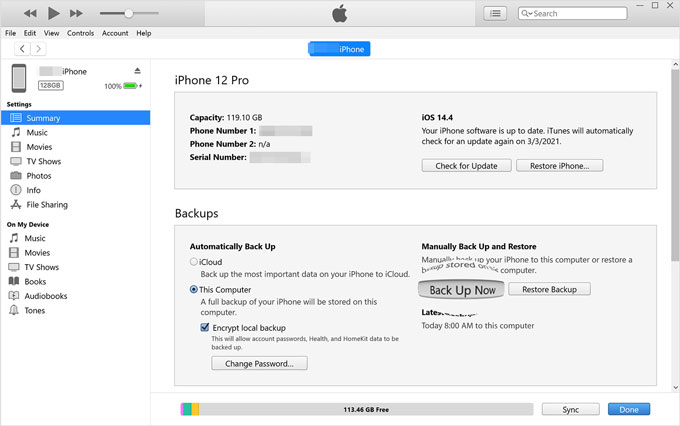
Step 3. Open iTunes and click the device icon in the top left corner.
Step 4. Go to the "Summary" page and click "Back Up Now", then wait for the backup to complete.
Windows 10 and later versions come with a built-in "Photos" app that can be used to import photos and videos from an iPhone.
Here is how to back up videos from iPhone to PC using the Photos app:
Step 1. Connect your iPhone to the PC using a USB cable and unlock the iPhone.
Step 2. Type "Photos" in the Windows search bar and open the app.
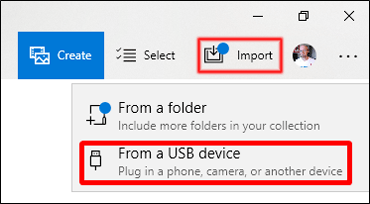
Step 3. Click the "Import" button in the top right corner and select "From a USB device".
Step 4. Choose the videos you want to import, then click "Import Selected".
In addition to the Windows Photos app, you can also use the built-in File Explorer on Windows to easily transfer photos and videos from your iPhone to your Windows PC.
Here is how to copy videos from iPhone to PC using File Explorer:
Step 1. Connect your iPhone to the Windows computer using a USB cable and select "Trust This Computer".
Step 2. Open Windows "File Explorer" and find "Apple iPhone" on the left side.
Step 3. Go to the "DCIM" folder and look for the folder containing the videos (usually named something like "100APPLE").

Step 4. Select the videos you want to back up, right-click to copy, and then paste them into a designated folder on your computer's hard drive.
If you are a Mac user, here are also three ways you can use to transfer videos from iPhone to Mac.
For macOS Catalina (10.15) and later versions, Apple has replaced iTunes with Finder for device management. Therefore, using Finder to back up iPhone videos is an officially recommended method.
Here is how to back up videos from iPhone to Mac using Finder:
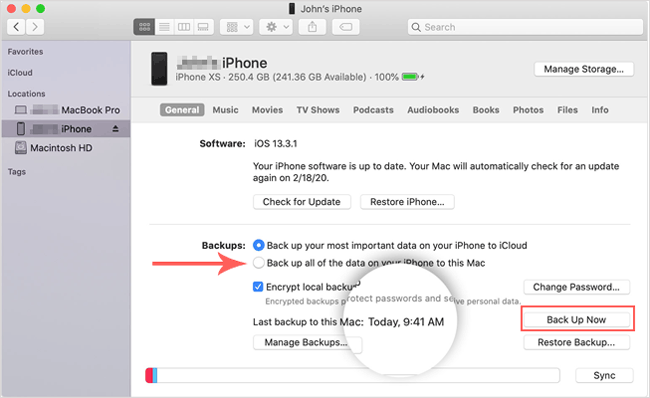
Step 1. To start, find a working USB cable, then use it to connect the iPhone to the Mac. Then, open the Finder app on your Mac and select your connected iPhone at the screen's sidebar.
Step 2. Tap the "General" tab in your top menu and select "Back up all of the data on your iPhone to this Mac" from the list of items. You can click "Encrypt local backup" to make the files more secure.
Step 3. Now click "Back Up Now". Once done, all your data, including videos, will be saved on your Mac.
Similar to Windows, macOS also has a built-in "Photos" app that can be used to import photos and videos from your iPhone and organize them.
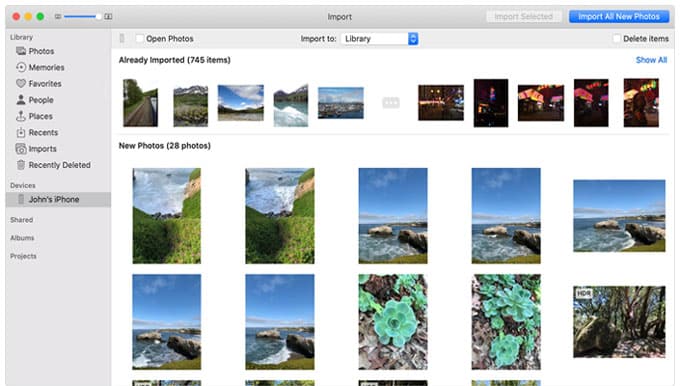
Here is how to import videos from iPhone to Mac using the Photos app:
Step 1. Connect your iPhone to the Mac and open the "Photos" app.
Step 2. In the left sidebar, find and click on the iPhone under "Devices".
Step 3. Select the video files you want to import, then, at the top of the interface, choose from the "Import to" dropdown menu and select either "New Album" or "Photo Library".
Step 4. Click "Import Selected Items", and the system will copy the selected videos to your Mac.
If you want to back up videos from iPhone to Mac wirelessly, AirDrop is a good choice. AirDrop is a wireless transfer tool between Apple devices. With it, you can transfer files between iPhone and Mac effortlessly.
Here is how to send videos from iPhone to Mac wirelessly via AirDrop:
Step 1. On your Mac, open Finder, click "AirDrop" on the left sidebar, and make sure the "Allow me to be discovered by" setting is set to "Everyone" or "Contacts Only."

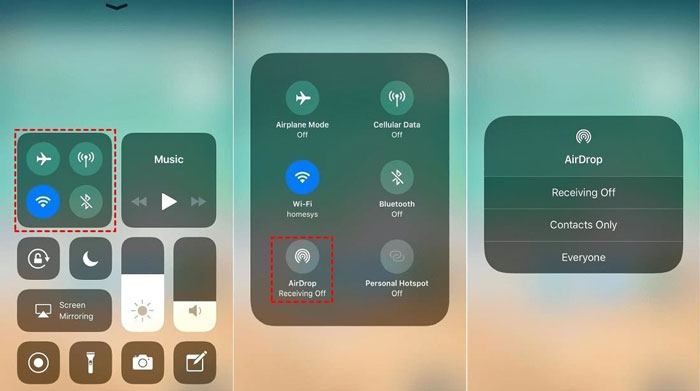
Step 2. On your iPhone, open Control Center, press and hold the Wi-Fi icon, tap "AirDrop", and select "Contacts Only" or "Everyone". (AirDrop not working?)
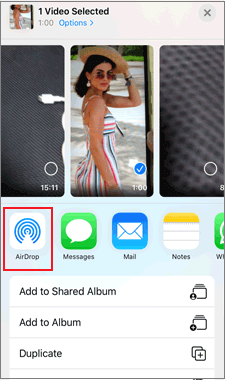
Step 3. Open the Photos app on your iPhone and locate the video you want to back up.
Step 4. Tap the "Share" button (a square icon with an upward arrow) and select "AirDrop" in the pop-up share menu.
Step 5. Your iPhone will automatically scan for nearby AirDrop devices. Select your Mac device, and a receive request will pop up on your Mac. Click "Accept".
Besides backing up iPhone videos to a computer, you can also back up iPhone videos to iCloud. iCloud is Apple's official cloud storage service that allows users to automatically sync photos, videos, contacts, and other data to the cloud. For users who prefer not to use a data cable, want to back up videos automatically, and access them anytime on other Apple devices, iCloud is a great choice. However, the free iCloud storage is only 5GB, which can quickly run out.
Here is how to back up videos from iPhone to iCloud:
Step 1. Open "Settings" and tap your "Apple ID" (profile picture).
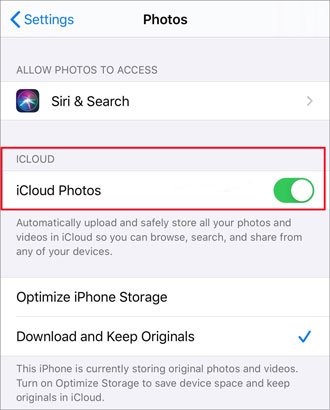
Step 2. Go to "iCloud", then select "Photos".
Step 3. Turn on "iCloud Photos", and your videos on your iPhone will be automatically uploaded to iCloud. (iCloud Photos not syncing?)
Step 4. You can access the backed-up videos on iCloud.com or other Apple devices.
If your iCloud storage is full or you prefer a larger free storage option, Google Photos is a great alternative. It offers 15GB of free cloud storage for backing up photos and videos and works across multiple platforms, including iPhone, Android, Windows, and Mac.
Here is how to back up videos from iPhone to Google Photos:
Step 1. Download and install Google Photos. Once installed, open Google Photos and log in with your Google account.
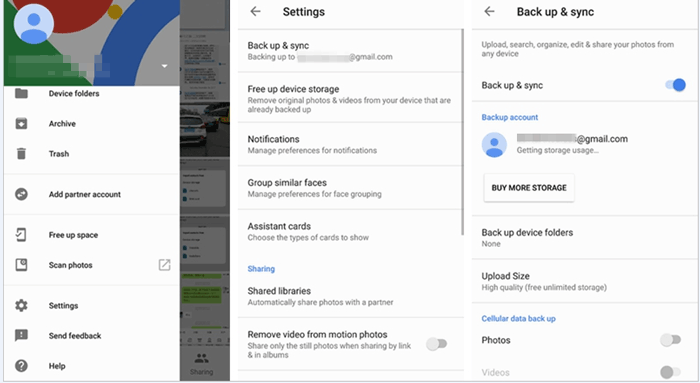
Step 2. On the Google Photos homepage, tap the "profile" icon (Google account icon) in the top right corner.
Step 3. Select Google Photos "Settings" > "Back up & sync".
Step 4. Turn on the "Back up and sync" toggle to allow Google Photos to automatically upload photos and videos.
There are various methods to back up iPhone videos, and you can choose the most suitable one based on your needs. If you need an efficient and secure way to manage and back up videos, Coolmuster iOS Assistant is undoubtedly the best choice. It supports quick video export to both Windows and Mac, avoiding the hassle of iTunes, while also managing other iOS data. Try iOS Assistant now and make iPhone video backups easier!
Related Articles:
[Step-by-Step Guide] How to Transfer Videos from iPhone to iPad?
How to Send Videos from iPhone to iPhone? [Easy to Solve]
How to Send Video from iPhone to Android Effectively [Solved]
How to Back Up iPhone to External Hard Drive on Windows or Mac


 Free Download for PC
  Free Download for Mac

