iTunes Backup Corrupted? How to Fix Corrupted iTunes Backup or Incompatible Problem?

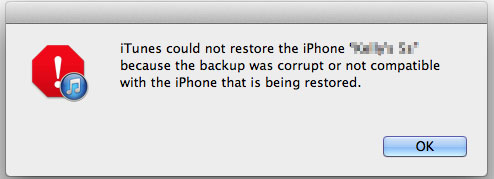
While people try to restore an iTunes backup, some of them can't finish the restore process successfully because the iTunes remind them that "iTunes could not restore the iPhone because the backup was corrupted or not compatible with the iPhone that is being restored". Then does it mean the data in the backup file will never be found back? Or you need to leave the problem alone? The answer is absolutely No. To be honest, the problem is rarely a compatibility issue, and no one can predict when this situation will happen and how. So for most people, when the "Disaster" is happened, what you need to do is to find a way to fix the problem and get your data back. If you don't know how to do it, this article will guide you through it step by step.

Actually, every time when you're creating backup with iTunes, it may appears some errors but you may don't know because there is no messages to inform you. So you may think you have created an iTunes backup successfully, but when you need to use the backup, you'll find there is something wrong, and you have to find another way to restore your backup data. What's more, referring to the incompatible issue, this is mainly because of different iOS versions. After figuring out why your iTunes backup file is corrupted or not compatible, here it is time to find the way to help you restore data from the corrupted or incompatible backup files. In this post, we have summarized two different methods for your reference, you can compare them and decide which one is better according to your own needs.
As you can see, errors always happen while you're creating backup with iTunes, so why don't you try to find an alternative tool to iTunes as your backup assistant? We know that there are lots of 3rd-party application on the market and claims that they can help iOS users export and backup iDevice data on the desktop PC or Mac within few clicks, and the data can be reused as you like. And lots of facts have also proved that these kinds of program really does a good job in the daily life. So in order to avoid losing data during the iTunes backup process, you're strongly recommended to use Coolmuster iOS Assistant. With it, you can:
- Backup up to 14 types of different data to PC or Mac with one simple click, including movies, photos, tv shows, podcasts, books, contacts, text messages, notes, safari bookmarks, etc. All the exported files can be viewed, edited or shared on your desktop computer without restrictions.
- Not like iTunes, this program allows you to only backup the data you think it is really important to you. That means you can select the data for backup according to your own needs. And this could greatly improve your working efficiency.
- You're allowed to backup the iOS data for unlimited times without worry about the data on the computer will be synced or overwritten by new exported data. And just like iTunes, this alternative tool can also works with all iDevices, including iPhone 14/13/12/11/X/8 Plus/8/7/6, iPad Pro/Air/4/mini/2, iPod touch 8/7/6/5/4/3/2, etc.
- After backing up data on computer, if you need, you can re-sync the exported data to your iTunes library or iPhone, iPad or iPod at ease. (See how to sync data from iPhone to iTunes)
- ...
Now, let's have a brief look on the primary window of the powerful program:

Even though the solution 1 could be the ideal one to solve your problem, but sometimes you may don't want to ask help to 3rd-party program at once. So if you're familiar with iTunes or you wish to solve the program manually, you can take a free trial on the second solution - restore from iTunes backup one more time after deleting the corrupted and incompatible iTunes backups.
To reach it, the most important thing for you is to find the place that the corrupted or incompatible backup files stores on your desktop computer. Below are the routines for Windows or Mac users reference:
For Windows Users
- Windows Vista/7/8: \user\(username)\AppleData\Roaming\Apple Computer\MobileSync\Backup\
- Windows XP: \Documents and Settings\(username)\Application Data\Apple Computer\MobileSync\Backup\
For Mac Users
- Righ click Finder > Go to Folder > Input: ~/Library/Application Support/MobileSync/Backup/ > Ok.
After that, you'll successfully enter the Backup folder and find several folders that named by your device's identifiers. Here, you need to locate your device identifier by clicking the iDevice serial number. Then, you can delete all folders which are matched the identifier in the iTunes backup folder in your computer.
When the above settings have been done, you need to create a new backup file with iTunes, and then try to restore it. If you still fail to do it after the above settings, just return to the solution 1 and use it to backup & restore iOS data.
Related Articles:


