We all know that iPods are great at playing songs, but did you know that with the right tools, you can also transfer music from iPod to computer so you can listen to all your favorite music on your computer. Don't know how? Don't worry. In this guide, we'll share 7 foolproof methods that will allow you to transfer your favorite music from your iPod touch 8/7/6/5/4/3/2 to your computer. Even those with minimal technical experience can easily complete the music transfer process. Read on!
Transferring music from your iPod to computer is now easier with Coolmuster iOS Assistant. This secure and reliable iPod/iPad/iPhone music manager allows you to swiftly move different kinds of data files from iPhone/iPad/iPod to computer. If you need to transfer your precious tunes from iPod to computer or back up iPod music to computer quickly, iOS Assistant is here for you. It's easy to use and works on both Windows and Mac systems. It supports a wide range of data types, scans all files and displays them on the interface for easier preview and selection.
Key Features of iOS Assistant:
Here's how to move music from iPod to the computer in 1 click via iOS Assistant:
01 To get started, download and launch the Coolmuster iOS Assistant on your computer. For a secure connection, connect your iPod to the computer with a USB cable and authorize the device by tapping "Trust" in response to the 'Trust This Computer?' message that appears.
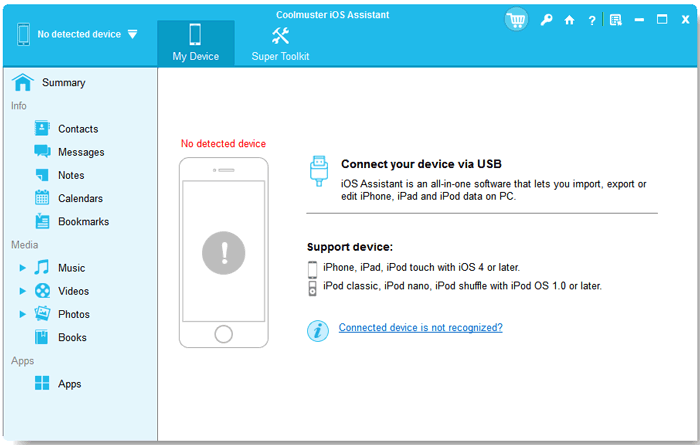
02 After your computer detects the iPod, you'll be presented with the main interface displaying the data available on your device on the left panel.

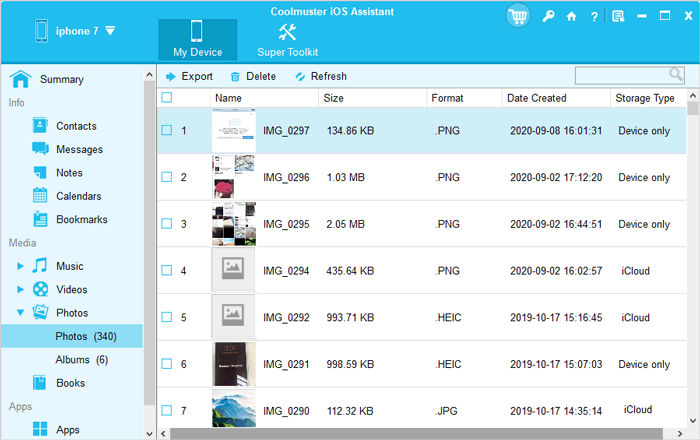
03 Now start transferring music from your iPod to the computer by navigating to the "Music" folder in the left sidebar and checking off all desired songs on the right. Then tap "Export" at the menu bar and transfer those songs to the computer.
A video guide about how to use iOS Assistant to transfer music from iPhone to computer for your reference:
With iCloud, users not only gain access to the ability to store their data on iPod devices, but they can also manage all of their music via the cloud. If you have already downloaded songs into your iPod, moving them onto iCloud is a simple syncing process. You just have to enable the 'iCloud Music Library' option on your iPod and iTunes. (How to access iCloud backup?)
Unfortunately, if you own an older model of iPod, such as an iPod nano, iCloud won't help download your tunes. But if you have the latest iPod model, here are the steps to move your music from iPod to Windows computer:
Step 1. If you've already subscribed to Apple Music, this feature is automatically enabled. If by any chance you disabled it without knowing, go to "Settings," tap on "Your Name," click on "iCloud" and "Music," and look for the option for "iCloud Music Library" and toggle it on.
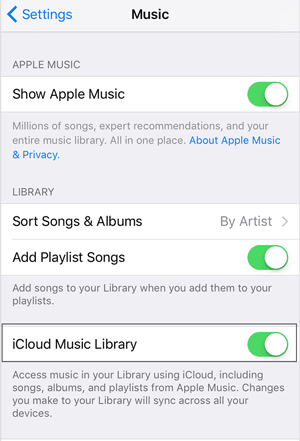
Step 2: All the music will be swiftly synced to your iCloud Music Library, which can easily be accessed via Apple Music in iTunes.
Step 3. Access iTunes on your computer and press "Preferences." Then, simply check the box next to iCloud Music Library. Make sure it's activated. Once you confirm it's turned on, all songs bought with your iPod can sync directly into iTunes. And then they can easily be downloaded onto any computer.
Transferring your music from iPod to a computer isn't challenging. An excellent way to achieve iPod song transfer is to use iTunes. It's not only easy but also a straightforward way to copy music. Developed by Apple, this iPhone/iPad/iPod transfer software allows transferring purchased iPod music to your computer. Follow the steps below to download your iPod music files to your PC:
Step 1. Start by connecting your iPod to a PC using a USB cable and open the most up-to-date version of iTunes. Click on "Preferences."
Step 2. Tap the "Devices" tab, then check the option for "Prevent iPods, iPhones, and iPads from syncing automatically."
Step 3. Select the "Advanced" tab and tick both boxes labeled: "Keep iTunes Media folder organized," and "Copy files to iTunes Media folder when adding to library."
Step 4. Now plug in your iPod to the PC and select the iPod icon. Subsequently, select "Summary," then be sure to tick off the box for "Enable disk use."
Step 5. On the PC, open the search bar on your taskbar and type in "Folder." Choose "Show hidden files and folders," go to the "Advanced Settings" tab, select "Show hidden files, folders, and drives," then click OK.
Step 6. Return to iTunes, press the Ctrl + O keys, and select your iPod in the window. Move on to tap "iPod Control" and then to "Music." Now choose all the folders, then click "Select Folder" at the bottom.
You can also back up your iPod to iTunes. To do that:
1. Plug it into your computer and launch iTunes.
2. From there, scroll down to the "Summary" section and click "Backup Now" within Backups.
3. Ensure you backup the data to your computer's local storage instead of iCloud.
Note: Using iTunes has its downsides. First, the entire procedure can be somewhat intricate. The music files won't be moved directly to your machine but only synced with the iTunes library. Also, it will likely prove difficult if you want to transfer the music elsewhere. Another thing is that you must first create a backup before syncing your iPod, as this process will delete any data stored on your device.
Another option for transferring your music is directly copying the files from your iPod to your PC. Once you have connected your device, an iPod drive will appear in File Explorer and allow you to access the stored data. More often than not, you can access this drive and see all the files on iPod.
However, certain iPod folders and files are sometimes hidden, making them nearly impossible to find. To ensure that no music goes unnoticed during the transfer, it's essential to first uncover any hidden items stored. Follow these steps to show the hidden folders or files and move them to PC:
Step 1. Connect iPod to computer. In File Explorer, you'll see your iPod as a drive. Open it, go to the "iPod_Control," and click on the "Music" folder.
Step 2. If your iPod appears empty, you'll have to reveal hidden folders/files on your computer.

Step 3. Head to "iPod_Control," look for the "Music" folder, and copy all its contents. Paste this copied data onto the computer's hard drive. By doing this, the tunes can be transferred from your iPod to your computer.
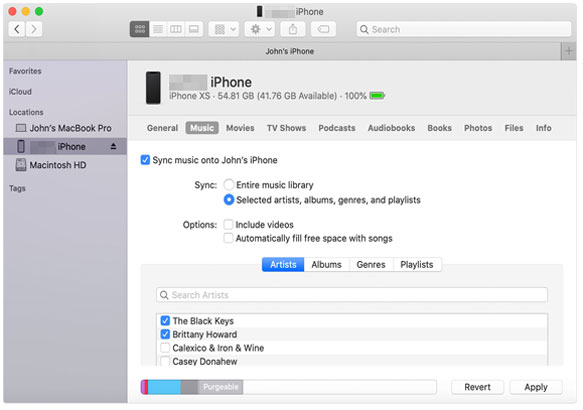
You can also move your songs from an iPod to Mac via Finder. However, you should first turn off the option for auto-sync in iTunes. It is a better way to copy your tracks to a computer with the steps below:
Step 1. Connect your iPod to the Mac using a working USB cable.
Step 2. Next, create a folder to save the files on the computer and open the Finder. Then locate the music folder from the Mac.
Step 3. Drag the files, then drop them to your Mac in the folder you created.
Dropbox is an efficient cloud storage service that can help you do iPod music transfer. Cloud storage services allow you to move data between devices linked to the same account. With Dropbox, moving songs from your iPod to your computer is as easy as pie. To know how to import songs from an iPod onto a PC quickly and efficiently, follow these steps: (See how to back up iPhone to Dropbox.)
Step 1. You should download Dropbox on your iPod and Mac. Once you have done that, sign in to Dropbox with the same credentials across all your devices.
Step 2. Upload the songs you want to be moved from your iPod. Once completed, access Dropbox on your Mac and download all the uploaded music.

If you purchased songs on iPod but they can't be found due to accidental deletion, you can still re-download them from iTunes, but only on authorized devices. Here's how:
Step 1. Launch iTunes and navigate to the "Account" tab at the top of the window.
Step 2. Select "Sign In" and enter the Apple ID you used when making the purchase.
Step 3. On the "Account" page, click "Purchased" followed by "Music. Then select the "Not in My Library" option and press the download button to have it on your computer.
Apple offers products with an extra layer of security and privacy for their users, yet transferring music from iPod to computer can be difficult. Worry not, though; we've outlined methods that are easy to use and require minimal technical expertise. You should choose the method that suits you.
We highly recommend using Coolmuster iOS Assistant to transfer music from iPod to PC/Mac for swift results. Its intuitiveness and compatibility with thousands of devices make it one of the most sought-after data management programs.
Related Articles:
iPhone "Save Image" Not Working, How to Fix?
Photos Didn't Transfer to New iPhone? Work It Out with Easy Solutions
Transfer Viber Messages to New iPhone [Including iPhone 15/14/13]
Contacts Didn't Transfer to New iPhone? 7 Flexible and Easy Fixes


