
How to Transfer Music from Mac to iPhone: 5 Effective Methods

Guess you guys may have stored too much music on Mac, like me. I love music and enjoy listening to classical music when I am working on my MacBook because that music makes me relaxed and gives me inspiration for my innovative work. However, the Mac is not portable anywhere. Thus, you may need to transfer music from Mac to iPhone. How to transfer music from Mac to iPhone? The following ways may be helpful.
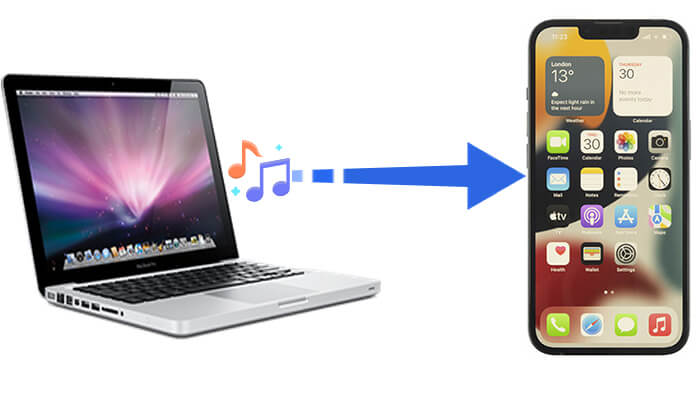
iOS Transfer is a powerful data transfer software designed to easily transfer files between different devices. For users looking to transfer music from Mac to iPhone, it offers a simple and efficient solution. Users just need to connect their iPhone to the Mac via USB, and it will automatically recognize the device, allowing for easy browsing and selection of music files to transfer.
The software supports multiple audio formats and maintains the original quality of the music. Additionally, it allows users to manage their music library, create playlists, and even import music from iTunes, ensuring you can easily enjoy your favorite melodies on your iPhone.
Key features of iOS Transfer:
Here is how to transfer songs from Mac to iPhone using iOS Transfer:
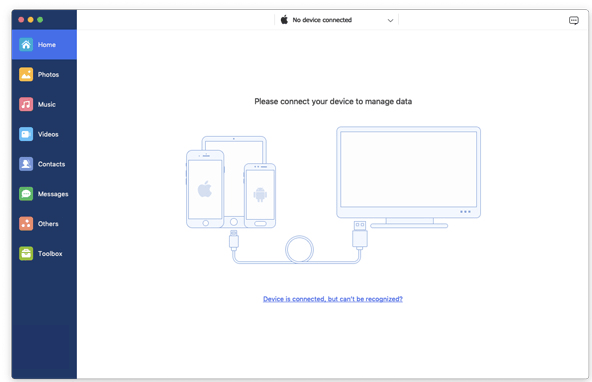
01Launch iOS Transfer after installing it on Mac and connect your iPhone to Mac via a USB cable.
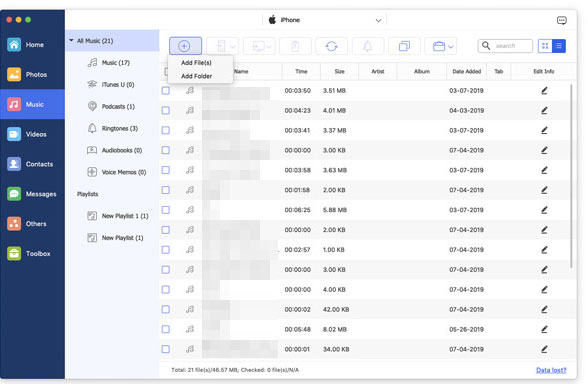
02Click "Music" from the left window and select a folder to be imported in. Then, tap the "Add" button on the top to import music from your Mac to the designated folder on your iPhone. After a few seconds, you will find the transferred music on your iPhone.
When transferring music from Mac to iPhone, iTunes and Finder are the official tools provided by Apple. iTunes is used for earlier versions of macOS, while Finder takes over the functionality of iTunes in macOS Catalina and later. With these two tools, you can manage and sync music files to your iPhone.
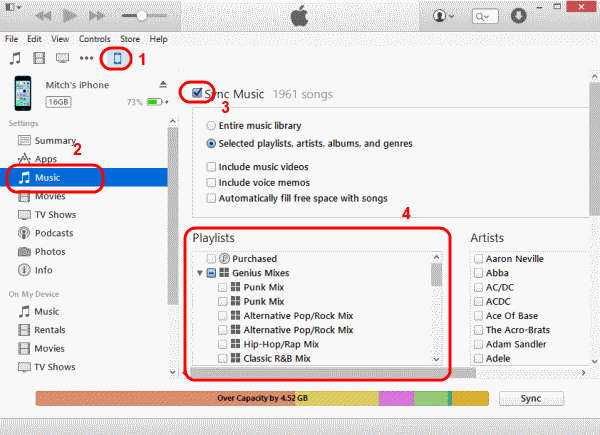
Step 1. Open iTunes on your Mac and connect your iPhone to the Mac using a USB cable.
Step 2. Click on the iPhone icon in iTunes to access the device management page. (iTunes not recognizing iPhone?)
Step 3. Select "Music" from the left menu.
Step 4. Check the "Sync Music" option, then choose the music files or playlists you want to transfer.
Step 5. Click the "Apply" or "Sync" button and wait for the transfer to complete.
Step 1. Connect your iPhone to the Mac using a USB cable and open Finder.
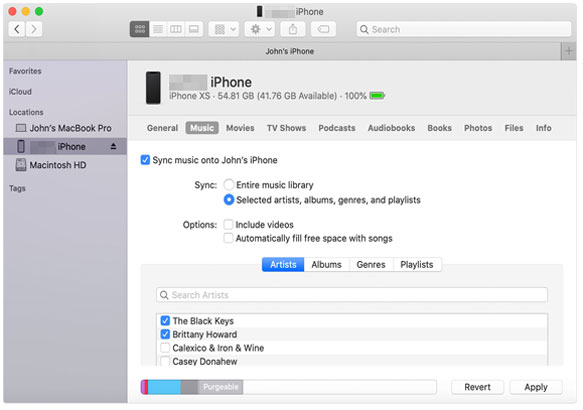
Step 2. In the Finder window, select your device under the "Locations" section, then navigate to the "Music" tab.
Step 3. Check the option "Sync music onto [your iPhone name]". You can choose to sync either the "Entire music library" or "Selected artists, albums, genres, and playlists". Click on your preferred option.
Step 4. Make sure the music files you want to sync are selected, then click "Apply" to start syncing songs from your Mac to your iPhone.
AirDrop is a feature that allows for quick file transfers between Apple devices, enabling you to directly transfer music files from your Mac to your iPhone.
Here is how to download music from Mac to iPhone via AirDrop:
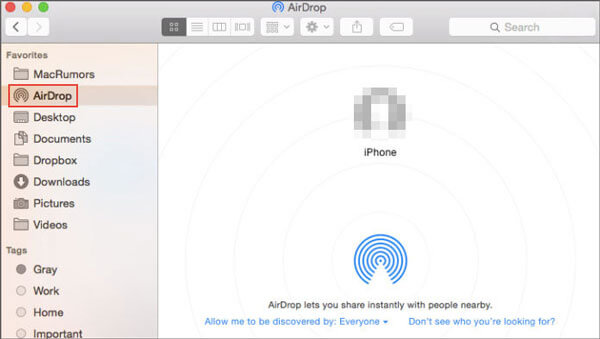
Step 1. Go to Finder and select "AirDrop" on your Mac. Choose "Everyone" at the bottom of the AirDrop window to allow other devices to discover and receive your files.
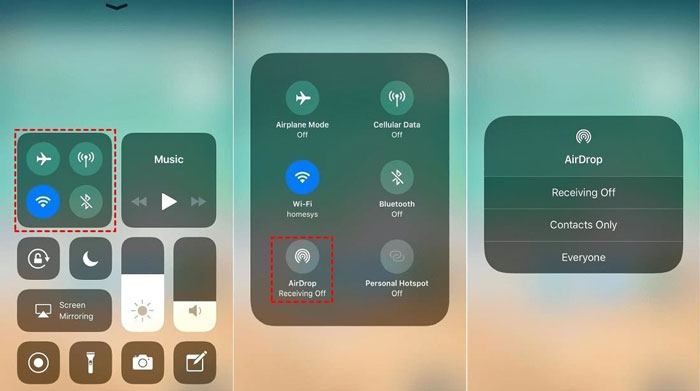
Step 2. Open your iPhone's Control Center, turn on AirDrop, and select "Everyone", ensuring that both Wi-Fi and Bluetooth are also enabled.
Step 3. Open Finder and navigate to the folder where your music files are stored.
Step 4. Drag and drop the music files you want to transfer into the AirDrop window and select your iPhone as the target device.
Step 5. After completing the fourth step, a notification will appear on your iPhone asking for approval to transfer the data. Click the "Accept" button, and you're all set! (AirDrop declined?)
If you can't find the airdropped music, you can read this article to learn where airdropped files go.
[Answered] Where Do AirDrop Files/Photos/Videos Go on iPhone/Mac?Many cloud services can also help you transfer music from Mac to iPhone. You can upload music files to cloud storage and then download and play them on your iPhone. Here, we take Dropbox as an example.
Here is how to get music from Mac to iPhone using Dropbox:
Step 1. Open Dropbox in your web browser on your Mac and sign in with the same account you use on your iPhone.
Step 2. Once you're on the homepage, select the folder where you want to save the files.
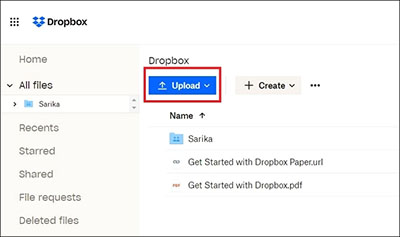
Step 3. Click the blue "Upload" button, and from the drop-down menu, choose "Files" to upload individual music files or "Folders" to upload all music from a specific folder.
Step 4. Then, open the Dropbox app on your iPhone, and you'll see the uploaded items. Select the songs you want and download them to your iPhone.
Tips: Read this article to learn how to back up your iPhone to Dropbox effortlessly.
If you are an Apple Music subscriber, you can easily sync music between your Mac and iPhone. Apple Music allows you to access the same music library across all your devices.
Here is how to sync music from Mac to iPhone with Apple Music:
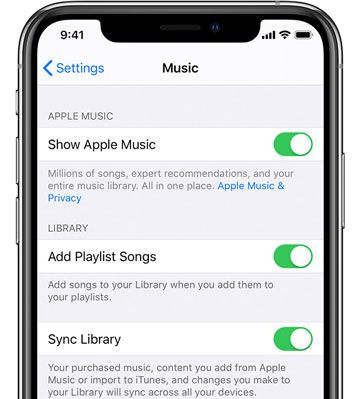
Step 1. Open the Settings app on your iPhone and tap on "Music", then enable the option labeled "Sync Library" or "iCloud Music Library".
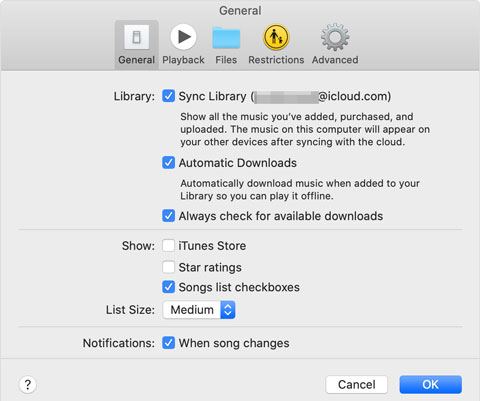
Step 2. On your Mac, open the Music app, click on "Music" at the top, and select "Preferences".
Step 3. Activate the "Sync Library" option and click "OK".
Whether you prefer one-click transfers or are more accustomed to the traditional iTunes method, the options above will help you easily transfer music from Mac to iPhone. If you're looking for the fastest and most convenient transfer experience, we highly recommend using iOS Transfer. It not only offers a user-friendly interface but also ensures the security and integrity of your data during the transfer process.
Choose the method that suits you best and enjoy a seamless music transfer experience!
Related Articles:
How to Transfer Music from Mac to iPhone without iTunes [6 Methods]
How to Transfer Files from Mac to iPhone? Solved in 5 Proven Ways
How to Transfer Music from Computer to iPhone? [5 Ways Offered]


