
[2023] How to Fix iCloud Error Connecting to Server on Mac/iPhone/iPad

iCloud is an essential service for Apple users. It gives users a great experience by connecting and syncing to grant access to various essential tasks. That's why when you start encountering issues with iCloud, measures should be placed to counter the problem sooner.
One of the many issues users face when using iCloud is "iCloud connection to server failed" error. Though it's quite common, it can still be worrying. Don't worry much if iCloud can't connect to iCloud server; this article is here to enlighten you. We'll explain all the reasons why connecting to Apple's server fails and show you concrete ways to resolve the error. Read on.
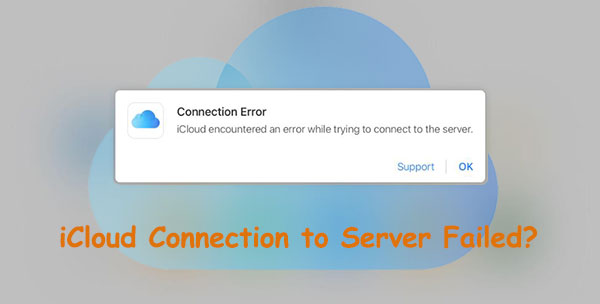
If you've been receiving an iCloud error connecting to server when trying to connect to your Apple ID server, it implies that an issue has occurred in the connection between your device and the server or within the server itself. It's unclear what precisely is causing this error; however, there are several potential causes as to why iCloud could not communicate with the server. Here are the most common causes:

It's tricky to guess the exact source of this error without troubleshooting, but thankfully, you can try a few possible solutions mentioned below.
See more:
Easily Restore iPhone from Backup [Contain iTunes and iCloud Backups]
iPhone Won't Backup to iCloud, How to Fix It?
You now know the possible causes of iCloud server error. The next step is to troubleshoot the problem and fix it for good. Here are several solutions that can help:
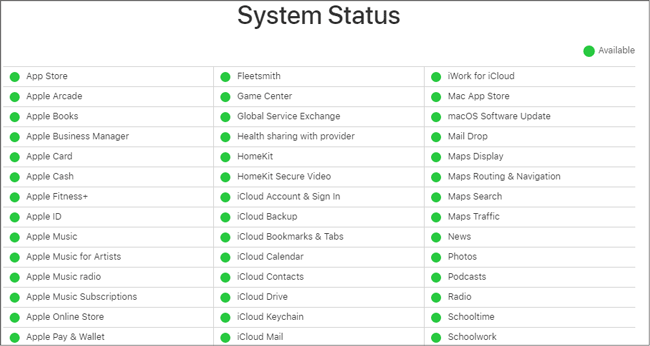
If you can't connect to iCloud (iCloud upload stuck?), the server may have a problem. Therefore, the first thing you should do is check the server status of iCloud. You can do this by visiting the Apple System Status page. Here, you can see if all iCloud services are running or if there is an issue.
Step 1. Head to Apple's System Status website.
Step 2. Ensure all the services you need, like App Store and iCloud, are running. You will know this if they are in green. Apple usually provides clickable links for recent issues on its website if you want to learn more about them.
Another problem that will prevent connecting to the iCloud server is an unstable network. Therefore, it is best to connect to strong WiFi instead of using your phone's hotspot.
If you still have problems, try turning off and on the WiFi from your menu bar. To restart the router, flip the switch located at its back panel on/off.
Here is how to test WiFi speed:
Step 1. Navigate to speedtest.net on your browser.
Step 2. Tap on the "Go."
Step 3. Check the download and upload speeds. If the Mbps are very lower than what's stated in the contract, you can contact your service provider.
Try signing out of your Apple ID, then sign back in. This will bring a fresh connection of the iPhone with Apple servers. (How to delete Apple ID without password on iPhone?) Doing this can resolve iCloud encountered an error and allow you to use iCloud again without a problem. Here is how:
On iPhone:
Step 1. Start by opening the Settings application on your iPhone. Click on the option for "your name".
Step 2. After that, on the next screen, look for the option for "Sign Out" at the lower part of the screen.
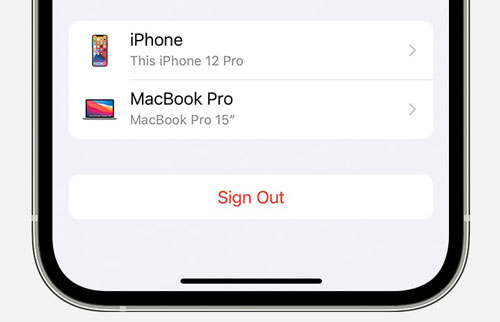
Step 3. Now input your account's Apple ID and password and click "Turn Off."
Step 4. Log in using your Apple ID and password again and see if the error is solved.
On Mac:
Step 1. Head to "System Preferences" and look for "Apple ID".
Step 2. Open the Overview tab and tap "Sign Out".
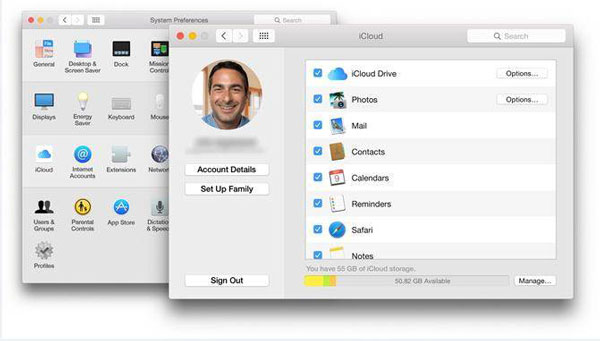
Step 3. If asked to save data, choose "Keep Copy" and sign in again
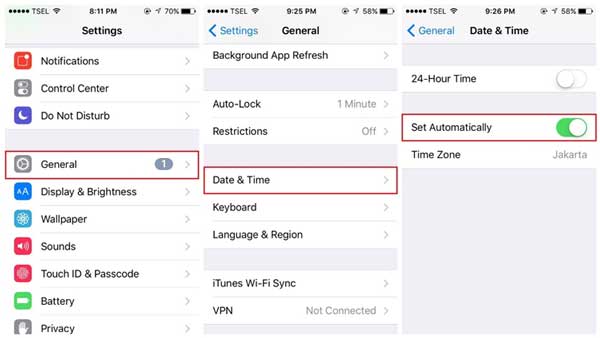
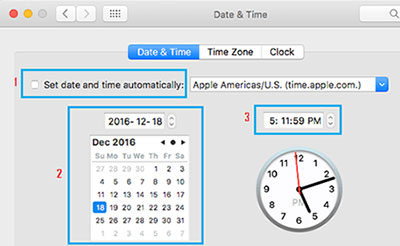
When you try logging into iCloud, your device will automatically check if the time and date match those of the Apple servers. If they are different, you will see an error connecting to the Apple ID server on your iOS device. Apple servers rely on the time and date set on your phone. As such, ensuring the date and tie on the device are set to automatic is important.
On iPhone:
Step 1. Open your iPhone's "Settings" application, then go to "General."
Step 2. Click "Date & Time", then toggle on the "Set Automatically" option.
On Mac:
Step 1. Go to "System Preferences" then to "Date & Time".
Step 2. Tick the box for "Set date and time automatically."
To ensure maximum security for your device and avoid any glitches or bugs, it is highly recommended that you update to the latest version of iOS when there is. Similarly, one of the first things to do when experiencing iCloud server problems is to ensure the device runs on an updated version.
On iPhone:
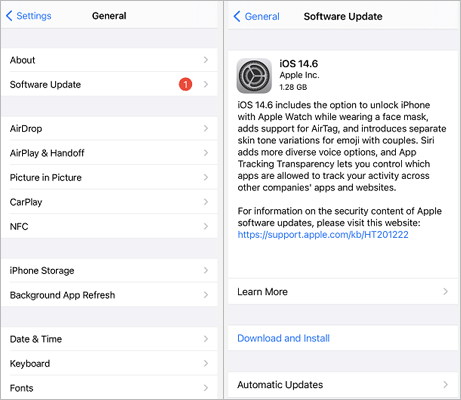
Here is how to check updates on an iPhone:
Step 1. Go to the settings page and click on "General".
Step 2. Below the General, you'll see various options. Choose "Software Update". Click on it to show the available updates.
Step 3. Hit the "Install now" to download the updates.
On Mac:
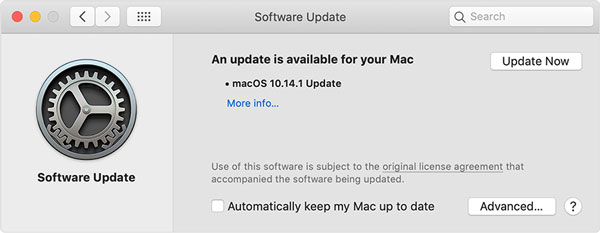
Step 1. Head to the Apple Menu. You'll find option lists; choose "About This Mac."
Step 2. Now look for the "Software Update" option under the current macOS version.
Step 3. Check the available updates. If you find any, tap "Update Now" to install them on Mac. Once done, restart your Mac.
Nowadays, most people use a VPN for security purposes, which is good. However, sometimes the VPN can interfere when trying to update your Apple ID settings. If not, it can reset the Apple ID passcode. So, to avoid any issues with the iCloud server, switch the VPN off on your device.
It is likely that a bug has caused the connection problem to the Apple ID server. The best way to remove the bug is by signing into your Apple ID using another device or from the web directly. But, to do that, you'll need a verification code.
Normally, when you log into iCloud on one of your devices, a verification code will be sent to the other device. However, if you don't have the device, you will not get the code. But you can get the code using the below steps:
On iPhone:
Step 1. Open the setting application and click on "your name".
Step 2. Click on "Password & Security" and "Get Verification Code".
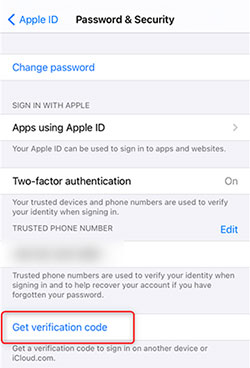
Step 3. Now copy and paste the code when logging into iCloud using another device or on the internet.
On Mac:
Step 1. Tap on the Apple logo and choose "System Preferences."
Step 2. In the next window, tap "Apple ID" and click on the tab for "Password & Security." Now tap on the button for "Get Verification code".
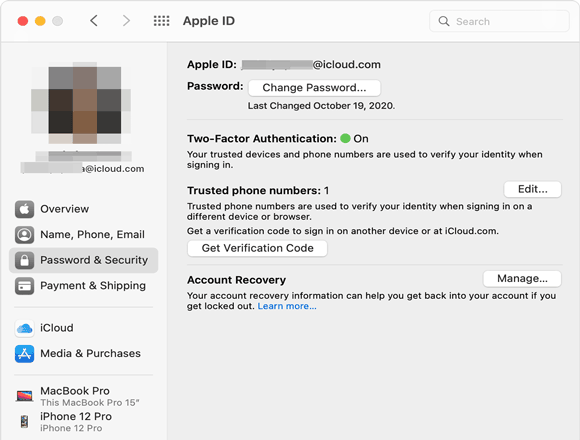
Step 3. Use the code when logging into iCloud.
Another likely cause of t"there was an error connecting to the Apple ID server" message may be attributed to authentication. Resetting the Apple ID password would provide a fresh start for the system. Here is how:
Step 1. Open "System Preferences" and click on "Apple ID."
Step 2. Head to "Password and Security". Choose the option for "Change password."
Step 3. Enter the current system password, type in your new password, and confirm it. Once done, tap "Change."

Did all other troubleshooting attempts have failed, and you're still unable to connect to the Apple ID server? Resetting your iPhone's network settings may be a great last resort. Keep in mind that this will delete all of your saved WiFi passwords and paired devices, but if it is something you are ready for, then proceed with these steps:
Step 1. Click on the "Settings" application and choose "General".
Step 2. Hit the "Transfer/Reset iPhone" option.
Step 3. Click on "Reset".
Step 4. Click "Reset Network Settings" from the pop-up window and confirm this action.

You may like:
Restore from iCloud Paused? Fix It with 9 Solutions Here!
Top 7 Solutions to Fix iCloud Photos Stuck at 1%
Backing up data in iCloud is a hassle, and many people are faced with iCloud backup failed issues now and then. Why not go the easy way to back up and restore your data with the best, most recommended iPhone data manager - Coolmuster iOS Assistant? This is the reliable, efficient solution you shouldn't miss. It's easy to use and highly recommended for non-tech savvy and professionals alike.
iOS Assistant can backup data such as contacts, videos, music, messages, photos, apps, calendars and more to your computer without any problem. Not only that, but restoring them is just as easy. It's compatible with most iPhones and is iOS 16-supported.
Key Features of Coolmuster iOS Assistant:
Steps to backup iOS data in one click by using iOS Assistant:
01 Download the software onto the computer. Open it and then connect the iOS device to the computer using a lightning cable.
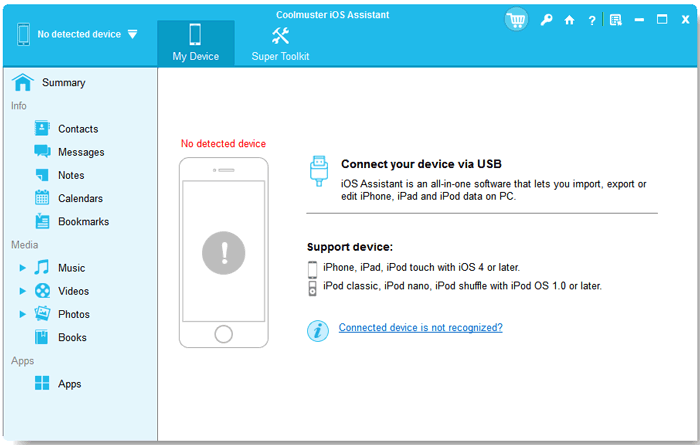
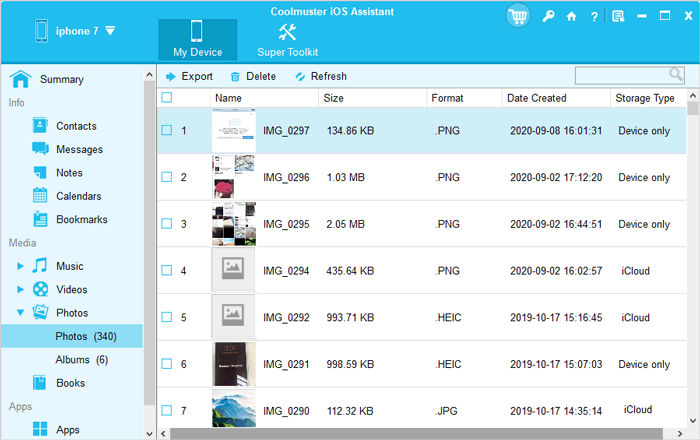
02 After your device is recognized by the software, you will see all files on the interface arranged in categories. Click on one file at a time from the left panel, preview it, and then choose the items to back up. For example, if you are backing up contacts, choose the contacts folder in the left panel. Now preview and select the contacts to back up.

03 Now transfer the chosen files to the computer to back them up. Just hit the "Export" tab to transfer the data to PC.
Can't connect to iCloud server? With the tips we provided, you should be able to easily address any iCloud server error issues that arise. For ultimate protection of your data, Coolmuster iOS Assistant is your number one choice for backups. It's a no-brainer! You will have all your files safely saved to the computer in just one click.
Related Articles:
How to Fix iCloud Back Up Now Greyed Out?
Fast Fix iCloud Contacts Not Syncing | 8 Ways and Powerful Alternative
Not Enough iCloud Storage? Fix This Issue with This Full Guide
Contacts Didn't Transfer to New iPhone? 7 Flexible and Easy Fixes
Fix iCloud Link Not Working or Loading | Effective Solutions


