If you do not have an iCloud photo library, you need to make sure that your iPhoto library will be safe. Make sure to make a backup well in advance. You don’t need to make an iCloud account for this. You can do this manually. This is where iTunes come in handy. You can use it to manually transfer your photos.
Related: How to Use iCloud Photo Sharing
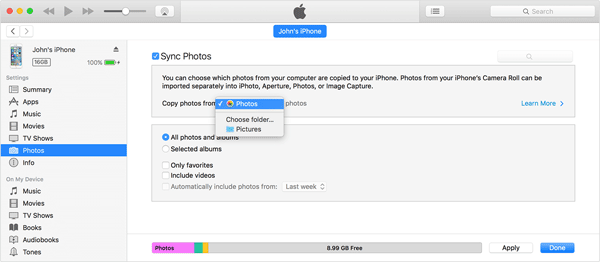
The procedure is simple. You just need to open iTunes, click on the device icon, and then click "Photos" in the sidebar on the left side. Now, select the checkbox next to "Sync Photos", choose which files and folders you want to transfer and then click OK option to continue the process.

However, sometimes, your iPhoto library might not show up in iTunes.
There are a few reasons why this may happen:
1) Your iPhoto library may not be syncing properly with your iTunes.
2) The most common reason is due to incorrect parsing in the album Data2.xml file. This is caused by some characters in album names like ampersand ( &) which cannot be recognized.
3) You might have changed the location of your iPhoto library. This may cause problems. The ideal location should be user/pictures/iPhoto library.
4) This may also be caused after you get a new update for your iPhoto library.
In case your iPhoto library is not getting recognized by your iTunes, you can do the following.
Read More:
How to Fix 'iTunes Driver Not Installed' on Windows with Foolproof Methods
How to Transfer PDF to iPhone without iTunes in 7 Unexpected Ways?
1) Check album names and Data2.xml file
The first thing you need to make sure is that none of your photo albums or files contains "&" character. If they do, you should remove them from the names, otherwise there will be an error caused while reading the Data2.xml file. You do not have to delete them completely, of course. Change "&" to "and" and it will be fine!
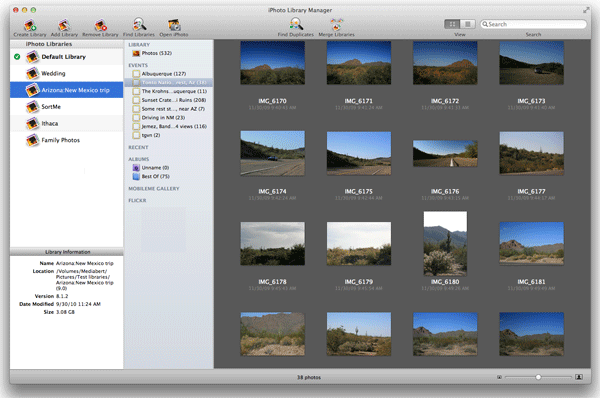
An easy way to find out the errors in your Data2.xml file, you should download iPhoto library manager. It will help you easily detect problems with this file which you can resolve by editing the text in text Wrangler. It also allows you to re-import all your photos, and sometimes this solves the problem. Your new reconstructed library has greater chances of getting recognized by iTunes.

2) Make sure keywords are okay
Often, malformed keywords may prevent your iPhoto library from getting recognized. You can try renaming your iPhoto keywords if nothing above works.
Go to iPhoto> Manage my keywords> edit Keywords. Rename the keywords you have used in the library.
Sometimes, some characters are automatically added to keywords. Make sure to read your keyword carefully and remove any unusual characters.
Things you need to keep in mind to ensure that your iPhoto library is recognized by iTunes:
1. Don't put "&" in your album names, or in names anywhere.
2. Make sure your software is up to date. Out dated software may often cause recognition problems.
3. Make sure that your photos and albums are appearing in your iPhotos library. If you see an empty folder, then it means that they aren’t visible in your library. In this case, the issue is mostly with the location your library.
Follow the above steps to ensure that iTunes recognizes your iPhoto library.
Related Articles:
How to Back up Photos to iCloud in A Batch
[Solved] How to Unlock Disabled iPad without iTunes | Latest Guide
How to Put Music on iPod without iTunes? (4 Effective Ways)
How to Restore Contacts from iTunes Backup to iPhone Easily? (Top 3 Ways)