
[Step-by-Step] How to Put Movies on iPad with or without iTunes?

Are you a movie enthusiast who wants to know how to put movies on iPad? With your iPad's sleek, portable design and larger display, watching your movies using an iPad is one of the greatest experiences you can ever have. You now don't have to move around with your heavy laptop again. All you need to do is read this article. It will explain in detail several methods for easily transferring movies to your iPad, including both using iTunes and methods that don't require iTunes, helping you enjoy your movie-watching experience with ease.
If the movies you want to add to your iPad were purchased from iTunes or are stored in your iTunes library, the easiest way to transfer them is by syncing the movies to your device using iTunes.
How do you put movies on iPad using iTunes? Here are the steps:
Step 1. Begin the procedure by downloading, installing, and launching the latest iTunes application into your computer. (iTunes keeps crashing?)
Step 2. Use a lighting cord to connect the iPad to the computer. Tap the 'Trust" popup on the iPad and move to the next step.
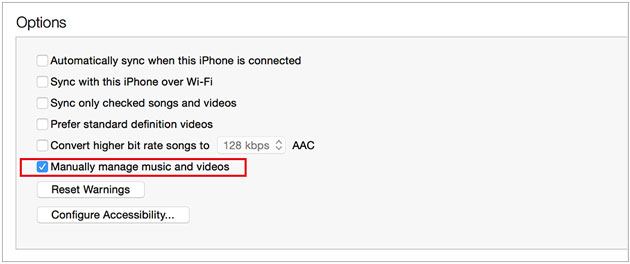
Step 3. A new iTunes interface will appear. Click the iPad icon and hit the "Summary" button. Select the "Manually manage music and videos" option from the available choices.
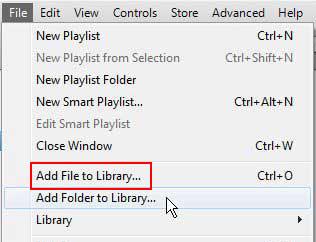
Step 4. Add the movies you wish to transfer to the iTunes library by clicking on the "File" menu item and choosing the "Add File to Library..." option.
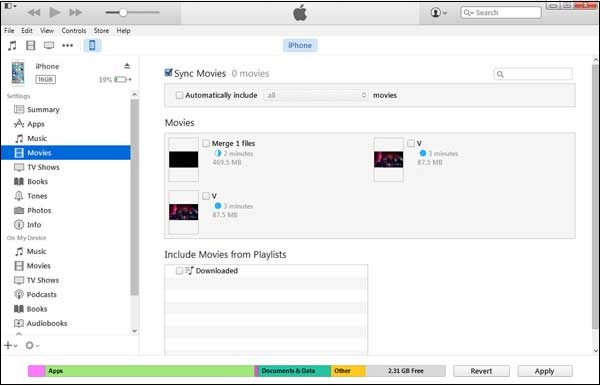
Step 5. Select your movies of interest by hitting the "Movies" button that is located under the Settings button, check on the "Sync Movies" option, and choose your movies of interest. After that, hit the "Apply" button on the bottom right corner of the screen to add your desired movies to the iPad.
As is well known, iTunes syncing will overwrite the existing videos on your iPad. If you don't want to affect your existing data, you can read this part to learn how to put movies on iPad without iTunes.
iOS Transfer is a professional iOS file transfer software that supports the fast transfer of movies, music, photos, and other data without overwriting the existing content on your iPad. Additionally, it supports various video formats such as MP4, AVI, MKV, and MOV, avoiding compatibility issues.
What can iOS Transfer do for you?
How do you put movies on an iPad using iOS Transfer? The steps are as shown below:
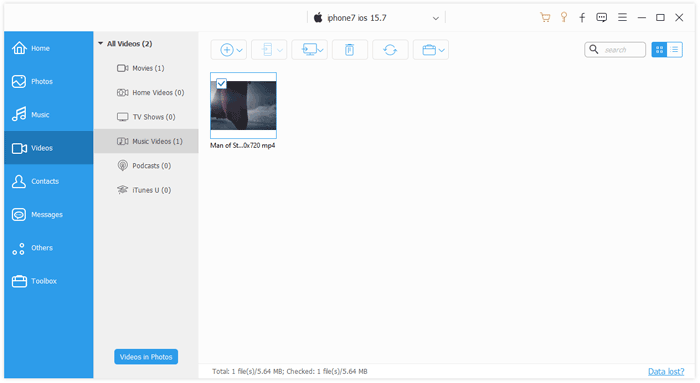
01Start the movie transfer procedure by downloading, installing, and launching the application on your computer. Use a lighting cable to connect the iPad to a PC. A new software interface will appear on your computer screen.
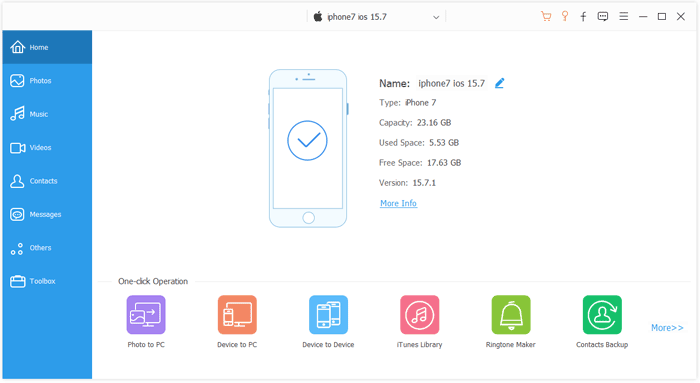
02Click on the "Videos" folder in the left section, then choose "Movies" to see all the available movies. Hit the "Add" button and select the movies you wish to import to the iPad, and then click "Open". All the selected movies will be transferred to your iPad.
Want to send movies to iPad wirelessly? Look no further than iCloud Drive. This Apple cloud storage service makes sending files directly onto your iPad a breeze. However, this method is limited by iCloud storage space, and the upload and download speeds depend on the network. (How to fix not enough iCloud storage? )
Follow the below steps on how to put movies on iPad via iCloud Drive:
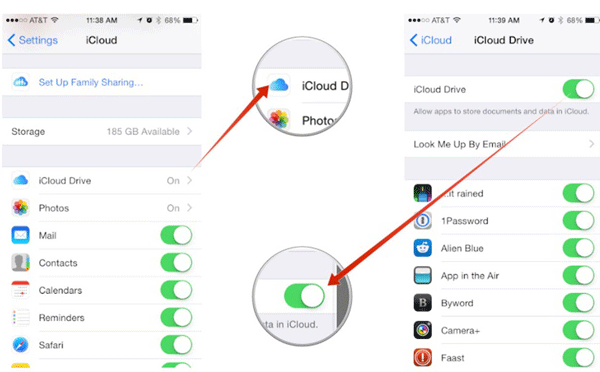
Step 1. Launch the "Settings" application on the iPad. Tap on your name, hit the "iCloud" button, and enable the "iCloud Drive" feature.
Step 2. Use your computer browser to log in to your iCloud account using the Apple account login credentials used on the iPad.
Step 3. Hit "iCloud Drive", click the "Upload" button and remain patient for the movie uploading process to complete.

Step 4. Open the "Files" app on your iPad and go to the "iCloud Drive" directory. Find the uploaded movie file, tap the "Download" button, and once it's finished, you can play it.
With the introduction of macOS Catalina, Apple revolutionized device syncing between Macs and iDevices by introducing the Finder application. Users can easily transfer movies to their iPad from Mac with Finder.
Follow the steps shown below on how to put movies on iPad from Mac using Finder:
Step 1. Open Finder and connect your iPad to the computer using a USB cable.
Step 2. Unlock your iPad and trust the computer. If prompted, enter your iPad passcode to proceed.
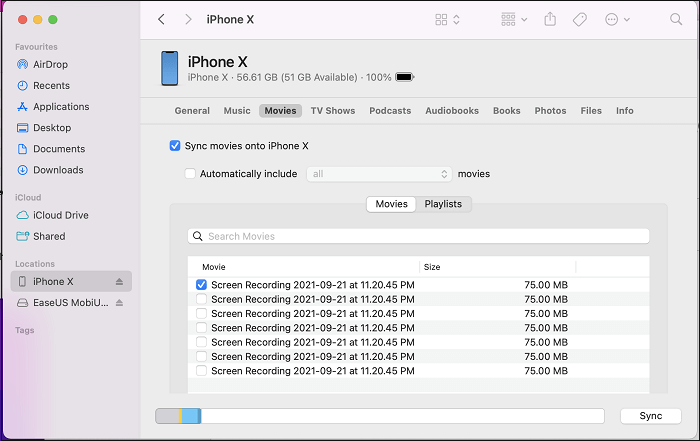
Step 3. In Finder, select your iPad and click on "Movies".
Step 4. Check the "Sync movies onto [your iPad name]" option and choose the files you want to transfer.
Step 5. Click "Apply" to begin transferring the movies to your iPad.
Now you understand how to put movies on an iPad using the different methods discussed in this article. However, the best bet is iOS Transfer. It supports multiple formats, is easy to use, does not affect the existing data on your iPad, and offers fast transfer speeds.
Related Articles:
How to Transfer Music from Computer to iPad? Solved in 4 Proven Ways
How to Transfer Photos from Mac to iPad with or without iTunes?
How to Transfer Videos from iPhone to USB Stick with or without a Computer?
How to Transfer Photos from PC to iPad with or without iTunes?


