
How to Share Calendar on iPhone/iPad? Solve in 4 Proven Ways

Calendars are essential tools for managing time and planning. By sharing a calendar, you can easily synchronize schedules with family, friends, or colleagues, enhancing efficiency. So, how do I share a calendar on iPhone? If you're not sure how to do it, this article is for you. It will provide a detailed guide on how to share calendar on iPhone, helping you manage your time and schedules more effectively.
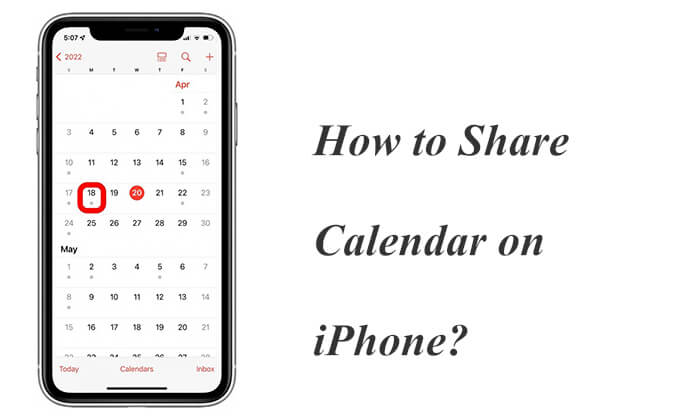
Sharing a calendar is a convenient way to sync schedules with friends, family, or colleagues, ensuring everyone is on the same timetable. How can you share calendars on iPhone? Here are the specific steps:
Step 1. Launch the Calendar application on your Home screen. (iPhone calendar disappeared?)
Step 2. Select the "Calendars" icon at the bottom navigation.
Step 3. Tap the "i" button next to the calendar you want to share.
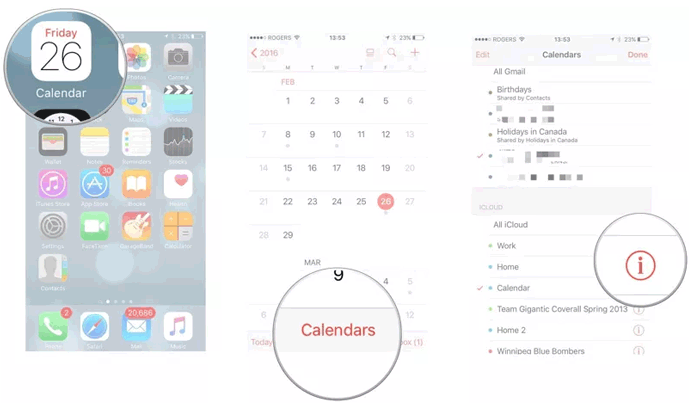
Step 4. Tap on the "Add Person" option under the "Share With" section.
Step 5. Select the people that the user would want to send the schedule to and click the "Add" icon.
Step 6. After adding all the recipients of the calendar, select the "Done" option to complete the sharing. Those that have iCloud accounts will receive a notification for them to accept the organizer invite.
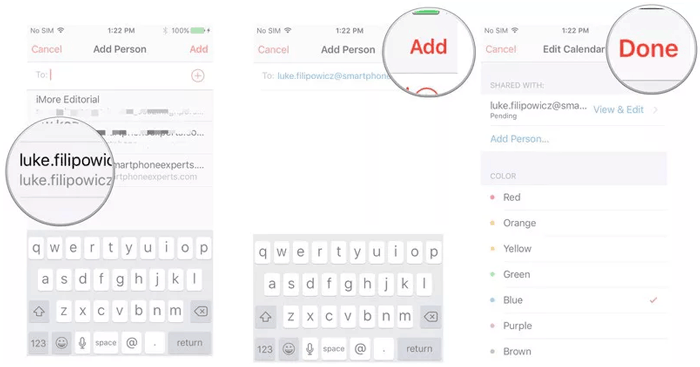
By default, your iPhone allows the specified people to edit your calendar. To prevent someone from making changes, go to the "Edit Calendar" screen and select the recipient you want to restrict from editing.
If you need to let more people view your schedule, making your calendar public is a great option. With a public calendar, anyone with the link can view your calendar without needing to invite each person individually but is not able to edit the calendar.
Here is how to make a shared calendar on iPhone for everyone:
Step 1. Launch the Calendar application from the home page.
Step 2. Click on the "Calendar" icon at the bottom of the page displayed.
Step 3. Tap the "i" button for the event you want to make public.
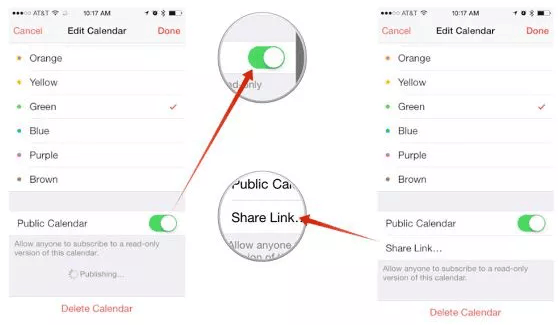
Step 4. Turn on the option for "Public Calendar".
Step 5. Select "Share Link" to send the plans to others.
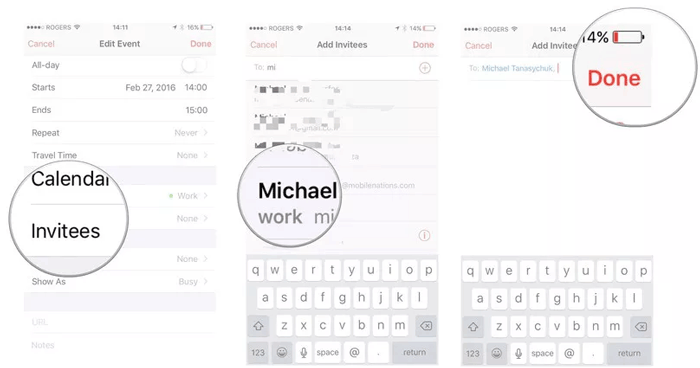
Sometimes, you might only need to share a specific event rather than your entire calendar. In this case, you can choose to share just that individual event to ensure the invitees can participate.
Here's how to share a calendar on iPhone:
Step 1. Launch the Calendar application from the home page.
Step 2. Create a new activity or select an existing function that you intend to share.
Step 3. After creating the activity you click on the "Edit" key on the upper right side of the screen and add invitees to the calendar.
Step 4. Add all the email addresses of the people that the user would like to invite to the function and repeat the process with every person that the user intends to invite.
Step 5. After all the recipients have been added, click the "Done" key to send the invitations to the event.
Read the following article to learn how to transfer your calendars from your old Android to the new Android phone.
How to Transfer Calendar from Android to Android (2024)With Family Sharing, you can create a shared family calendar that allows all family members to view and edit it. Family Sharing allows you to share a calendar with up to five family members. To share a calendar on your iPhone, enable Family Sharing.
Here is how to sync iPhone calendar with family:
Step 1. Enable Family Sharing on your iPhone or iPad. (Family Sharing iCloud storage not working?)
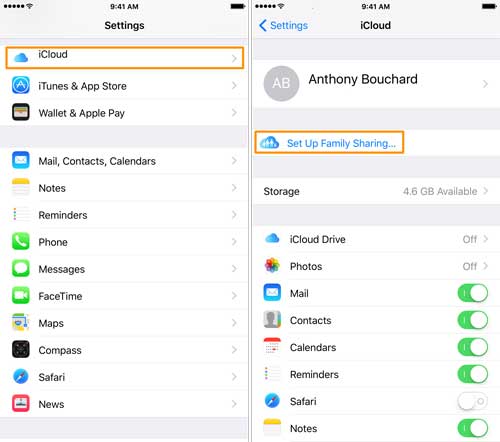
Step 2. Open the Calendar app on your iPhone.
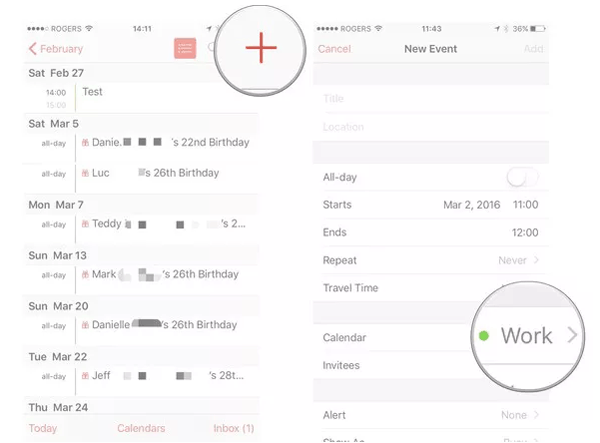
Step 3. Choose an existing event or create a new one by tapping the "+" icon in the top right corner.
Step 4. Tap "Calendar" and select the calendar labeled "Family".
Step 5. Enter the event details and save it.
In addition to managing calendars on your iPhone, you can use Coolmuster iOS Assistant to manage your calendar on a PC or Mac. It is a powerful software designed to simplify the data management process for iOS devices. With this tool, you can conveniently manage your calendar on a PC or Mac, including sharing it. It offers a simple and intuitive interface that allows you to easily edit, back up, and export calendar data, enhancing the convenience of calendar management.
Key features of Coolmuster iOS Assistant:
Here is how to manage iPhone calendars on your computer:
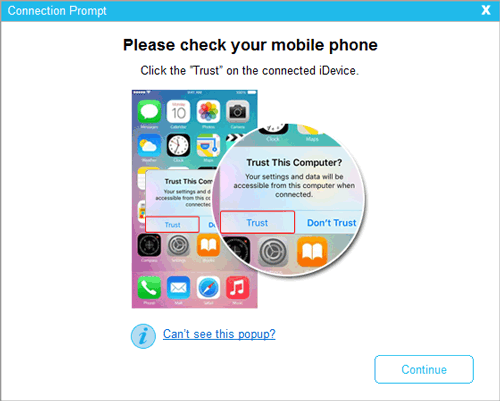
01Download, install, and launch the software into the computer. After that, connect your iPhone to the computer and trust your device.
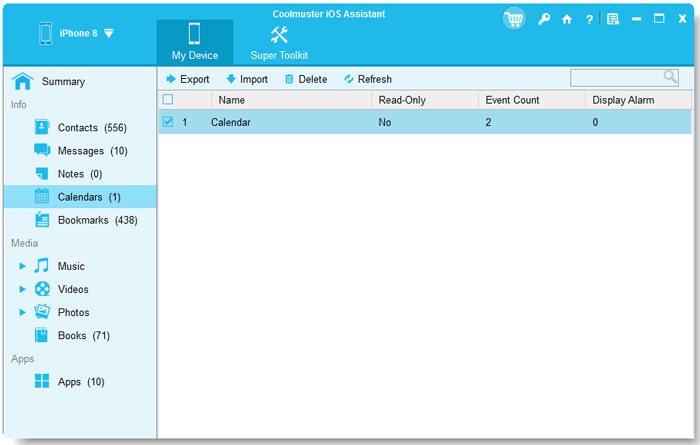
02Once successfully connected, you will see the interface as below. Now, you can manage your calendar on your computer.

03Click "Calendars" on the left panel, click " Export" to transfer your calendars from your iPhone to your computer, click "Import" to transfer your calendars from your computer to your iPhone, or click "Delete" to delete the unwanted calendars.
Video Tutorial:
This article will introduce you to various methods for sharing calendars on your iPhone. Sharing your iPhone calendar not only makes time management easier but also enhances coordination in both work and life. By the way, using Coolmuster iOS Assistant, you can manage your calendar more conveniently on a PC or Mac, ensuring data security and integrity.
If you haven't tried these methods yet, follow the steps outlined in this article and give them a go!
Related Articles:
4 Best Ways on How to Print Calendar from iPhone
iPhone Calendar Not Syncing? Here are 7 Fixes
How to Transfer Calendars from Samsung to Samsung without Pain? (Full Guide)


