Seamless data syncing between our devices has become an integral part of our daily lives. One of the most crucial pieces of info we carry with us is our contact list. As you know, there comes a time when you want to ensure your valuable iPhone contacts are accessible on your MacBook, whether for safekeeping, easier access, or simply to have a backup plan in place. Hence, knowing how to sync contacts from iPhone to Mac could be paramount. Well, this article provides five well-tried methods with step-by-step guidelines.
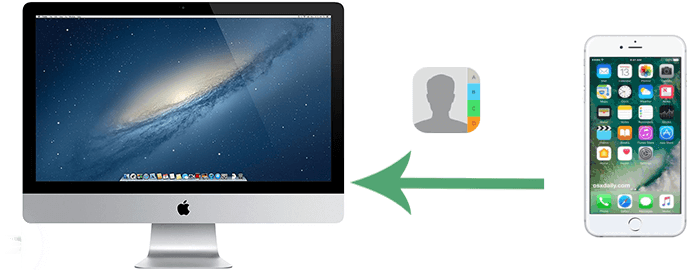
The first and simplest way to sync contacts between your iPhone and Mac is using iCloud. To accomplish this, just have iCloud Contacts enabled on both devices. Learn how to sync my contacts to my MacBook using iCloud:
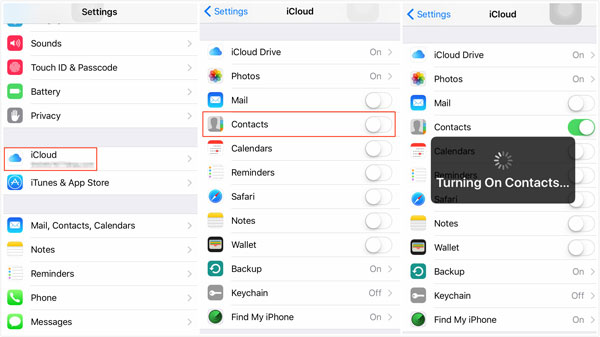
Step 1. On your iPhone, access Settings on your iPhone and tap your profile name at the top. Subsequently, Select iCloud > turn on Contacts > tap Merge.
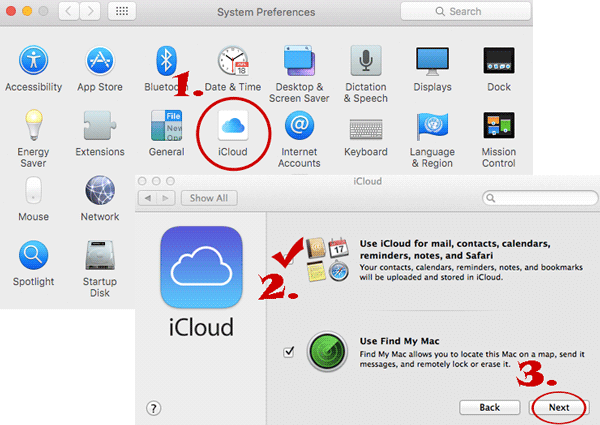
Step 2. On your Mac, click the Apple sign from the top-left corner and go for System Preferences. Then, click iCloud and check the box as prompted.
How to force my iCloud contacts to sync with Mac? To resolve it, open the Contacts app on your iPhone, scroll to the top of the screen, and pull down until you see the activity gear, prompting a refresh. If needed, you can also force a sync by either signing out of iCloud before signing back in or by restarting your iPhone in case of any difficulties.
How about importing contacts from an iPhone to a Mac without iCloud? Here, we present four efficient methods to do this. Feel free to explore these options and choose the one that best suits your preferences.
The swiftest and most flexible way to sync iPhone contacts with your Mac involves employing Coolmuster iOS Assistant. This great software is specifically crafted for Mac and Windows users, helping back up, restore, preview, transfer, and manage iOS data. It provides a superior user experience compared to Apple iTunes.
With this software, you can easily transfer your iPhone contacts to your computer with only one click. What's more, it supports various formats, such as CSV, vCards, XML and so on.
What are the capabilities of Coolmuster iOS Assistant?
Sound amazing? Give Coolmuster iOS Assistant for download and adhere to the simple instructions to get contacts from iPhone to Mac with this smart program:
01Run iOS Assistant and link your iPhone to your Mac.
Install the utility on your Mac computer, then start it. Connect your iPhone to your computer via USB. When a window pops up, tap Trust and Continue to establish a virtual connection between both devices.
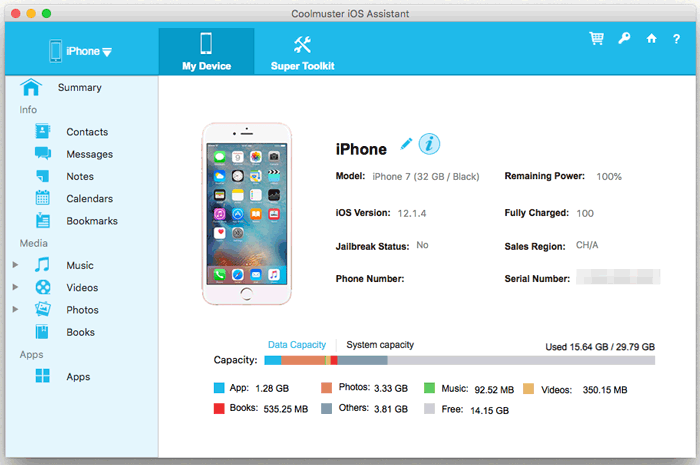
02Sync contacts from iPhone to Mac immediately.
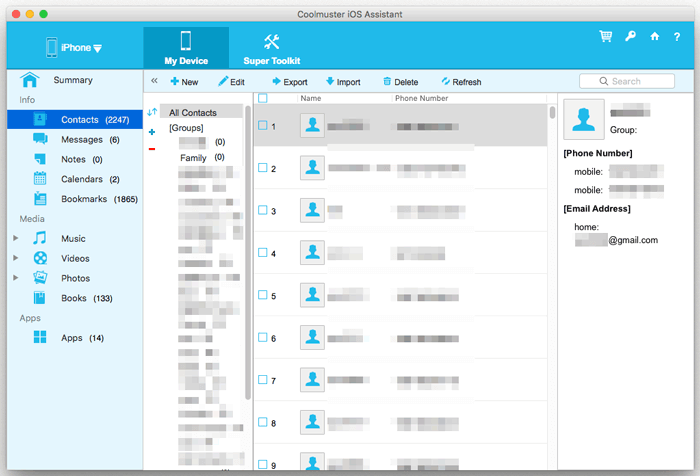
Once the connection is established, go to the Contacts tab on the left panel. Select the specific contact(s) you wish to sync to your Mac and click Export. Finally, choose a location on your Mac to save the contacts.
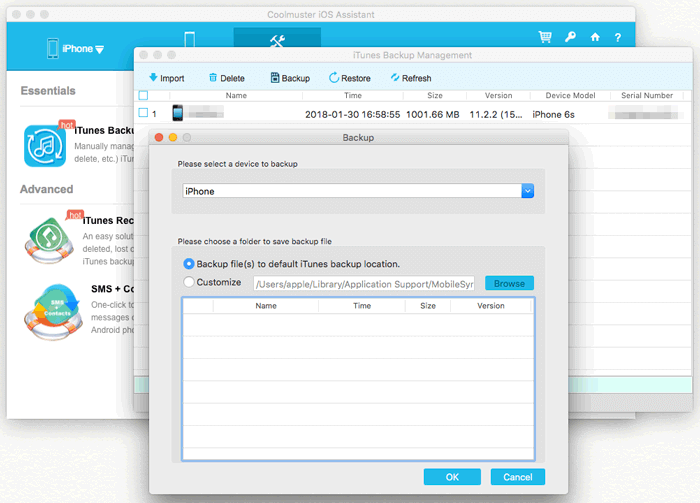
Optionally, you can bulk sync your iPhone contacts to your Mac. To do this, navigate to the Super Toolkit section in the program interface and select the iTunes Backup & Restore option. Click Backup, choose the device for backup, select the storage location for the backup, and click OK.
You May Like: Want to know how to sync contacts from Mac to iPhone? You can check here if you are interested.
If you prefer to sync only specific contacts and not your entire address book, a quick method is to send them through AirDrop. Yet, please ensure that both your iPhone and Mac are on the same Wi-Fi network before proceeding. Next, we shall guide you through how to sync contacts to Mac from iPhone with AirDrop:
Step 1. Activate Bluetooth on both devices. On your iPhone, navigate to Settings > Bluetooth and switch it on. For your Mac, access Apple Menu > System Preferences > Bluetooth and enable it.
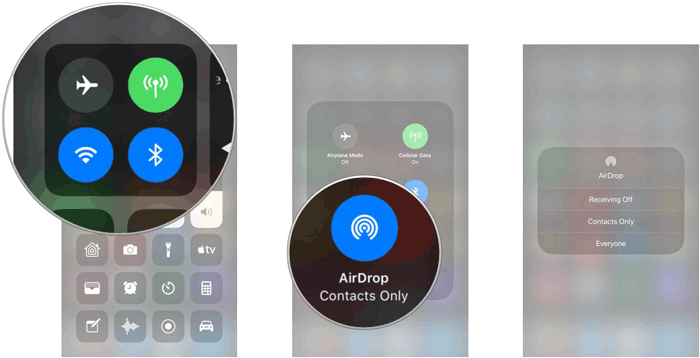
Step 2. Enable the Airdrop feature on your iPhone. Open the Control Center, tap the Network settings card, and select Contacts only or Everyone from the list.
Step 3. To activate Airdrop on your Mac, go to Finder > Go > Airdrop. Then, choose Allow me to be discovered by and select either Contacts only or Everyone.
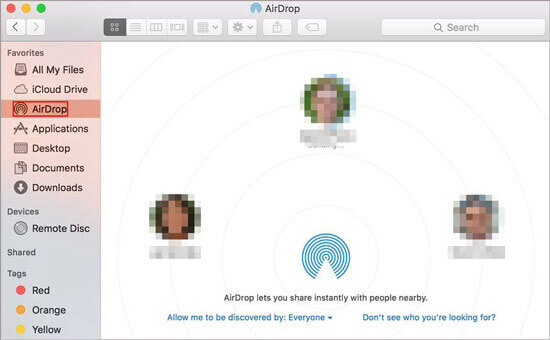
Step 4. On your iPhone, open the Contacts icon, select a contact, and click Share Contact. From the expanded list, choose Airdrop and select your Mac name to initiate the contact transfer.
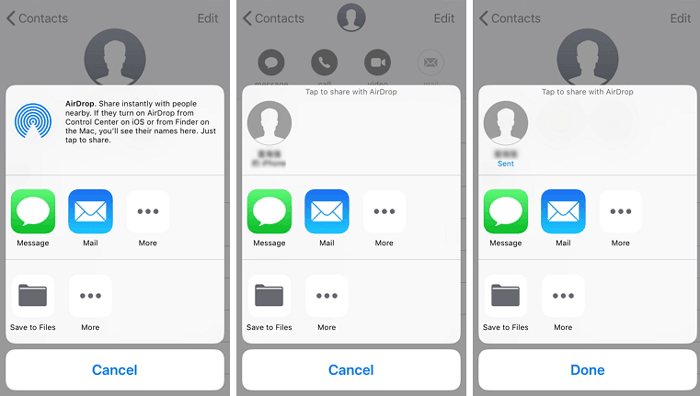
Tips: Is AirDrop not working on iPhone or iPad? Read this article to learn how to fix it.
iTunes can also be used to sync content with devices like iPhones, iPads, and iPods via USB. For macOS Catalina 10.15 or newer, iTunes has been replaced by Finder, making it the go-to option for compatible Macs. Without further ado, let's see how to add contacts from iPhone to Mac with iTunes:
Step 1. Link your iPhone to your Mac and open iTunes/Finder. When prompted, input the device passcode or touch Trust as asked, Trust This Computer.
Step 2. Click on your iPhone icon in the upper left corner of the iTunes window.

Step 3. In macOS Mojave and earlier, you'll find an Info tab. In macOS Catalina and later, there is a Sync Contacts option in the Finder.
Step 4. In macOS Catalina and later, choose the Sync Contacts option. You can also customize which contacts you want to sync, like All contacts, Selected groups, or specific folders.
Step 5. Click the Apply or Sync button in iTunes or the Finder to start the sync process. iTunes will sync your iPhone contacts with the Contacts app on your Mac.
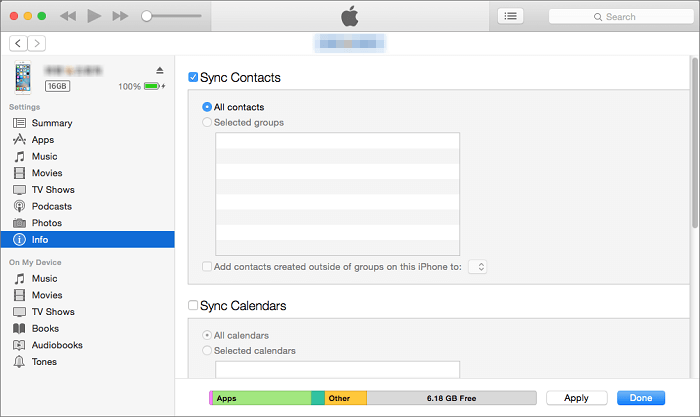
To restore contacts from iTunes, you can read the following article.
How to Restore Contacts from iTunes Backup to iPhone Easily? (Top 3 Ways)Transferring contact info from an iPhone to a Mac via Email may not be straightforward, coupled with some limitations. For instance, you can only send one contact at a time, which can be time-consuming. Still, this approach is applicable when you need to sync only a few contacts. How can you share contacts between iPhone and Mac? Here are the directions:
Step 1. On your iPhone, access Contacts and choose the contact you want to send to your Mac.
Step 2. Tap Share Contact and select the Mail option. Once you choose Mail, you can send the contact to your email address.
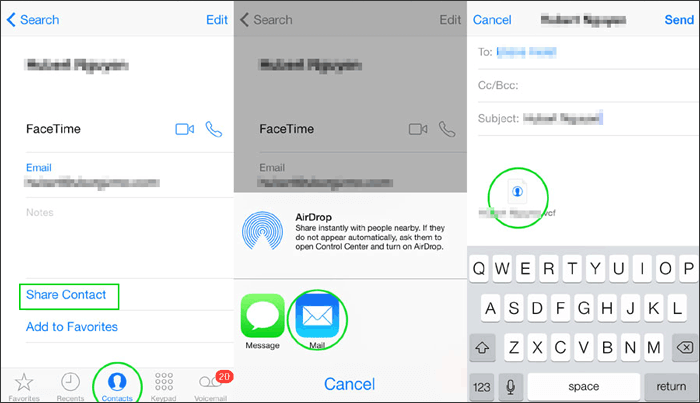
Step 3. Open the email or messaging app on your Mac, where you'll find the contact. Finally, download the contact file (VCF) and open it to add the contact to your Mac's Contacts app.
Gmail can be accessed on a wide range of devices, including iPhone, Mac, iPad, iPod, and various other phones and computers. Another approach for exporting contacts from your iPhone to your Mac involves using Gmail. To achieve this, you'll have to sync your iPhone contacts with your Gmail account and then download these contacts to your Mac. The steps involved can be somewhat intricate. Here is how to sync contacts from iPhone to Mac using Gmail:
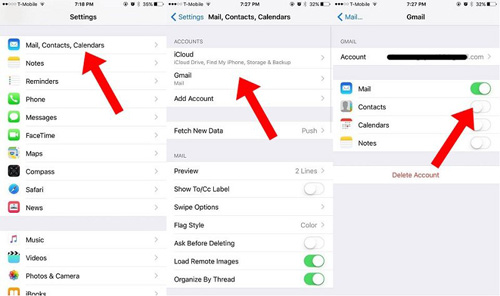
Step 1. On your iPhone, access the Settings app, then navigate to Mail, Contacts, Calendars, and select Add Account. Choose the Google option.
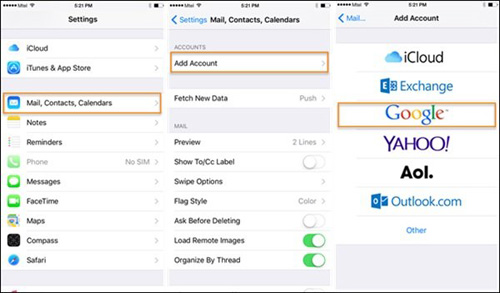
Step 2. Sign into Google with a valid Gmail account, click Next and Save. Then enable Contacts and tap Save. After the last synced time updates, you will transfer iPhone contacts to Gmail successfully.
Step 3. On your Mac, visit the Google Contacts website page and log in with the same Gmail account that you use to back up contacts on your iPhone. Select the desired contacts from the list > Tap the gear icon at the lower left corner > Export > Selected contacts > Export as [the format] > Export.
When your iPhone contacts fail to synchronize with your Mac through iCloud, a few primary reasons could be causing the issue. Here are the main causes and speedy solutions:
That's all there is to it. To be fair, iCloud isn't an ideal service to make the transfer due to demerits, including syncing delays, poor compatibility, a limited amount of free storage, etc. So, which method described above is the most worthwhile? Coolmuster iOS Assistant provides two flexible synchronization options while also delivering additional features, such as convenience in managing contacts and other content on your iPhone. Download Coolmuster iOS Assistant to get contacts from iPhone to Mac effortlessly.
Related Articles:
How to Sync Contacts from iPhone to iPad [Solved in 5 Ways]
How to Get Contacts from iCloud to iPhone 15/14/13/12? [Solved]
How to Transfer Photos from Mac to iPhone? [6 Easy Ways]
Seamless Sync: Effortlessly Transfer Files between iPhone and Mac


