[Guide] How to Sync iPhone Notes with MacBook Pro or MacBook Air?

Today's iPhones and iPads are versatile. One of the most used functions is to take notes and store them for future reference. This type of activity helps business people keep track of what's happening in a meeting or jot down information on a customer site to record information for contracts and/or orders. Of course, the problem is that you need to sync iPhone notes with Macbook when you go back to the office. For all the hype surrounding the iPhone 6, it should seamlessly sync your iPhone notes with your MacBook with fast messaging.
Why Coolmuster is the solution to your note transfer woes
Many balk at sending their critical notes to a Cloud data account and would prefer to a direct transfer from their iPhone directly to their iPad or Mac. That's what today's article is about how to get around having to purchase an online SkyDrive Account. You have a product in Coolmuster iOS Assistant that transfers via cable anything that is on your iPhone or iPad to your MacBook or other Mac. It is easier to use than trying to work through iTunes or purchasing a SkyDrive account and you know exactly where you data is at all times.
Apart from notes, this iOS transfer tool can also copy contacts, photos, music, movies, voice memos, Safari bookmarks, TV shows and more files from iPhone 14/13/12/11/X/8 Plus/8/7/6 to MacBook Pro or MacBook Air. You can also manipulate the data any way you like and in a manner that is often difficult to do on the small iPhone's screen. This makes using your note more convenient and allows for inclusion in larger documents and presentation you are working on.
Below is an Example of how it all will work for you. Before that, you can get the free trial version of the iPhone to Mac Transfer downloaded on your MacBook.
Read More:
How to Back Up iPhone without iTunes? Top 3 Ways
How to Fix iTunes and iPhone Errors?
Step 1. Install and Launch iPhone to Mac Notes Transfer
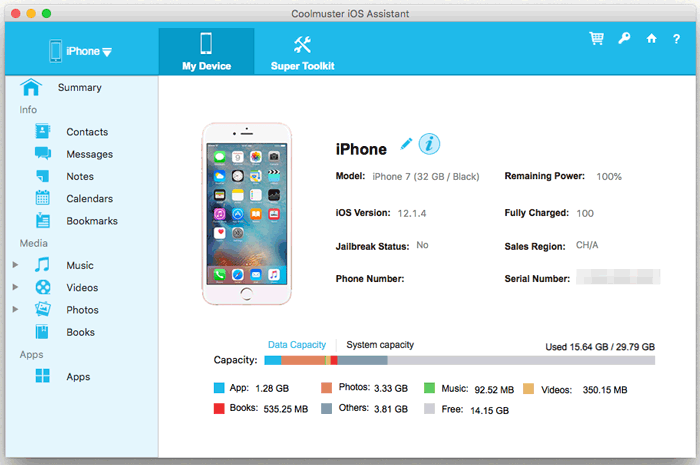
Connect your iPhone to the MacBook via USB cable and quickly install the transferring tool on your MacBook. Launch the tool and then you'll see your iPhone info showing in the main interface.
Tips: The iPhone to Mac Transfer supports all models of iPhone, iPad and iPod.

Step 2. Select and Check the notes you want to transfer
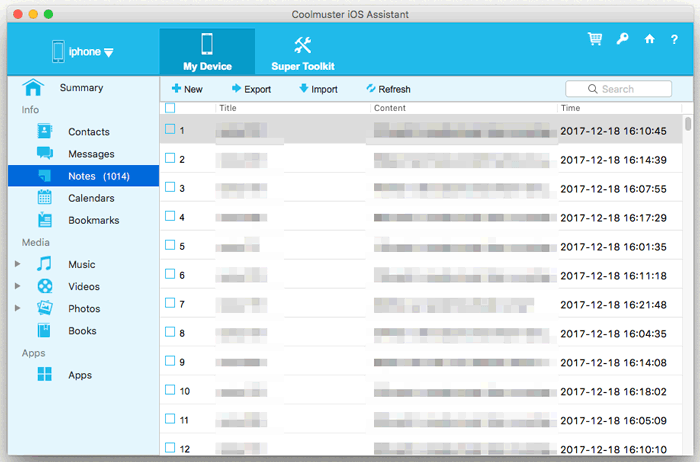
After detecting by the program, you can see all your iPhone data has been scanned out and categorized into different folders, such as music, movie, TV shows, etc. Just go to open the folders of "Notes" and preview all your iPhone notes one by one.

Step 3. Start to transfer iPhone notes to MacBook
Next select "Export". Your information is transferred quickly with no muss or fuss. If you want to transfer all your notes, all you have to do is click "Select All" and everything is transferred to your MacBook location of your choice.
You can now manage your data any way you like as the original is still on your iPhone and you are now working with the copy on your MacBook Pro or MacBook Air. Don't forget to install Coolmuster iOS Assistant on your computer. Get started now.
Related Articles:
How to Sync Outlook Contacts with iPhone
How to Backup iPhone to External Hard Drive
How Can I Manage iPhone without iTunes?


