The iPhone's Notes app is a powerful and practical tool that helps us record important information, to-do lists, and creative ideas. If you often take notes on your iPhone, you might also want to sync notes between iPhone and Mac to avoid losing them or for easy access and editing anytime. Can you share Notes between iPhone and Mac? Of course. This guide provides a detailed guide on how to sync notes from iPhone to Mac, helping you successfully complete the note synchronization.

Coolmuster iOS Assistant is the best choice for you to sync notes from iPhone to Mac if you want to transfer notes from iPhone to Mac without iCloud. You can use it to transfer all notes from your iPhone one time or selectively with 1-click and without any loss. Besides notes, it can manage other files, such as contacts, messages, photos, and more.
What can iOS Assistant do for you?
Here is how to transfer notes from iPhone to Mac without iCloud using iOS Assistant:
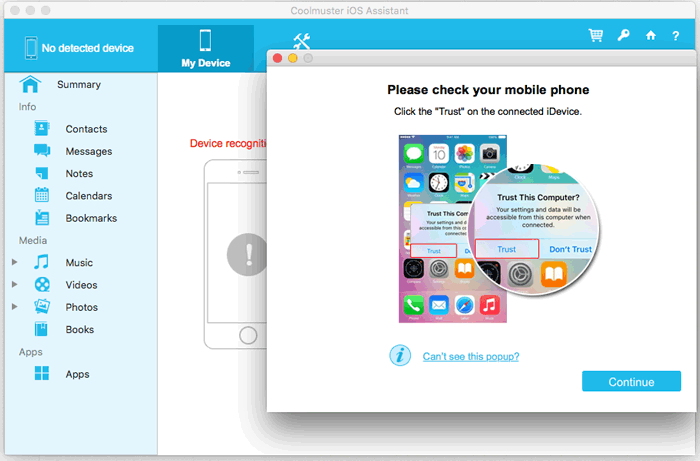
01Download and install the software on your computer, then connect your iPhone using a USB cable. When prompted on your iPhone, select the "Trust" option.
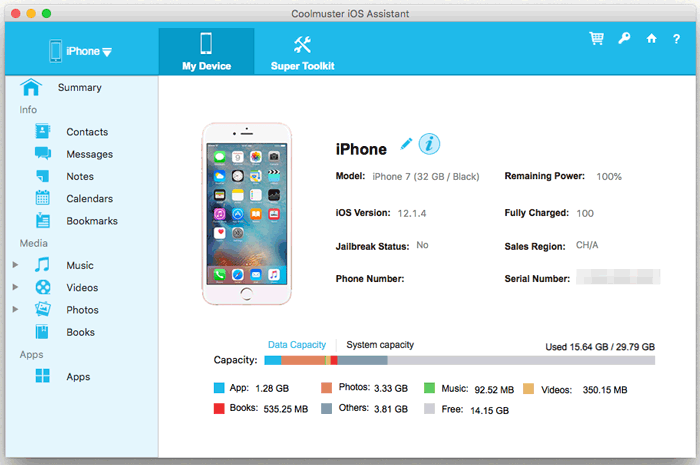
02Once your iPhone is recognized by the software, the main interface will appear. You'll see various file folders displayed on the interface.
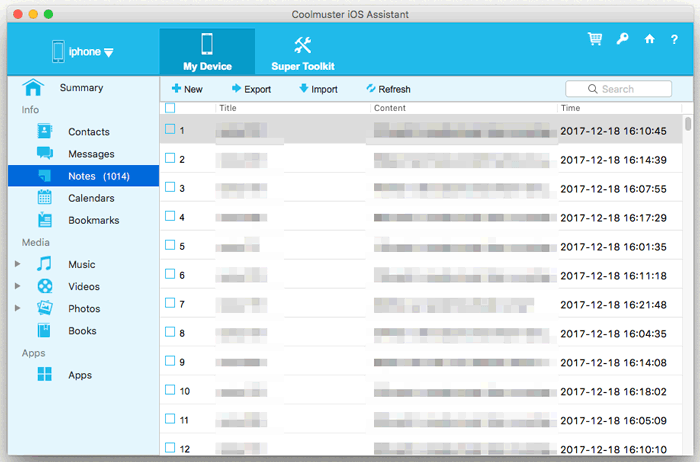
03Press the "Notes" option on the left-hand panel and the details of the notes will show on your right side. Select the notes that you'd like to sync, press the "Export" button, choose the file type of the output, and start the process.
Video Tutorial:
As an Apple user, iCloud is very familiar to us. It is the cloud synchronization tool provided by Apple. As long as you use the same Apple ID on both your iPhone and Mac and enable iCloud Notes sync, your notes will automatically sync between the two devices without the need for manual action.
Here is how to sync your notes from iPhone to Mac via iCloud:
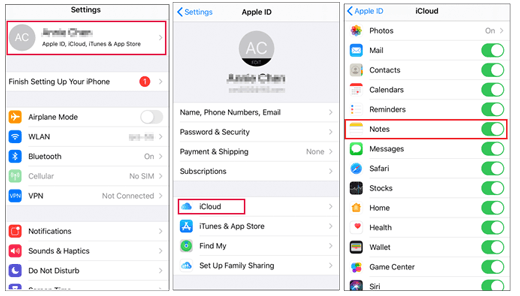
Step 1. Enable iCloud Sync on iPhone.
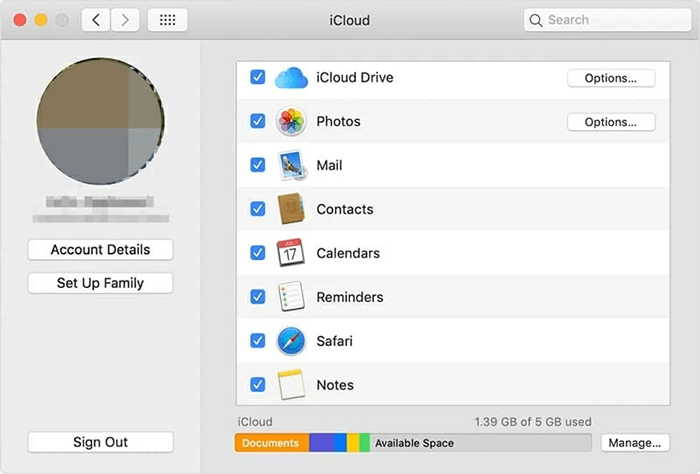
Open "Settings", tap on your "Apple ID", and go to "iCloud". In the iCloud settings, find the "Notes" option and make sure it is turned on.
Step 2. Enable iCloud Sync on Mac.
Open "System Settings" (macOS Ventura and later) or "System Preferences" (macOS Monterey and earlier). Click on "Apple ID" > 'iCloud", then ensure the "Notes" option is turned on. Open the "Notes" app on your Mac, and your iPhone notes will automatically sync to your Mac.
Note: This method requires a stable internet connection, and synchronization may experience delays. Additionally, iCloud storage is limited, so if space is insufficient, it may affect the synchronization process.
If you don't want to use iCloud but still want to quickly transfer some notes to your Mac, AirDrop is a great option. It allows you to wirelessly transfer data directly between Apple devices without needing the internet or third-party software.
How do I AirDrop Notes from iPhone to Mac? Here are the steps:
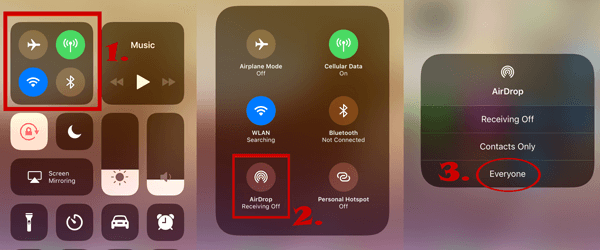
Step 1. Enable AirDrop on iPhone: Open the "Control Center", long press the "Wi-Fi" option, tap "AirDrop", and select either "Everyone" or "Contacts Only". (AirDrop not working?)
Step 2. Enable AirDrop on Mac: Open Finder, select "AirDrop" from the left sidebar, and make sure "Allow me to be discovered by" is set to either "Everyone" or "Contacts Only".

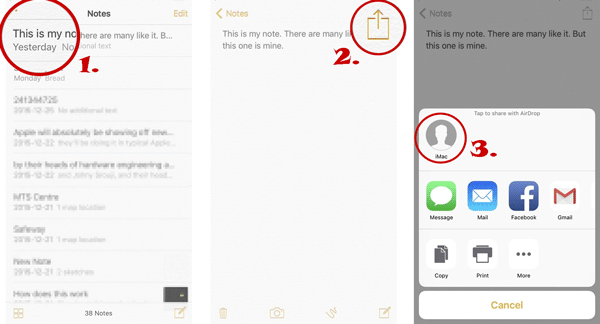
Step 3. Open the Notes app, and select the note you want to transfer.
Step 4. Tap the "Share" button (the square with an arrow), then choose "AirDrop".
Step 5. Select your Mac device, and a prompt will appear on your Mac. Click "Accept" to complete the transfer.
If you want to sync notes linked to your Google Gmail account, you can enable the sync option on both your Mac and iPhone. First, ensure that your Gmail account is connected to both your iPhone/iPad and Mac.
Here is how to sync notes between iPhone and Mac with Gmail:
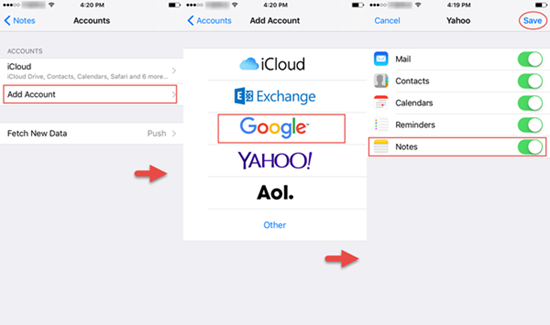
Step 1. On your iPhone, go to "Settings" > "Mail" > "Accounts". Select the Gmail account you've added; if not, tap "Add Account" and choose "Google".
Step 2. Enable the "Notes" option, and your iPhone notes will sync to your Gmail account.
Step 3. Open the Notes app on your Mac and click "Notes" in the menu bar at the top left corner.
Step 4. From the drop-down menu, select "Account", then choose the "Google" option.
Step 5. Follow the prompts to enter your username and password. Then, select "Notes" from the available options.

If you only need to send some important notes to your Mac, you can use email for the transfer. Here is how to transfer notes from iPhone to Mac free using email:
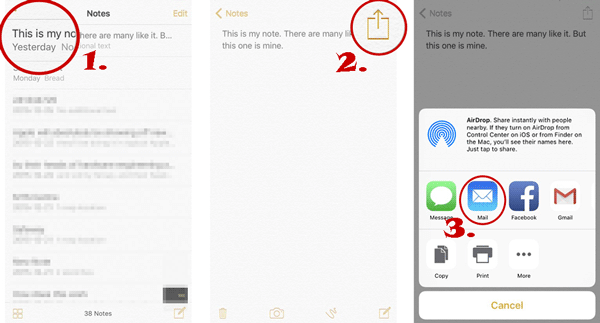
Step 1. Open the "Notes" app on your iPhone and select the note you want to send.
Step 2. Tap the "Share" button and choose "Mail".
Step 3. Enter your own email address and click send.
Step 4. On your Mac, open the email, download, and save the note.
In most cases, if you have enabled iCloud sync, your notes on your iPhone will automatically sync to your Mac. However, if the notes are not syncing properly, it could be due to the following reasons:
On this page, you learn how to sync notes from iPhone to Mac in 5 ways. To sum up, Coolmuster iOS Assistant functions are more than any other methods mentioned above in the aspect of managing between iPhone and Mac. It efficiently exports iPhone notes to Mac without needing iCloud, ensuring data security. If you want to manage your iPhone data more conveniently, give this tool a try!
Related Articles:
How to Transfer Notes from iPhone to Computer Easily? (Top 4 Ways)
[Solved] How to Sync iPhone to Mac Wirelessly or with Wires?
Comprehensive Guide: How to Sync Messages from iPhone to Mac


 Free Download for Mac
 Free Download for PC

