iCloud is a handy backup option for Apple users. It keeps your data safe by syncing it to the cloud, so you can access it from any device. But have you ever seen a message that says, "The last backup could not be completed"? That's your device's way of saying something went wrong during the iCloud backup process.
There can be a number of reasons why this happens. In this guide, we'll walk you through the common causes and show you some simple fixes to get your backups working again. Keep reading to learn how to solve the problem quickly and easily.
The "the last iCloud backup could not be completed" issue could occur for a number of reasons, including:
Now that we know the reason why backing up to iCloud is not working, it's time to take measures to resolve this problem. You can try the following solutions.
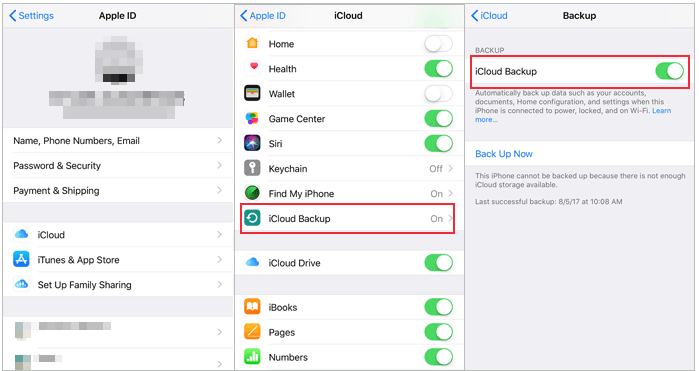
Firstly, you need to ensure that iCloud backup is enabled on your iPhone. You can check and enable iCloud backup by following these steps:
Step 1. Open the "Settings" app on your iPhone, then tap on your Apple ID.
Step 2. Tap on "iCloud" and scroll down to the bottom, then tap on "iCloud Backup".
Step 3. Make sure the "iCloud Backup" toggle is switched on. If not, toggle it on.
Step 4. Tap on "Back Up Now" and wait for the backup to complete.
The next step is to confirm that your iPhone is linked to a stable and quick Wi-Fi network. It is not advised to utilize a cellular connection for backup because iCloud backup uses a lot of data and time. You can use these procedures to verify and enhance your network connection:
Reconnect to the Wi-Fi
Step 1. Open "Settings" on your iPhone, then tap on "Wi-Fi".
Step 2. Toggle off the Wi-Fi switch, and then toggle on the Wi-Fi switch again.
Step 3. Wait for it to connect to the Wi-Fi network you're using.
Alternatively:
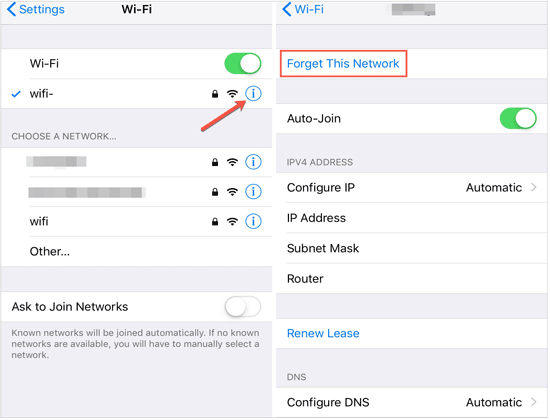
Step 1. Go to "Settings" > "Wi-Fi" > "Forget This Network".
Step 2. Reconnect by selecting the network and entering the password.
Use Another Wi-Fi
You can try utilizing another Wi-Fi network, such as your family's or friends, or public Wi-Fi in locations like cafes or libraries if your own Wi-Fi network is unreliable or has a slow signal.
Please be aware that there may be restrictions or dangers on some public Wi-Fi networks and that you may need to log in or authenticate. You will have to assess and accept accountability for these.
Reset the Network Settings
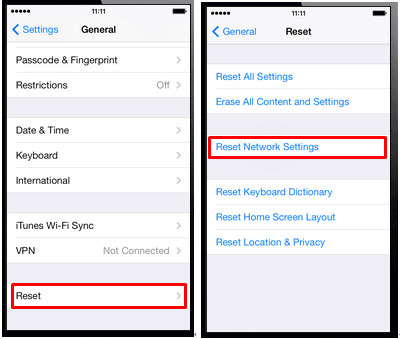
If your Wi-Fi network still remains unstable or interrupted, you can try resetting the network settings on your iPhone to restore the default network configurations. You can reset it as follows:
Step 1. Open the "Settings" app on your iPhone, then tap on "General".
Step 2. Scroll down to the bottom, tap on "Reset", then tap on "Reset Network Settings".
Step 3. Enter your iPhone unlock password, then tap "Reset Network Settings" to confirm.
Step 4. Wait for your iPhone to restart, then reconnect to the Wi-Fi network.
Occasionally, software bugs or cache problems on your iPhone can cause an iCloud backup to fail. Restarting your iPhone might help improve stability and performance by removing temporary files and memory. In order to restart your iPhone, follow these steps:
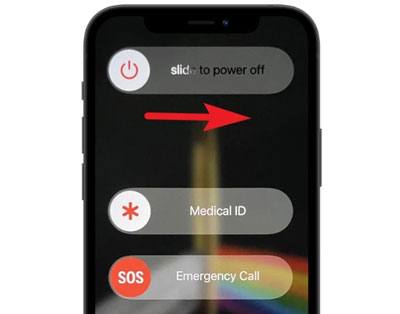
Step 1. Press and hold the "Power" button on your iPhone until the "slide to power off" option appears.
Step 2. Slide to power off your iPhone and wait for a few seconds.
Step 3. Press and hold the "Power" button again until the Apple logo appears.
Step 4. Wait for your iPhone to fully restart, then retry iCloud backup.
Curious about the difference between Hard Reset and Soft Reset iPhone? Here is a guide that explains the difference between the two in detail.
Hard Reset or Soft Reset iPhone? How to Choose?Additionally, you must make sure that there is enough storage space on your iPhone and iCloud for backups. You can get the message "iCloud could not complete backup" if your storage runs out. To check and clear up space on your iPhone and iCloud, use these steps:
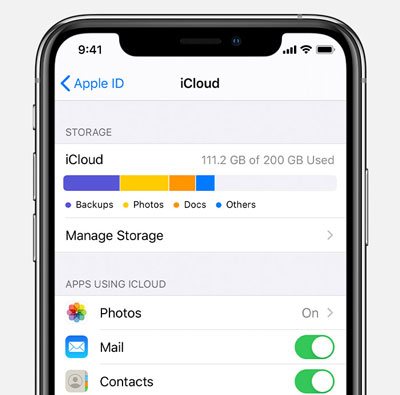
Check the iCloud Storage
Step 1. Open the "Settings" app on your iPhone, then tap on your Apple ID.
Step 2. Tap on "iCloud" and check your iCloud storage usage.
Step 3. If your iCloud storage is full, you can choose to purchase more iCloud storage or delete some unnecessary iCloud data.
Check the iPhone Storage
Step 1. Open the "Settings" app on your iPhone, then tap on "General".
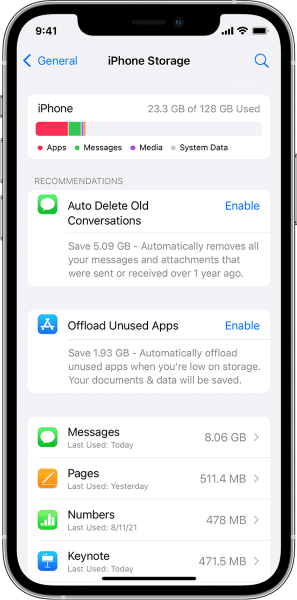
Step 2. Tap on "iPhone Storage" and check your iPhone storage usage.
Step 3. If your iPhone storage is full, you can choose to delete some unnecessary apps, photos, videos, music, etc., or transfer some data to your computer.
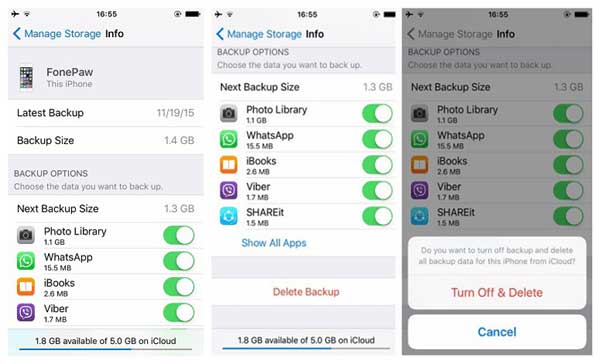
To reduce iCloud capacity and increase the success rate of iCloud backups, you can also attempt to remove outdated or useless backups. The ways to remove outdated iCloud backups are as follows:
Step 1. Open the "Settings" app on your iPhone, then tap on your Apple ID.
Step 2. Tap on "iCloud" and scroll down to the bottom, then tap on "Manage Storage".
Step 3. Tap on "Backups" and select the backup you want to delete, such as backups for devices you no longer use.
Step 4. Tap on "Delete Backup" and then tap "Turn Off & Delete" to confirm.
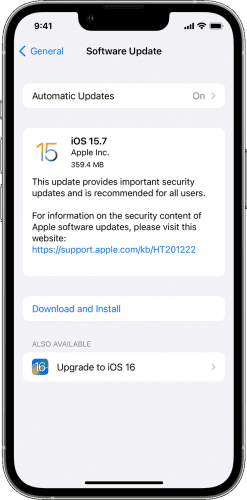
Make sure the most recent iOS version is installed on your iPhone, as earlier or incompatible versions could interfere with backups. To update your iOS version, take the following actions:
Step 1. Open the "Settings" app on your iPhone, then tap on "General".
Step 2. Tap on "Software Update" and check for available updates.
Step 3. If there is an update available, tap on "Download and Install", then follow the prompts to complete the update process. (iPhone software update failed?)
To update your iCloud settings and data, you can try logging out of your account and then back in. This could fix some problems with your iCloud account, like sync errors or authentication failures. To log out of and back into your iCloud account, take the following actions:
Step 1. On your iPhone, open the "Settings" app, then tap on your Apple ID.
Step 2. Scroll down to the bottom, tap on "Sign Out", then enter your Apple ID password and tap "Turn Off".
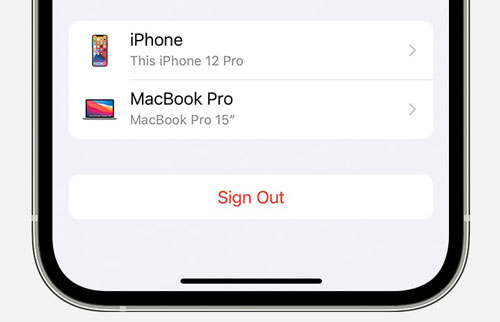
Step 3. Wait for your iPhone to sign out of the iCloud account, then reopen the "Settings" app and tap "Sign In".
Step 4. Enter your Apple ID and password, then tap "Sign In".
Step 5. Re-enable iCloud backup, then try backing up your iPhone again.
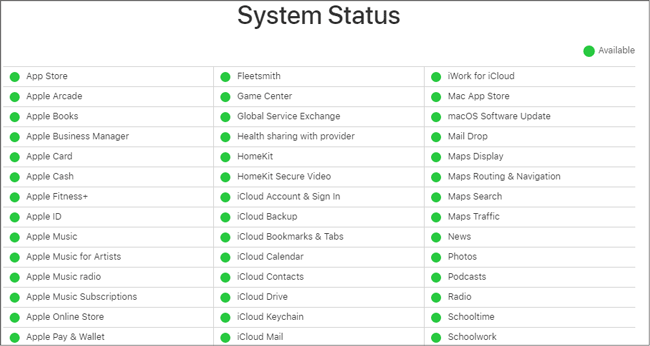
Lastly, to find out if there are any problems or iCloud service maintenance, you may also check Apple's system status. If so, you might have to wait for Apple to fix the problem before trying to create another iCloud backup.
Above are some common methods to resolve the "iPhone backup could not be completed" issue, and you can choose the one that suits your situation. As we can see, iCloud is not always perfect to back up your iPhone. Then, is there a better way to do this? Of course, you can use Coolmuster iOS Assistant as an alternative to back up your iPhone.
This software can help you back up and restore your iPhone with one click without any issues or limitations. Besides, you can use it to selectively transfer files from your iPhone to your computer. In a word, it's a powerful data manager tool.
Key features of Coolmuster iOS Assistant:
Follow the steps below to back up your iPhone to your computer using iOS Assistant:
01Download the correct version of the software based on your computer's system, connect your phone and computer using a data cable, and then click the "Trust" option on your device.
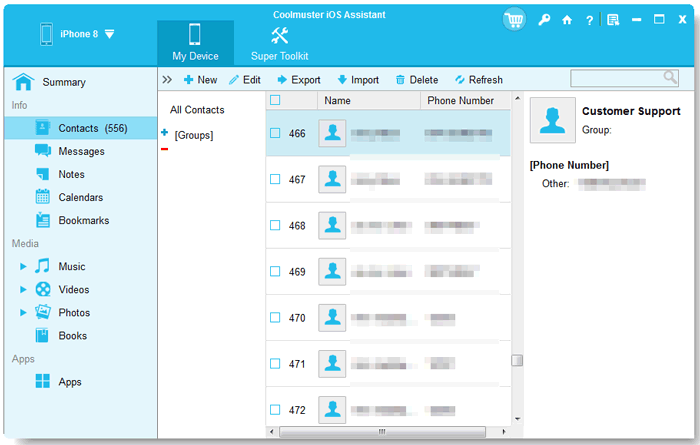
02Once successfully connected, you will see the main interface, as shown in the following image. To back up your phone, switch to the "Super Toolkit" section.

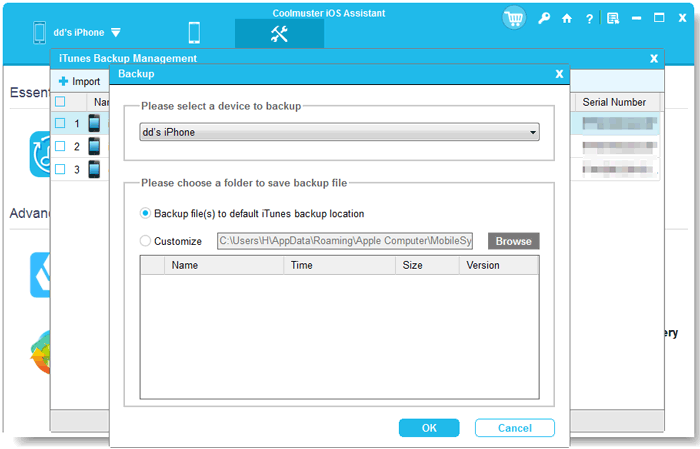
03Click on the "iTunes Backup & Restore" and then the "Backup" option tab. From the drop-down menu, select the device you want to backup. Click on the "Browse" option to choose the location to save the new backup file. Finally, click the "OK" button to start backing up iOS data.
If you only want to back up specific types of files, once successfully connected, click on the file type on the left panel. Preview and select the files you want to export to your computer, then click on the "Export" button.
Video Guide:
In conclusion, if you encounter the issue of "the last backup could not be completed", you can try the solutions provided in this article. If all the solutions fail to solve this issue, you can try another backup method, such as Coolmuster iOS Assistant. Download and try it by yourself and it will not disappoint you.
Related Articles:
List of 10 Best iPhone Backup Extractor Software [2025]
How to Back Up iPhone Without iTunes Successfully - 3 Proven Methods
[2025] How to Fix iCloud Error Connecting to Server on Mac/iPhone/iPad
10 Tricks for the Issue Cannot Restore Backup to This iPhone Because the Software Is Too Old


