The iPhone and Mac are two core devices of the Apple ecosystem, and the calendar sync feature is crucial for maintaining consistency in scheduling. It ensures that you can stay on top of your schedule no matter which device you're using. This article will provide a detailed guide on how to transfer calendar from iPhone to Mac and offer several methods to meet your needs.
If you prefer to transfer your calendar without using iCloud, Wi-Fi, or the risk of data being overwritten, then Coolmuster iOS Assistant is the best choice. It is a powerful iPhone data management tool that allows you to directly export your iPhone calendar to Mac, with options to export as CSV, HTML, or TXT files, making it easy to archive or edit on your Mac. Additionally, it supports the transfer of various data types such as contacts, messages, photos, and more.
Main features of iOS Assistant:
How do I transfer my calendar from iPhone to Mac? Follow the steps below:
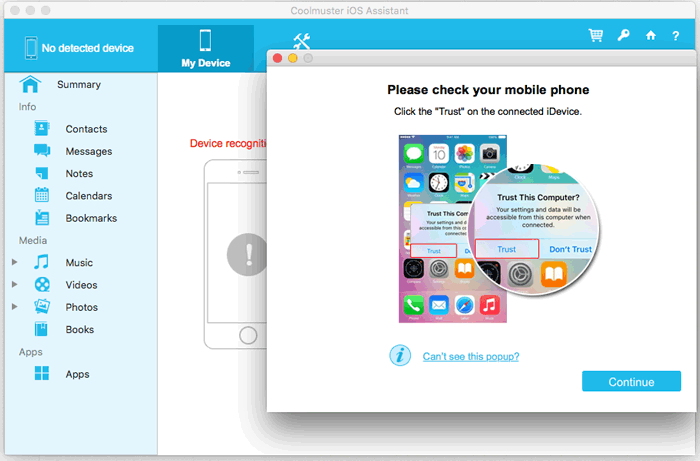
01Download and install the program on your Mac, then connect your iPhone using a USB cable. The software will automatically detect your connected iDevice, and a pop-up will appear on your device prompting you to trust the program. Simply click "Continue" on the program to proceed.
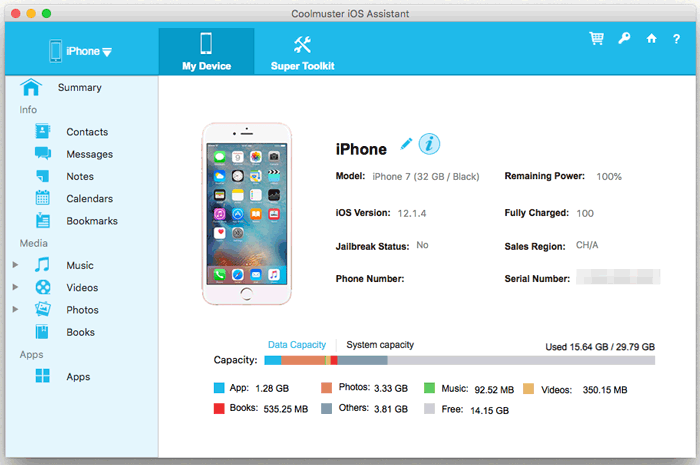
02After that, your device information will appear on the right panel, while various content folders will be displayed on the left.
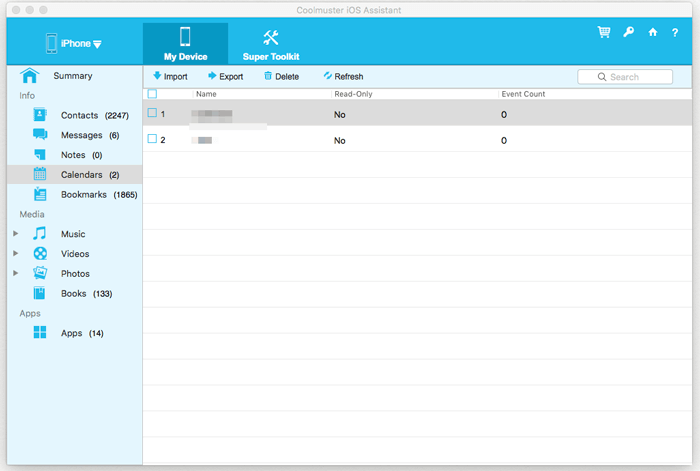
03Simply click the "Calendars" button to view the list of calendars with details on the right. Select one or more calendars you wish to transfer from your device to your Mac, then click "Export" to save them on your Mac.
Video Tutorial:
iTunes (or Finder for macOS Catalina and later) can sync iPhone calendars to your Mac, but it does so by overwriting all the data, meaning it will replace the calendars on your Mac with the ones from your iPhone. Therefore, please make sure that the data on your Mac is backed up before using this feature.
Here is how to transfer calendar from iPhone to Mac using iTunes/Finder:
Step 1. Open iTunes on your Mac (or Finder for macOS Catalina and later).
Step 2. Connect your iPhone to the Mac using a USB cable and unlock your iPhone.
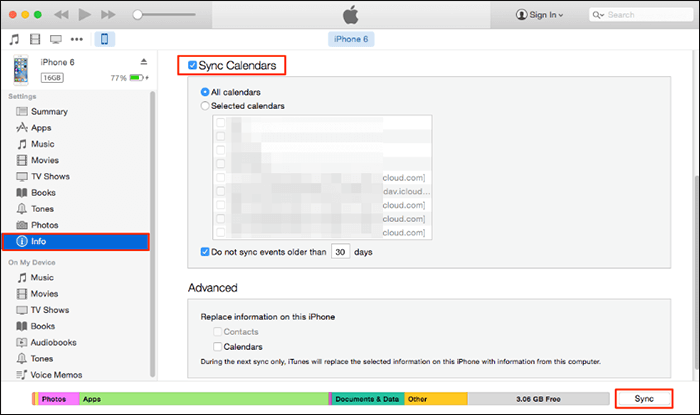
Step 3. Click the device icon in the iTunes interface to go to the "Info" tab.
Step 4. Check the "Sync Calendars" option, then choose either "All calendars" or "Selected calendars".
Step 5. Click the "Apply" button to begin syncing your iPhone calendars to your Mac.
iCloud is the official syncing method provided by Apple, which automatically keeps your iPhone calendar in sync with your Mac without manual intervention. However, iCloud relies on an internet connection and may encounter synchronization issues. (How to free up iCloud storage?)
Here is how to sync iPhone and Mac calendar with iCloud:
Step 1. On your iPhone, open "Settings" and tap your "Apple ID" (the personal avatar at the top). Go to "iCloud" and, in the list of apps using iCloud, find "Calendars" and make sure its toggle is turned on.
Step 2. On your Mac, click the "Apple menu" in the top left corner > "System Settings" (for macOS Ventura and later) or "System Preferences" (for macOS Monterey and earlier).
Step 3. Select "Apple ID", then click "iCloud". In the iCloud options, ensure that "Calendars" is turned on.
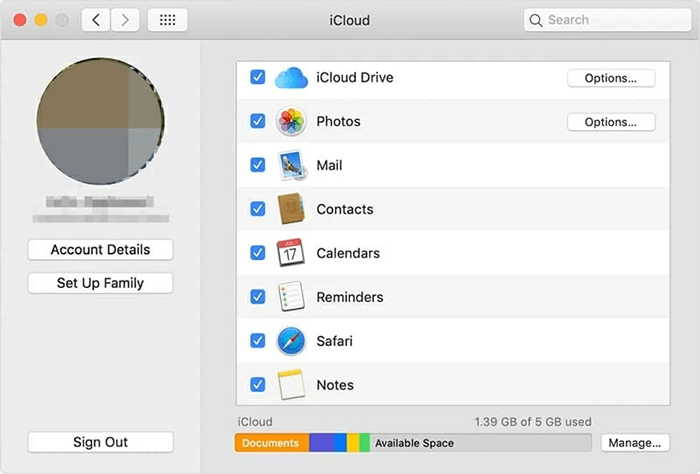
Step 4. Make sure both your iPhone and Mac are connected to Wi-Fi. After a few minutes, your iPhone calendar data will automatically sync to the "Calendar" app on your Mac.
There are several reasons why your iPhone calendar might not sync with your Mac:
There are three ways to help you transfer calendar from iPhone to Mac. If you want to efficiently, securely, and flexibly manage your iPhone calendar, Coolmuster iOS Assistant is the best choice. It not only allows you to export calendar data individually without affecting existing data, but also supports various files such as contacts, messages, photos, and more, making your iOS device management more efficient!
Related Articles:
How to Sync iPhone and iPad Calendars? Solved in 2 Easy Ways
[Step-by-Step] How to Sync iCloud Calendar with Google Calendar?
4 Best Ways on How to Print Calendar from iPhone
How to Share Calendar on iPhone/iPad? Solve in 4 Proven Ways


 Free Download for Mac
 Free Download for PC

