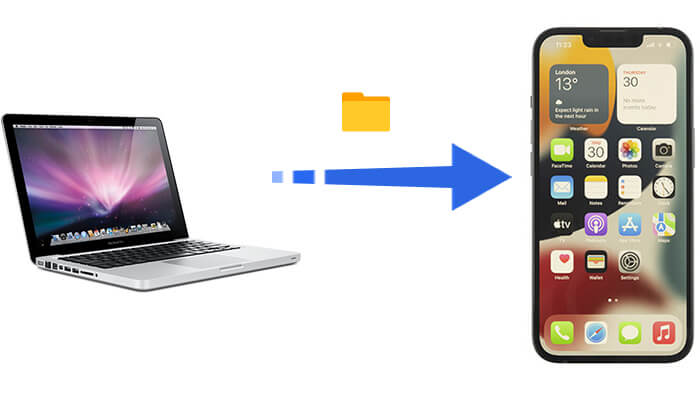
Whether it's office documents, photos, videos, or music, many iPhone users need to transfer files between their iPhone and Mac. Storing some files on the Mac not only helps free up space on the iPhone but also serves as a data backup. Therefore, knowing how to transfer files between iPhone and Mac is essential. Fortunately, with the five methods provided in this article, you can do file transfer between Mac and iPhone without hassle.
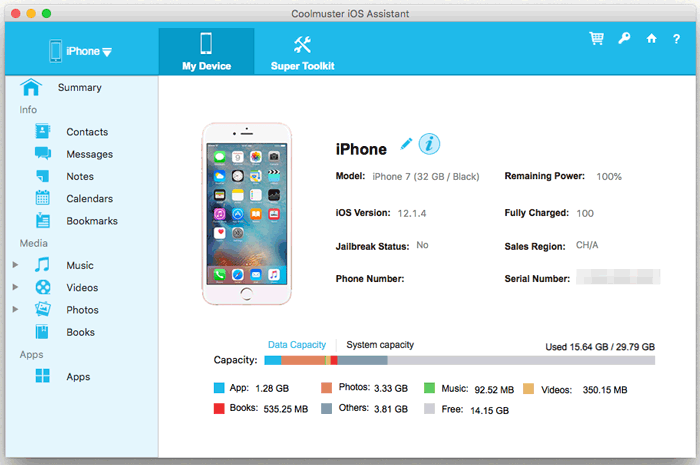
The first option on our list for transferring files between iPhone and Mac is Coolmuster iOS Assistant. It is the most reliable software to share files from iPhone to computer and vice versa. This professional iOS file management tool supports one-click batch transfer of various file types, including photos, videos, music, contacts, messages, etc., and also supports backup and recovery functions.
Highlights of iOS Assistant:
Here is how to transfer data from iPhone to MacBook or vice versa using iOS Assistant:
01Install the software on your Mac computer and link the device using a lightning cable. The software will detect your phone automatically, and a pop-up message will show on the screen on your computer.
02Hit the "Trust" option and press "Continue" to proceed. When the device gets detected, you'll see all files arranged in folders in the main interface.
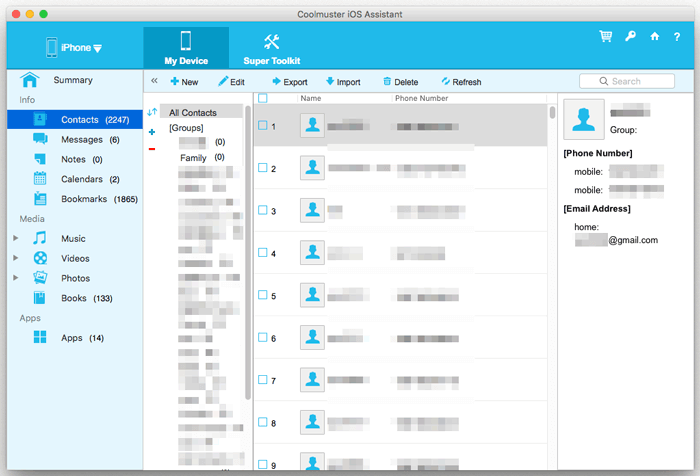
03Click on the file type in the left menu, such as "Contacts".
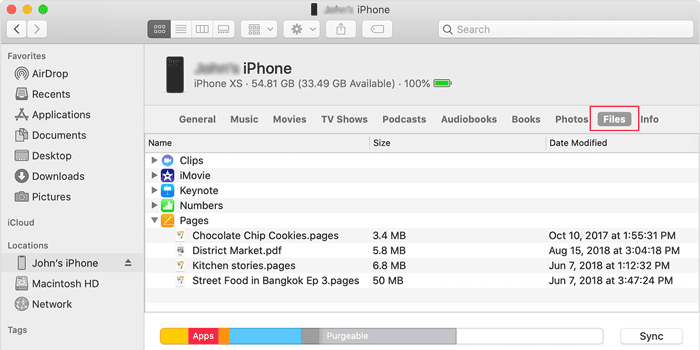
Apple provides official file transfer methods, Finder (for macOS Catalina and later) and iTunes (for macOS Mojave and earlier), allowing users to transfer files supported by certain apps between Mac and iPhone, such as Pages, Numbers, Keynote, and some third-party app files.
In macOS Catalina and later, Finder replaces iTunes as the iPhone device management tool. You can use Finder to transfer files from Mac to iPhone, or from iPhone to Mac.
Here is how to transfer files from iPhone to Mac or vice versa using cable:
Step 1. Use a USB cable to connect your iPhone to the Mac.
Step 2. Open Finder on the Mac and locate your iPhone device in the left sidebar.
Step 3. Click on the iPhone device and select "Files" from the top menu.
Step 4. Start to transfer files between iPhone and Mac.
If your Mac is running macOS Mojave or an earlier version, you need to use iTunes for file transfer.
Here is how to transfer data from iPhone to Mac or vice versa using iTunes:
Step 1. Use a USB cable to connect your iPhone to the Mac and open iTunes.
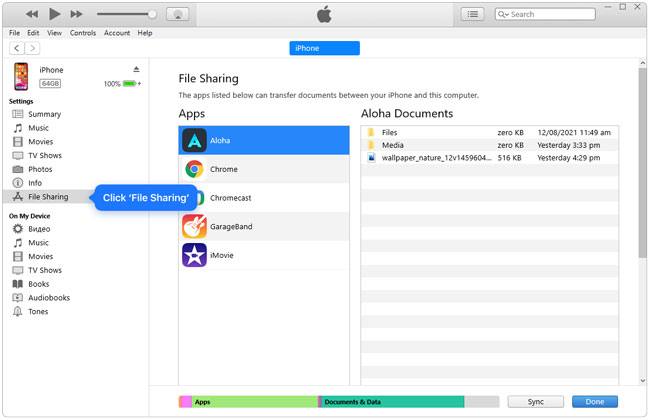
Step 2. Click the device icon and select "File Sharing" from the left sidebar.
Step 3. Select an app that supports file sharing, such as Pages or Keynote.
Step 4. Start to transfer files between Mac and iPhone.
If you want to sync files without using a cable, iCloud is a great option. It allows you to seamlessly sync photos, documents, and other files between your Mac and iPhone. However, the free space is limited to 5GB, and additional storage requires a paid plan.
Here is how to upload files from iPhone to Mac or vice versa via iCloud:
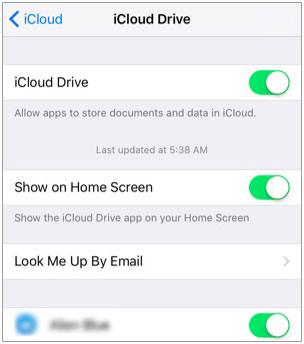
Step 1. Head to "Settings" and click on the "your name" option at the top. Scroll down to get to "iCloud" and hit on its option. From there, switch on the "iCloud Drive" option.
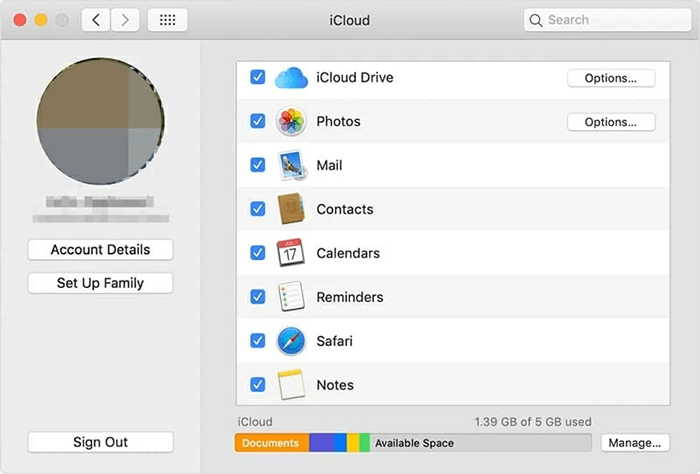
Step 2. On the Mac, head to "Apple menu", to "System Preferences", then locate "iCloud". From there, you should choose the "iCloud Drive" option.
Step 3. The files will then automatically sync and can be accessed in iCloud Drive or the relevant apps. (iCloud Drive not syncing?)
If your iCloud storage is full and you don't want to purchase additional space, is there another way to transfer data from iPhone to Mac or Mac to iPhone wirelessly? Of course. You still have AirDrop as a great option to move your files wirelessly.
How do I AirDrop files from iPhone to Mac or Mac to iPhone?
Step 1. On your iPhone, open the "Control Center", long press on the "Bluetooth" icon, tap "AirDrop", and select "Everyone".
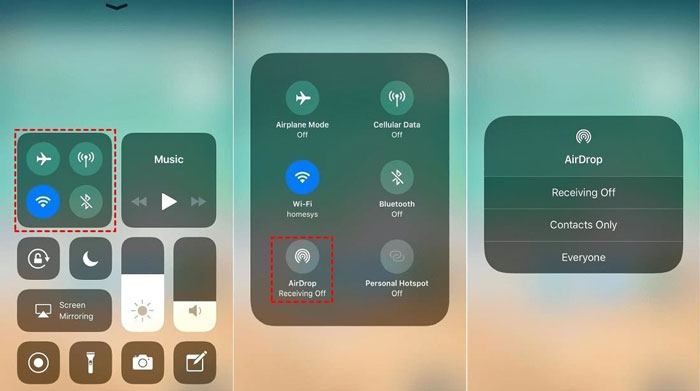
Step 2. On your Mac, open "Finder", click "Go" in the menu bar, choose "AirDrop", and set it to allow your device to be discovered by "Everyone".

Step 3. Select files and start to transfer.

Step 4. On the other device, click "Accept", and the file will be saved automatically.
If you only need to transfer a small number of files (such as documents, PDFs, small images, or audio files), email is a simple and quick method. Through email attachments, you can easily share files between your iPhone and Mac without the need for a cable or third-party apps. However, there is a limit to the attachment size, usually no more than 25MB.
Here is how to move files from iPhone to Mac or vice versa using email:
Step 1. Open the email app on your iPhone or Mac, such as Gmail or Apple Mail.
Step 2. Compose a new email and attach the files.
Step 3. Send the email to your own email address and download the attachment on the other device.

That's all about how to transfer files between iPhone and Mac. We have introduced a total of 5 methods, each with its own advantages and disadvantages:
If you need an efficient and comprehensive file management solution, Coolmuster iOS Assistant is the best choice!
Related Articles:
Complete Guide: How to Transfer Files from iPhone to PC
How to Transfer Files from Mac to iPhone Using USB? - 2 Workable Ways
Top 5 iPhone File Transfer Apps to Transfer Files from iPhone to PC/Mac
[Solved] How to Sync iPhone to Mac Wirelessly or with Wires?


 Free Download for Mac
 Free Download for PC

