
5 Effortless Ways to Transfer Files from iPad to PC [Step-by-Step Guide]

It's easy to coodinate your iOS device and PC now, so, you can transfer files from iPad to PC seamlessly. But what methods can you use to make the data transmission smooth? That's the point that we'll discuss. We have offered 5 reliable approaches, including the wired and the wireless transfer. You can select one that you like the most.
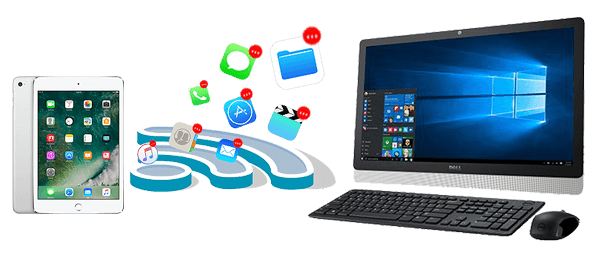
USB connection is the most common method for file transfer. Here are three commonly used methods to explain how to transfer files from iPad to PC via USB connection.
USB transfer is suitable for those who dislike to transfer files with the Internet. Maybe you think it will be time-consuming if you utilize USB. However, the fact is reverse. Coolmuster iOS Assistant, a desktop app to transfer iPad files to PC with USB, can copy files efficiently. It can export your contacts, music, videos, photos, apps, books, and more to a computer. Also, it allows you to import the files from PC to iPad.
Key features of Coolmuster iOS Assistant:
How can I transfer files from iPad to PC using iOS Assistant? Here are the steps:
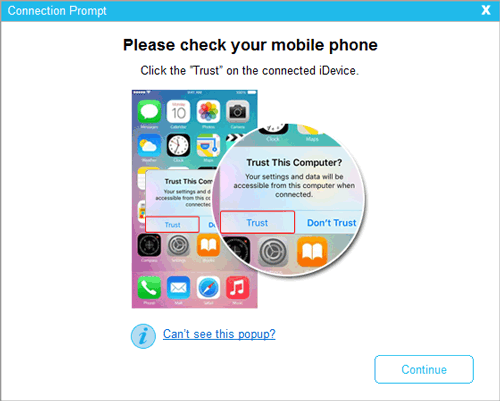
01Launch the program and use a USB cable to connect the iPad to the PC. Hit the "Trust" button when the pop-up window asks you whether to trust this computer. After that, tap on the "Continue" option to go on.
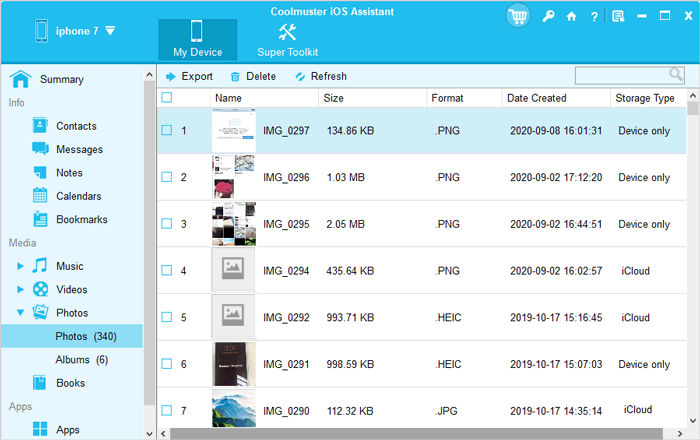
02The interface will be like this below when your iPad successfully connects with your PC via the program.

03Select the file folders that you want to transfer on your left-hand panel; you can see the more detailed information on your right panel on the interface. Next, choose the files you'd like to transfer, tap on the "Export" button, and the program will start to export these files to your computer automatically.
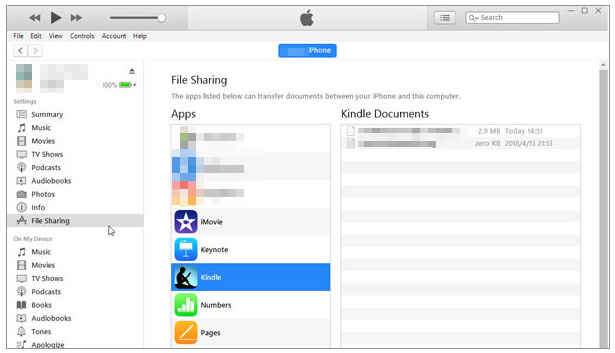
iTunes can help you transfer your iPad files to a computer, including basic information and media files. Its backup and restore features can sync files between iOS and PC devices with ease. Here's the guide:
Step 1. Download and install iTunes on your computer, then launch it.
Step 2. Connect your iPad to the computer using a data cable, and click on the icon of your iPad on the iTunes interface.
Step 3. Tap the "File Sharing" option, and select the app you want to transfer files from in the left panel, such as Music, Videos, etc.
Step 4. On the right panel, you will see a list of files under the selected app. Choose the files you want to transfer or select all directly.
Step 5. Drag the selected files to a folder on your computer, or click the "Save to" button in the bottom right corner, then choose a location to save, and start transferring files from iPad to PC.
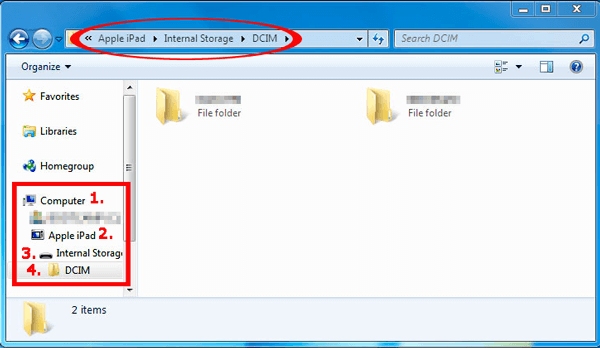
Utilizing the PC's File Explorer can copy iPad files to the PC with USB, but it only allows you to transfer camera photos and videos. If you just want to transfer these two file types, you can follow the steps below to start the data transmission:
Step 1. Connect your iPad to a PC with a USB cable, and click "Trust" on your iPad.
Step 2. Go to "This PC" and navigate to your iPad device.
Step 3. Access the folder named "DCIM", which is where your iPad stores photos and videos.
Step 4. Select the photos and videos, and drag and drop them to the folder on your PC.
Further Reading: How to Transfer Files from PC to iPad without iTunes [Top 5 Ways]
If you don't have a USB cable or prefer a more convenient way to transfer files from your iPad to your PC, you can utilize wireless connection methods. The wireless connection doesn't require any physical connections; all you need is for your iPad and PC to be connected to the network. Here are two commonly used methods to explain how to transfer files from iPad to PC wirelessly.
It's common to move files from an iOS device to a PC with iCloud. If you want to use the cloud storage, the transfer process will be seamless and wireless. However, it requires that there is sufficient cloud space on your iCloud account. You can delete some unnecessary files from iCloud if needed.
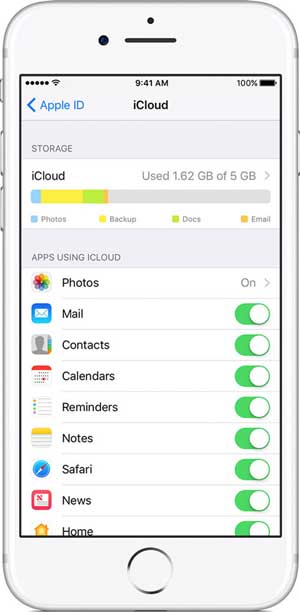
Step 1. On your iPad, open "Settings", then tap on your Apple ID and select "iCloud".
Step 2. Turn on the switches for the types of files you want to transfer, such as photos, contacts, notes, etc., and wait for them to sync to iCloud.
Step 3. On your PC, use a browser to access iCloud.com, then log in with your Apple ID.
Step 4. Select the types of files you want to transfer, such as photos, contacts, notes, etc., then click on the download button, choose a location to save, and the transfer will begin.
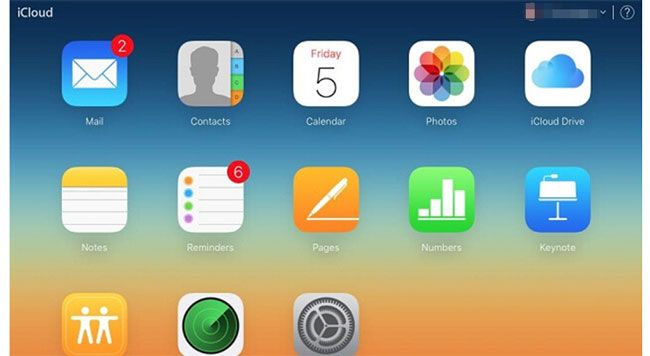
Step 5. Wait for the transfer to complete, and then you can view your iPad's files on your PC.
Also Read: iCloud storage is not enough? Read this article to find the solution.
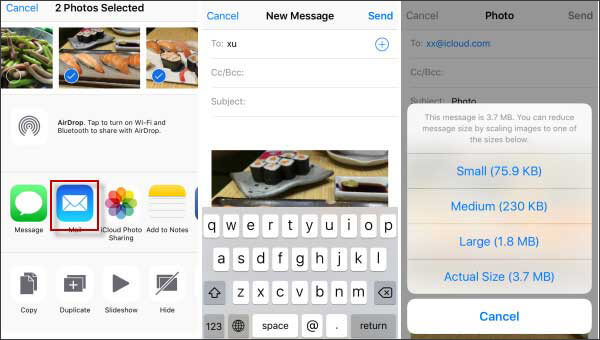
Email is one of the simplest ways to transfer files between different devices. As long as you add your photos to an email, you can send your photos from an iPad to a PC via a network. Yet, you can only add several photos ranging 25MB to 50MB.
Step 1. On your iPad, open the file you want to transfer, such as a photo, document, music, etc., then tap the share button. Select "Mail", then enter your email address and tap "Send".
Step 2. On your PC, open your email account, then find the email you just sent. Click on the attachment, then select "Download" or "Save As", choose a location to save, and the transfer will begin.
Step 3. Wait for the transfer to complete, and then you can view the files from your iPad on your PC.
With the 5 methods in this guide, it's believed that you can now transfer files from an iPad to a PC without effort. Furthermore, Coolmuster iOS Assistant simplify the process, making the transmission between your iPad and computer swift and stable.
Anyway, wired and wireless ways are prepared, embark on copying or moving your iPad files without data loss.
Related Articles:
How to Transfer Files from iPhone to PC Without iTunes? [6 Methods]
How to Backup iPad to Computer? [Can't Miss]
How to Transfer Photos from iPad to External Hard Drive with/without Computer?
How to Transfer Music from iPad to Computer? Top 3 Ways You Can't Miss


