
How to Transfer Photos from iPhone to iPad with/without iCloud?

"My iPhone 256GB is nearly full on storage, and I have about 80GB worth of photos. I have a brand new 512GB iPad Pro on which I don't really use any of the storage. I would love to transfer all my iPhone photos to my iPad and have them all automatically then deleted from my iPhone. Is there a way to do this? If so, how? I don't have iCloud storage to do it that way. Thanks!"
-- from Reddit
As this user mentioned, if your iPhone storage is full and you don't want to delete photos, you can move photos from your iPhone to your computer or iPad to free up space. So, how to transfer photos from iPhone to iPad? This article will detail several effective methods, including both using and not using iCloud, to help you easily complete the photo transfer.
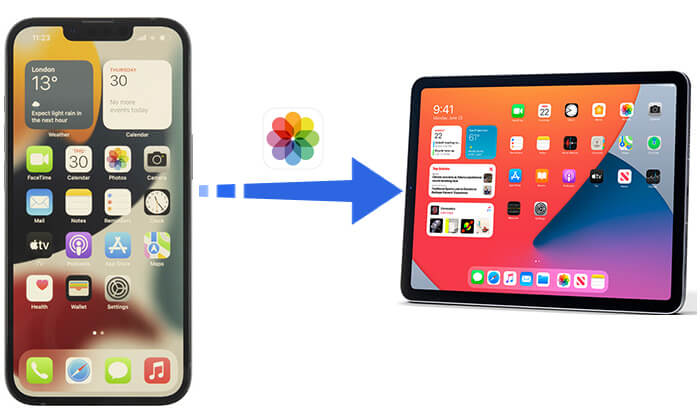
If you want to automatically transfer photos from your iPhone to your iPad, iCloud is an excellent option. This official cloud-based storage service helps you store data and makes it accessible across all your devices. However, you need to use the same Apple ID on both your iPhone and iPad and iCloud only provides 5GB of free storage. If you have a lot of photos, this space will quickly run out. (iCloud storage is not enough?)
How can I transfer pictures from iPhone to iPad via iCloud?
iCloud Photos can facilitate the seamless synchronization of all your photographs from your iPhone to your iPad. Here is how to do it:
Step 1. Go to "Settings" > "Apple ID" > "iCloud" > "Photos".
Step 2. Then, turn on "iCloud Photos" or "iCloud Photo Library".
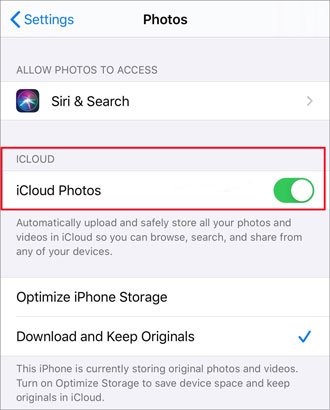
Step 3. Follow the same steps as above to turn on iCloud Photos.
Once iCloud Photos is enabled on both devices and they are connected to a Wi-Fi network, iCloud will automatically start syncing your photos.
In addition to the iCloud Photos feature, Photo Stream can also help you sync photos. However, it only syncs photos from the last 30 days, can store up to 1,000 photos, and does not count against your iCloud storage. Here are the steps:
Step 1. Open the "Settings" app on your iPhone. Tap on your name, select "iCloud", and then tap on "Photos".
Step 2. Enable "Upload to My Photo Stream" to sync photos and videos over Wi-Fi.
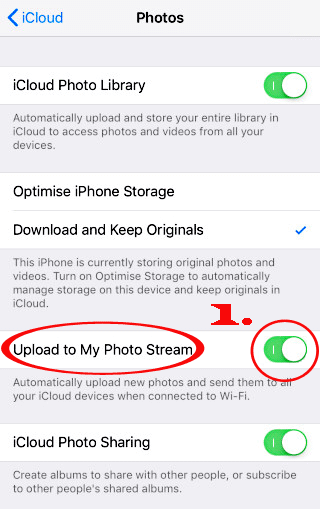
Step 3. Repeat these steps on your iPad. Once completed, all photos will be synced from your iPhone to your iPad.
Because the pictures that are synchronized to iCloud can only be saved for 30 days and iCloud free storage is limited, how can I get photos from iPhone to iPad without iCloud? In this part, we will introduce some transfer methods that do not use iCloud, allowing you to choose the most suitable option based on your needs.
If you are looking for the fastest and most convenient way, iOS Photo Transfer is your best choice. It is a professional iPhone data transmission tool that can help you transfer multiple types of data between iPhone and iPad quickly and directly, not limited to photos.
Core features of iOS Photo Transfer:
Here is how to import photos from iPhone to iPad using iOS Photo Transfer:
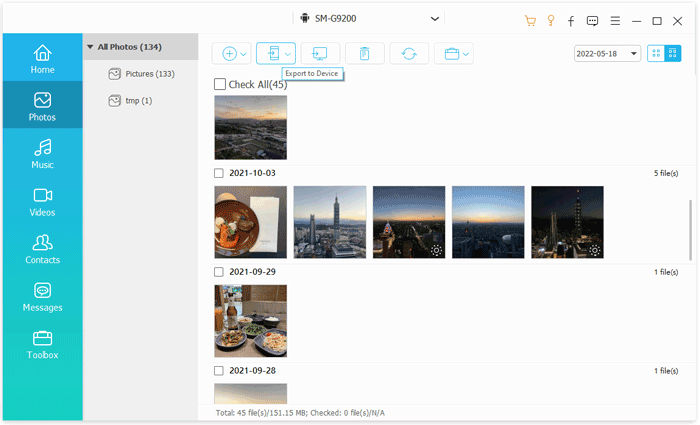
01Launch the app after you download and install it on your PC.
02Connect your iPhone and iPad to your PC via USB cables to wait for the detection. Make clear the source device and the target one. (If they are in the wrong place, tap to switch them.)
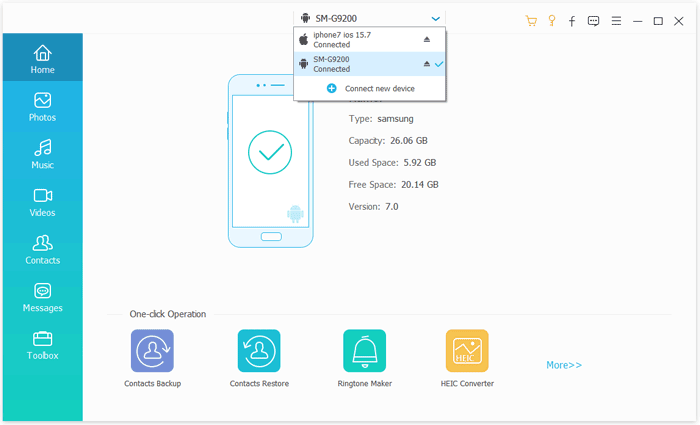
03Click the "Photos" category on the left panel, select the needed pictures you want to transfer, and then tap "Export to Device" to start the transfer process.
See More: If you want to transfer messages from your iPhone to your iPad, you can read this article to find how to do it.
In addition to playing music and videos, iTunes also has the function of transferring data between devices. With iTunes, you can export photos from your iPhone to your computer and then sync them to your iPad. This method, however, is relatively cumbersome.
Note: If you are using a Mac computer with macOS Catalina or later, you will need to use Finder to sync your iPhone and iPad with your computer.
Here is how to put photos from iPhone to iPad using iTunes:
Step 1. Connect your iPhone to the computer and open iTunes.
Step 2. Click the device icon and select the "Photos" tab.
Step 3. Check "Sync Photos", select the folder of photos you want to sync, and then click "Apply".
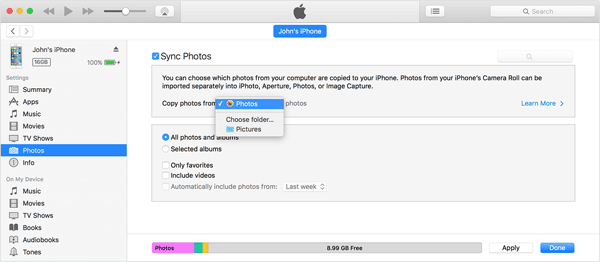
Step 4. Disconnect the iPhone, connect the iPad, and repeat the steps above.
AirDrop is a quick and wireless method for transferring files between Apple devices, allowing you to easily send photos from your iPhone to your iPad. However, this method requires both devices to be close to each other, and the transfer speed is limited by the Wi-Fi connection.
Here is how to move photos from iPhone to iPad via AirDrop:
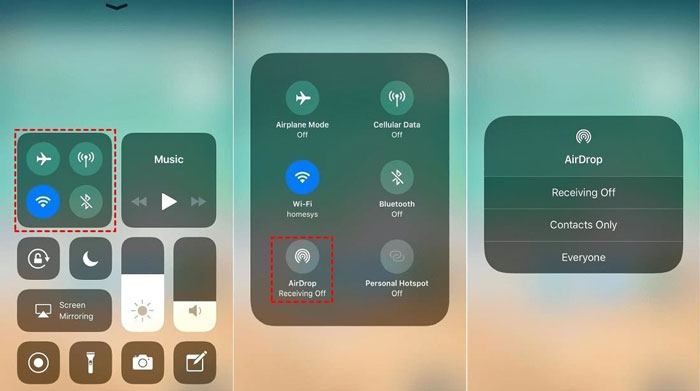
Step 1. Open the Control Center of both your iPhone and iPad. Tap "AirDrop" and then enable Bluetooth and Wi-Fi.
Step 2. Tap "Everyone" or "Contacts Only" on the windows.
Step 3. Open the "Photos" app on your iPhone to choose the pictures you want to sync from iPhone to iPad. Next, click "Share" and then "AirDrop".
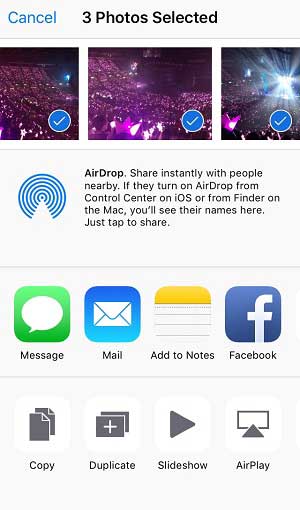
Step 4. Select the target iPad from the AirDrop options.
Step 5. On the iPad, tap "Accept" to start receiving the photos from your iPhone. Once completion is done, you can open the photos on your iPad.
Is your AirDrop stuck on waiting or stopped working, you can read this article to find the reasons and solutions.
12 Fixes for AirDrop Stuck on Waiting or Stopped WorkingAlthough email is not the preferred method for transferring a large number of photos (due to attachment size limitations), it is still a simple and flexible way to transfer files. By using email, you can send a small number of photos as attachments to yourself, then check the email on your iPad and download the photos. This method is suitable for quickly sharing a few photos with family or friends.
Here is how to send pictures from iPhone to iPad using email:
Step 1. Open the "Photos" app on your iPhone.
Step 2. Select the photos you want to transfer to your iPad.
Step 3. Tap the "Share" button and choose "Mail".
Step 4. Enter the necessary information, then tap "Send" to email the photos to yourself.
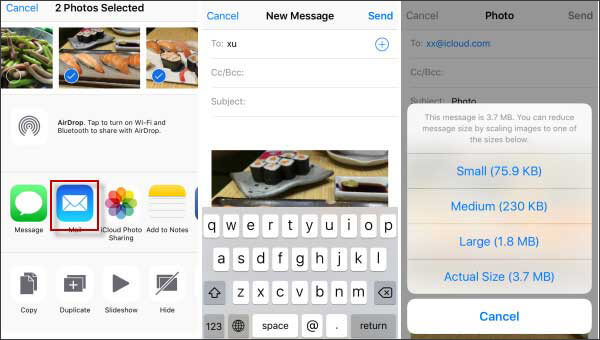
Step 5. Open the "Mail" app on your iPad, find the email you sent to yourself, and save the attached photos to your iPad.
You can easily transfer photos from your iPhone to your iPad using the various methods introduced in this article. Among these methods, iOS Photo Transfer is undoubtedly the most recommended tool. It is not only easy to use but also offers fast transfer speeds and supports multiple file types. Whether you want to transfer a large number of photos or just need a quick transfer, iOS Photo Transfer is your best choice.
I hope this article helps you manage and share your photos with ease!
Related Articles:
How to Transfer Photos from iPad to iPhone Seamlessly? (8 Easy Ways)
7 Quick Ways to Transfer Photos from PC to iPad (With or Without iTunes)
How to Transfer Photos from Android to iPad in 4 Simple Ways? (Updated)
How to Transfer Photos from iPad to PC without iTunes? 8 Easy Ways for You


