
How to Transfer Ringtones from iPhone to Computer with/without iTunes?

You may feel the default ringtones boring and want to set your favorite song as the ringtone on your iPhone. When enjoying the customized ringtones on your iPhone, you will also find that the downloaded and purchased ringtones have inevitably taken too much of the storage. So, it is wise of you to move the unused ringtones to your computer to free up more iPhone storage.
Is there any easy method to transfer ringtones from iPhone to computer? Sure. You are going to learn two effective solutions in the post.
To transfer both purchased and non-purchased ringtones from iPhone to computer, Coolmuster iOS Assistant is the best choice. It supports multiple tone formats, like MP3, M4A, AAC, AIF, WAV, MPEG, etc., and allows you to preview and selectively transfer the ringtones you like in 3 steps. Besides, it offers you two options to save your ringtones - either back up the ringtones on your computer or the default iTunes backup location.
All in all, you can use it to transfer tones from iPhone to PC without iTunes, back up and restore the overall iPhone files, and manage your iPhone data.
Key features:
Here is how to get ringtones off iPhone without iTunes:
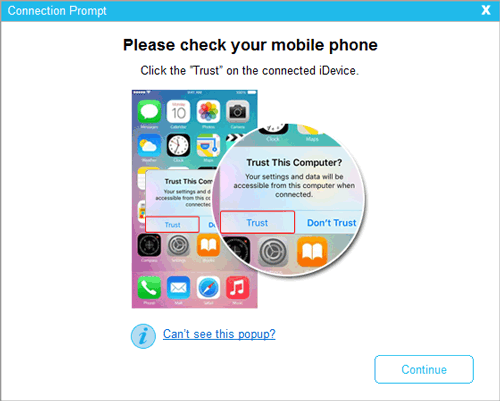
01Download and open this iPhone ringtone transfer software after installing it on your computer. Use a USB cable to connect your iPhone to this computer and hit "Trust" if a window pops up on your device. Then, click "Continue" on the program to move on.
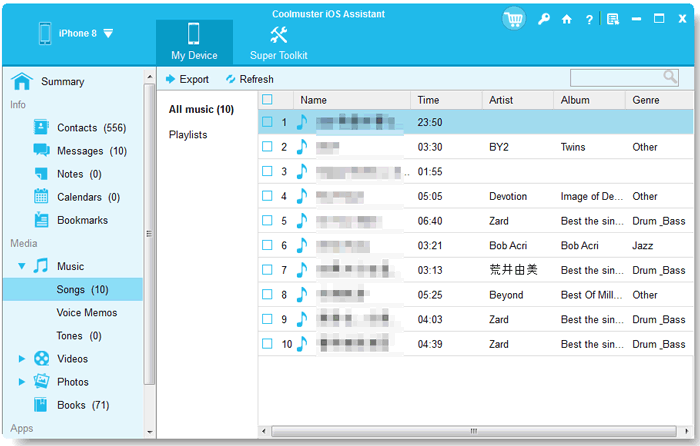
02Once connected, you will see the main interface below. As evident from the main interface, all varied file folders are neatly organized and displayed.

03Choose "Music" from the left panel, click the group "Tones", and freely preview the ringtone details. After checking the desired ringtones, tap the "Export" button on the top and select a backup location to save the files.
Video Tutorial:
Now, we know how to transfer tones from iPhone to PC. How about how to transfer ringtones to iPhone from computer? Here is also a step-by-step guide you can't miss.
How to Add Ringtones to iPhone 15/14/13/12 from Computer (Best Ever)Can you transfer ringtones from iPhone to iTunes? The answer is yes. But iTunes only supports tones purchased from the iTunes Store, not from other sources or customized by yourself. Apart from this, the major bug reported by many people is that it may cause data loss from your iPhone. Moreover, the syncing process may duplicate the purchased files on the iTunes library. Also, you cannot selectively transfer the wanted ringtones but the whole tone library to the computer.
If you don't mind the above disadvantages, you can do with the following steps:
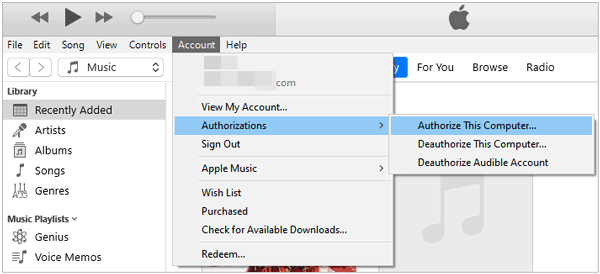
Step 1. Authorize your computer to work with the iTunes Store purchases by clicking the iTunes icon > "Account" > "Authorizations" > "Authorize This Computer" > "Authorize".
Step 2. Connect your iPhone to the computer with a USB cable and launch iTunes.
Step 3. When iTunes detects your iPhone, click "File" in iTunes window > tap "Devices" > "Transfer Purchases from iPhone".
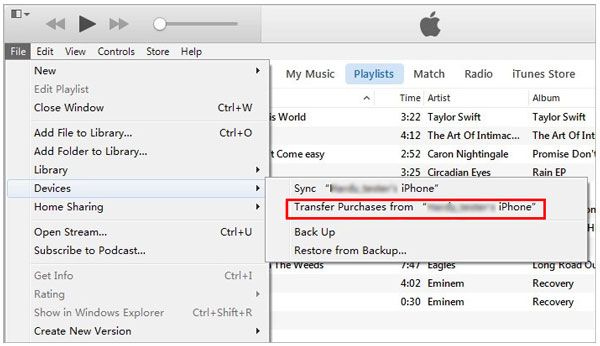
Step 4. Finally, it will transfer all the purchases from your iPhone to the iTunes library, like ringtones, music, TV shows, movies, audiobooks, etc.
Learn More: Click here to learn how to transfer ringtones from iPhone to iPhone.
How relaxing and exciting it is when a customized ringtone rings on your iPhone! If you want to customize a ringtone for yourself, you will get the steps here:
Step 1. Drag the MP3 file into the iTunes library. After cropping and saving the necessary part of the MP3 file, pull it into the iTunes library. (How to make MP3 ringtones on iPhone?)
Step 2. Right-click the music you wish to customize and click "Get Info" > "Options" > set a start and stop time for the tone.
Step 3. Tap the "File" tab at the upper-left corner, choose the option "Convert", and then "Create AAC Version" from the menu.
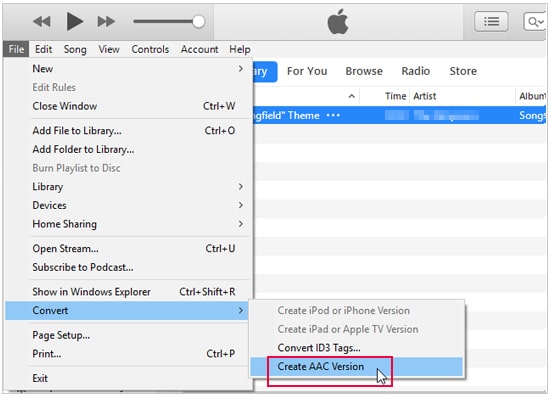
Step 4. Afterward, go to the location path, find the music file, rename it, and change the extension ".m4a" into ".m4r". Once done, your iPhone will recognize the audio file as a ringtone.
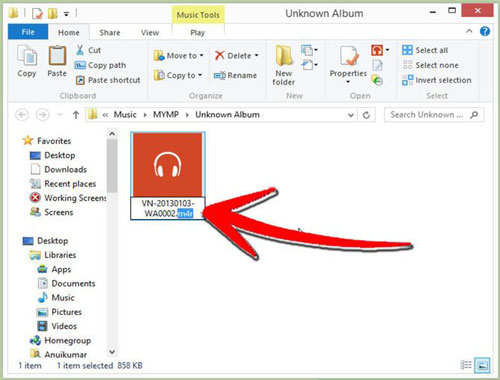
Step 5. Remove the AAC file and the MP3 file from the iTunes library to avoid mixing them and import the .m4r file into iTunes. iTunes will then sync and add the ringtone to your iPhone.
To transfer ringtones from iPhone to computer, you can choose the top 2 ways introduced in the above sections. If you hope to transfer all the purchased and non-purchased ringtones from your iPhone to a computer, you can make Coolmuster iOS Assistant the prior consideration. This iPhone ringtone transfer software leaves out any redundant operations and makes the desired songs transferred safely. By comparison, iTunes only lets you transfer the purchased ringtones from the iTunes Store.
You can decide according to your needs. And, if you need more technical support from us, please tell us in the comments.
Related Articles:
How to Add Ringtones to iPhone without iTunes & Make a Custom Ringtones on iPhone
How to Transfer Ringtones from Android to iPhone? 4 Ways + 1 Bonus
How to Transfer Music from iPhone to iPad [All 6 Ways]
[Newest Guide] How to Transfer Ringtones from Android to Android


