Whether it's for backup, freeing up storage space, or playing music on a computer, many users want to transfer music from their iPhone to their computer. So, how exactly can this be done? This article will provide a detailed guide on how to transfer music from iPhone to computer.
The best app to transfer music from iPhone to computer is Coolmuster iOS Assistant. It supports transferring all music from your iPhone (including both purchased and non-purchased songs) directly to a Windows or Mac computer without any data loss. Additionally, the software can manage other files on your iPhone, such as photos, contacts, messages, and more. If you want a fast, safe, and efficient method to transfer all your music in bulk, it is the best choice.
Key features of iOS Assistant:
Here is how to transfer all music from iPhone to computer using iOS Assistant:
01Download the correct version of the iOS Assistant program on the computer and connect the iPhone to the computer using a lighting cable.
02When your iPhone gets detected, a pop-up will show on the computer. Click on the "Trust" option on the phone and press "Continue" to proceed to the next step to start transferring your music.

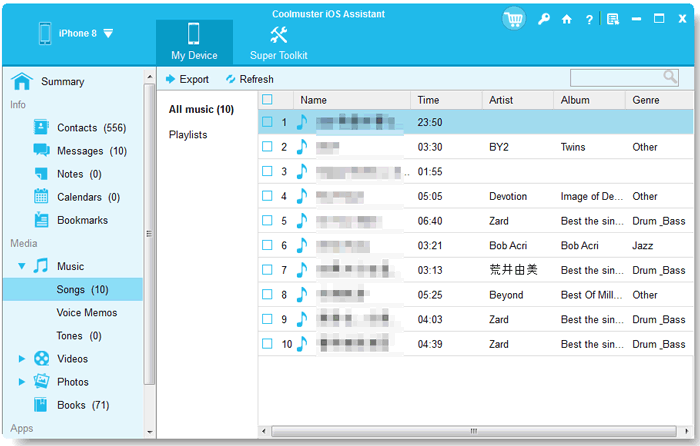
03Enter the "Music" folder, then preview the details. While previewing, choose the music files you need to transfer to your laptop. After choosing the right music files, tap "Export" and select the output.
If you still can't use iOS Assistant, please watch the video tutorial to learn more details on how to transfer music from iPhone to computer with iOS Assistant.
iTunes is the official iOS device management tool provided by Apple. It can sync music purchased on the iPhone to the computer. Although iTunes does not support transferring music manually imported to the iPhone, this method is the official recommended option for music purchased from the iTunes Store.
Here is how to transfer songs from iPhone to computer with iTunes:
Step 1. Download and install the latest version of iTunes on your computer.
Step 2. Connect your iPhone to the computer using a data cable and open iTunes.
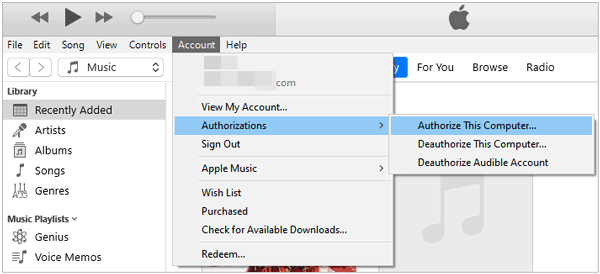
Step 3. Click "Account" > "Authorization" > "Authorize This Computer", and enter your Apple ID and password to authorize.
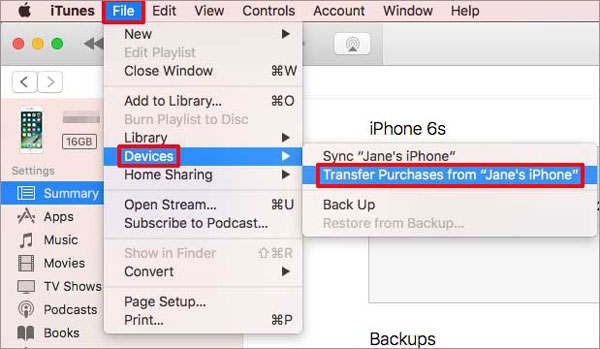
Step 4. Select "File" > "Devices" > "Transfer Purchases from [Device Name]" to transfer purchased music from the iPhone to the iTunes library.
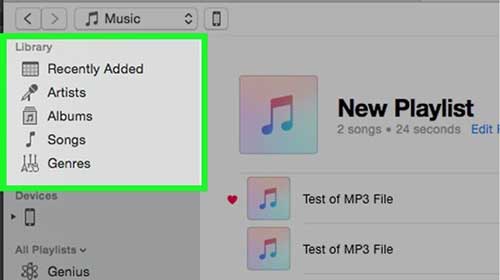
Step 5. Click on "Recently Added" on the left side of iTunes, select the purchased music you wish to save, and click the "Download" button to transfer the music.
If you only want to copy the purchased songs from your iPhone, you can redownload your purchased songs in the iTunes Store without connecting the phone device to the computer. Here's how you do iPhone music transfer to PC through Apple ID:
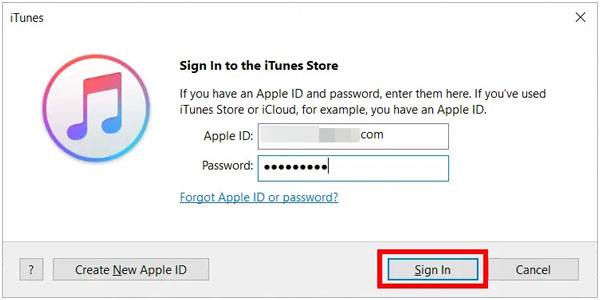
Step 1. Launch iTunes, then head to the "Account" menu. Select "Sign In", then enter the Apple ID you used to purchase the music.
Step 2. Head to "Account", then to "Purchased", and finally to "Music". Switch to the "Not in My Library" button to see all purchased items.
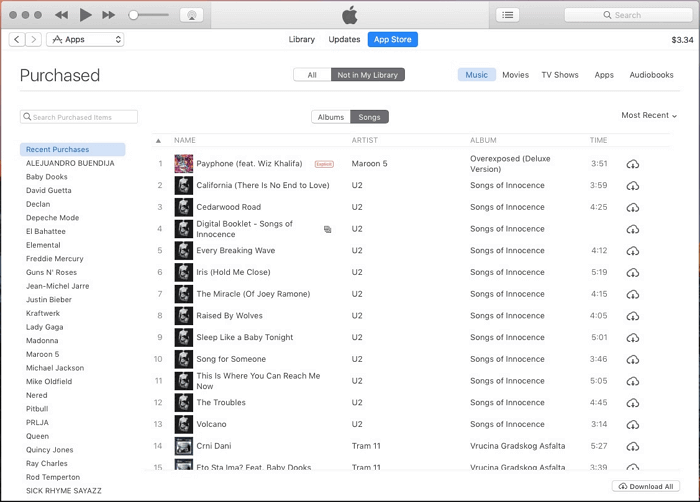
Step 3. Tap on the "Download All" button to save your songs to the PC.
If you prefer to export music from iPhone wirelessly, you can use cloud storage services like iCloud or Dropbox. These methods cater to different needs: iCloud is suitable for Apple Music users, while Dropbox works for all types of music files.
iCloud Music Library allows Apple Music subscribers to sync music across all their devices. If your music is stored in iCloud, you can download it directly to your computer.
Here is how to transfer music from iPhone to laptop with iCloud:
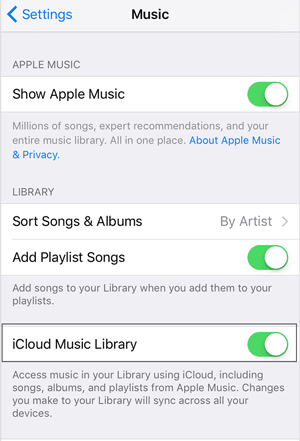
Step 1. Open "Settings" on your iPhone and choose "Music". Turn on "iCloud Music Library". When a pop-up window appears, choose to keep music on the iPhone to add the songs to the iCloud Music Library.
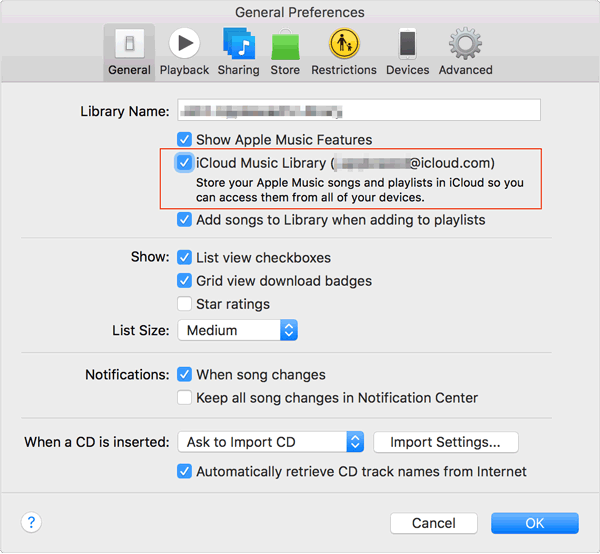
Step 2. On the computer, enable the "iCloud Music Library" option from "Edit" > "Preference" section on Windows, and on Mac, check in "iTunes" > "Preference" section.
Step 3. Tap the "General" option, then enable "iCloud Music Library" and hit "OK". All your music files will be transferred from your iPhone to iTunes. Click on the "cloud" button to pull the music from iPhone to PC.
Dropbox can help when transferring songs from an iPhone to a PC. This cloud storage service allows users to share data across devices on the same account. It can help you transfer files from iPhone to PC and vice versa. To transfer music from iPhone to PC, here is what to do:
Step 1. Download Dropbox on iPhone and PC. Log into your Dropbox account on both devices with the same account.
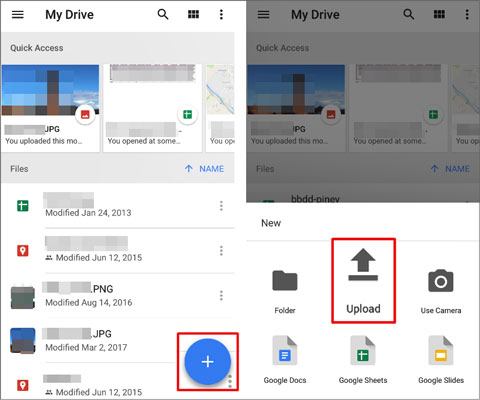
Step 2. Upload songs you wish to transfer from iPhone to computer. To do this, open the Dropbox app on your iPhone, go to your chosen folder, tap the "+" button, and select and upload your music files simultaneously.
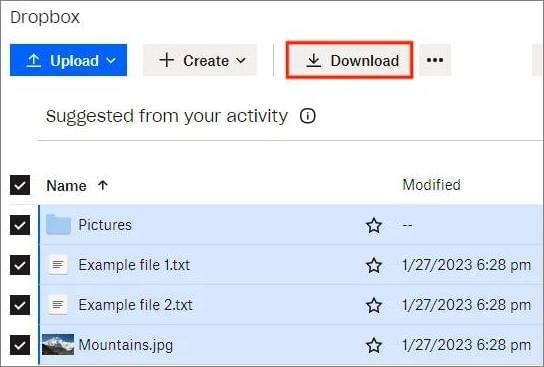
Step 3. Once done, access the music files from the computer and download them.
If you are using a Mac, AirDrop is one of the most convenient wireless transfer methods. AirDrop allows users to quickly share files between iPhone and Mac without the need for a data cable or third-party apps.
Here is how to transfer music from iPhone to Mac using AirDrop:
Step 1. Enable AirDrop on both your iPhone and Mac.
On your Mac: Open Finder, select "AirDrop" from the left sidebar, and set its visibility to "Everyone" or "Contacts Only".

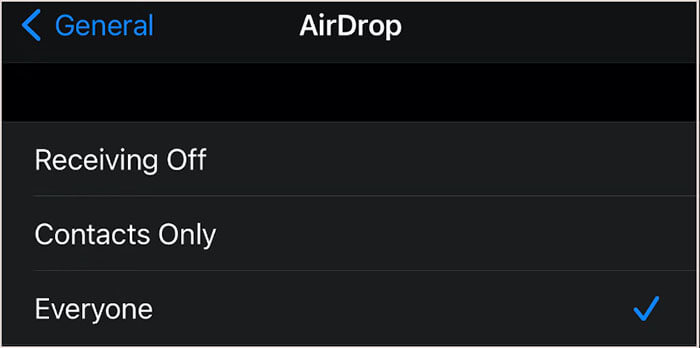
On your iPhone: Open "Settings", tap "General", enable "AirDrop", and choose "Everyone" or "Contacts Only".
Step 2. Find the music files you want to transfer on your iPhone, then tap "Share" > "AirDrop".

Step 3. Select your Mac device, and a receive request will pop up on your Mac; click "Accept". The music files will be saved in the "Downloads" folder on your Mac.
Now the ball is in your court. This article has highlighted the 6 best options to transfer music from an iPhone to a computer. Choose the most suitable method that meets your needs. However, we must say sharing music between an iPhone and a computer, particularly a Windows PC, can be tricky and needs technical know-how.
To avoid all that, we recommend using Coolmuster iOS Assistant to export music from the iPhone to the computer. It's faster, easy to use, and, more importantly, no technical skills required.
Related Articles:
2 Easy Ways to Transfer Music from iPhone/iPod to an External Hard Drive
How to Download Music on iPhone Without iTunes? 6 Ways to Solve Your Problem!
How to Transfer Music from Computer to iPhone Without iTunes? - 4 Ways
6 Effective Ways | How to Transfer Music from iPhone to iPad?


 Free Download for PC
  Free Download for Mac

