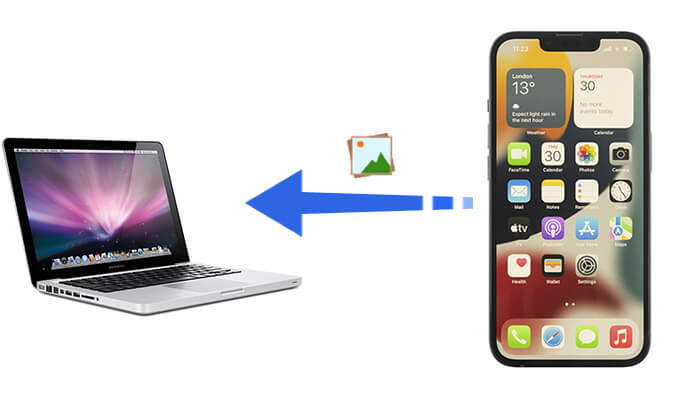
Whether it's for backing up photos, preventing data loss, or freeing up storage space on your iPhone, transferring photos to a Mac is a common need. This article will guide you step by step on how to transfer photos from iPhone to Mac, and you can choose the most suitable method based on your needs.
If you have a USB cable, connecting your iPhone to your Mac using the data cable is the most stable and fastest transfer method. Here are three common methods.
If you need to transfer a large number of photos in bulk at once while maintaining original quality, Coolmuster iOS Assistant is a powerful and efficient option. It is the best app to transfer photos from iPhone to Mac. It not only supports photo export but also allows you to manage contacts, messages, music, and other data on your iPhone.
Highlights of iOS Assistant:
Here is how to transfer photos from iPhone to MacBook in one click using iOS Assistant:
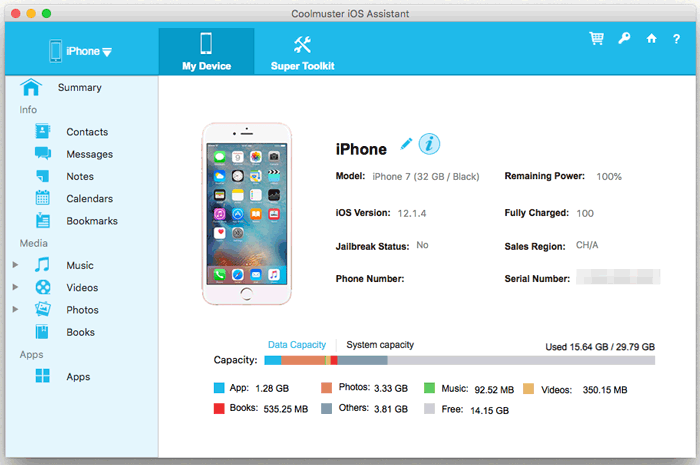
01Install and launch iOS Assistant on your Mac and connect iPhone to Mac via a USB cable. The program will automatically detect your device. Hit "Trust" and "Continue" when pop-up windows appear. After successful detection, you will see the iPhone's information on your Mac screen.
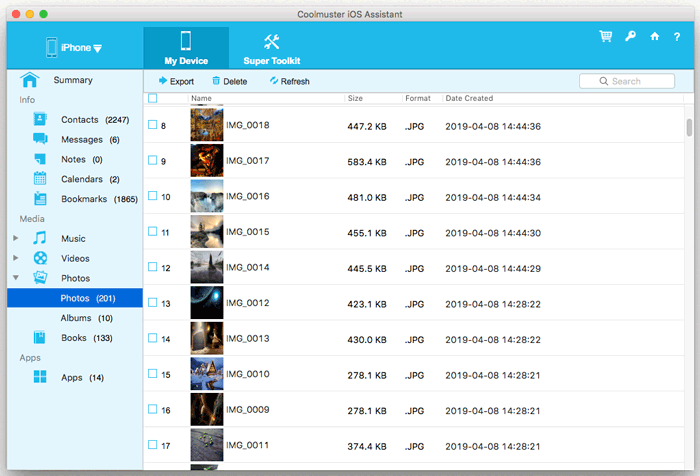
02Choose "Photos" from the left panel on this interface, tick desired items from the right panel and click "Export" on the top to back up iPhone photos to Mac.
Video Tutorial:
If you don't want to download any additional software, the built-in "Photos" app on Mac allows you to directly import and manage iPhone photos on your Mac.
Here is how to put photos from iPhone onto MacBook using the Photos app:
Step 1. Connect your iPhone to the Mac using a USB cable.
Step 2. Open the "Photos" app on your Mac.
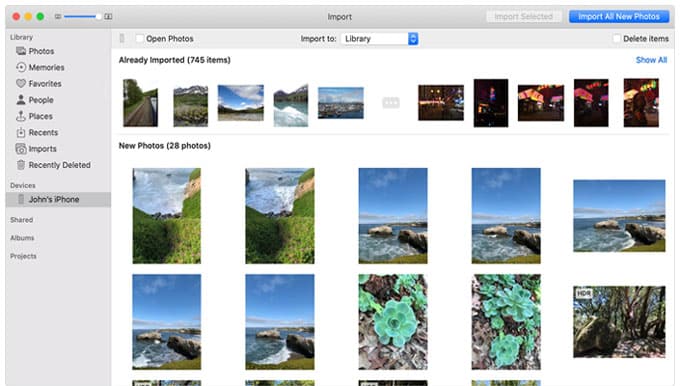
Step 3. Find your iPhone in the left sidebar, click on it, and wait for the photos to load.
Step 4. Select the photos you want to import, click "Import Selected Photos", or click "Import All" to transfer everything. (Can't import photos from iPhone to Mac?)
Step 5. Once the import is complete, you can view and manage your photos in the library of the "Photos" app.
In addition to the Photos app, Image Capture on Mac can also help transfer photos from your iPhone. Both applications function similarly when it comes to importing photos from iPhone to Mac. However, unlike the Photos app, Image Capture is primarily designed for uploading images from digital cameras or devices with cameras to your Mac.
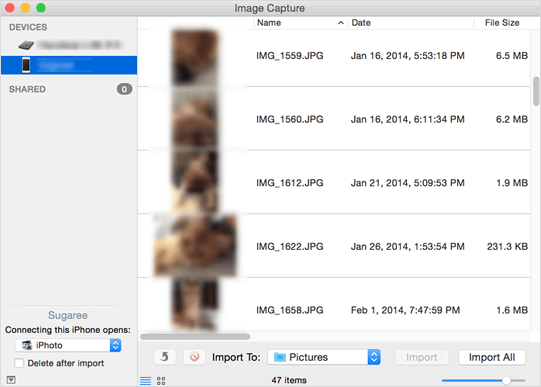
Here is how to save photos from iPhone to Mac with Image Capture:
Step 1. Connect iPhone to Mac via a USB cable and launch Image Capture on Mac.
Step 2. From the connected devices list, click on your iPhone's name and the "Import To" menu to set up a storage folder.
Step 3. Select photos from your iPhone and click "Import" or "Import All" to transfer photos from iPhone to Mac.
If you don't want to use a cable or need to transfer photos to your Mac anytime and anywhere, wireless transfer is a great option. The following three methods are suitable for different scenarios, so you can choose the most appropriate one based on your needs.
If you want your iPhone photos to automatically sync to your Mac without manual transfer, iCloud Photos is an ideal choice. iCloud Photos stores all your photos and videos in the cloud and syncs them across all Apple devices. This way, you can access photos taken on your iPhone on your Mac at any time, without needing a cable.
Here is how to back up iPhone photos to Mac with iCloud:
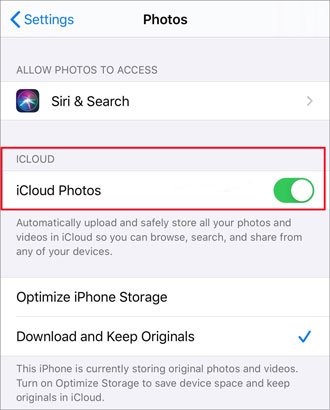
Step 1. On your iPhone, go to "Settings" > "Apple ID" > "iCloud" > "Photos" and enable "iCloud Photos".
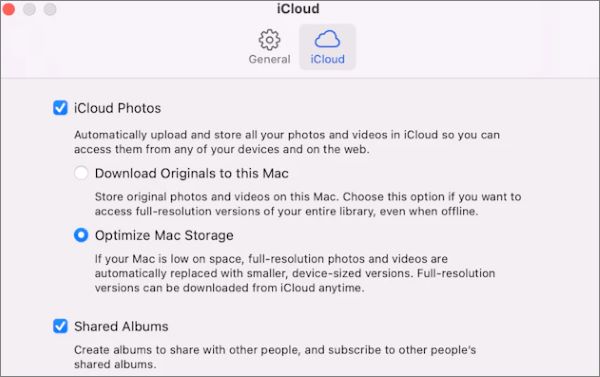
Step 2. On your Mac, open "System Settings" > "Apple ID" > "iCloud" > "Photos" and turn on "iCloud Photos".
Step 3. Ensure both your iPhone and Mac are connected to Wi-Fi, and the photos will automatically sync to iCloud. (iCloud photos not syncing?)
Step 4. You can view and download your photos from the "Photos" app on your Mac or iCloud.com.
If you don't want to use iCloud but still want to quickly transfer photos wirelessly to your Mac, AirDrop is a very convenient option. AirDrop relies on Wi-Fi and Bluetooth, allowing you to transfer files directly between your iPhone and Mac without the need for additional apps or cables.
How do I AirDrop multiple photos from iPhone to Mac? Follow the steps below:
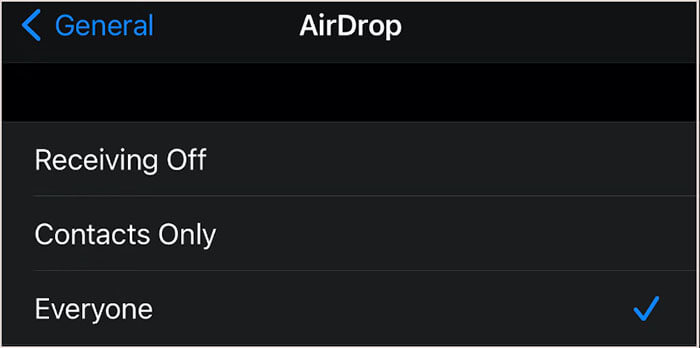
Step 1. Enable AirDrop on iPhone: Head to "Settings" > "General" > "AirDrop" > "Contacts Only" or "Everyone".
Step 2. Enable AirDrop on Mac: Go to "Finder" > "Go" > "AirDrop" on your Mac, and click the blue drop-down info "Allow me to be discovered by:" and select "Everyone" or "Contacts Only".

Step 3. In the Photos app on your iPhone, select the photos you want to transfer.
Step 4. Click the "Share" button and choose "AirDrop", then select your Mac device and click "Send".
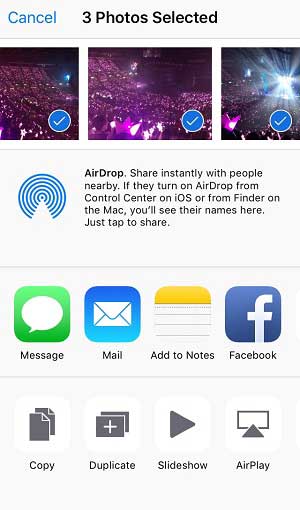
Step 5. On your Mac, accept the file, and the photos will be automatically saved to the "Downloads" folder.
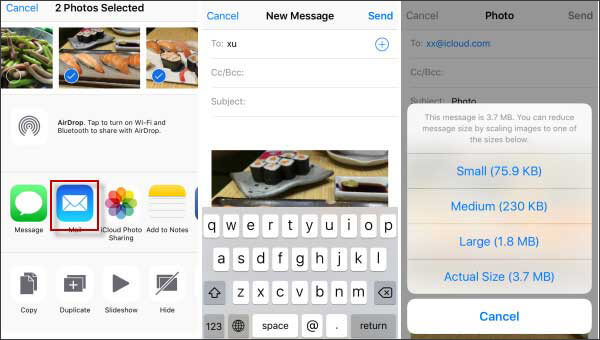
If you want to transfer only several photos, you can also transfer pictures from iPhone to Mac through Email. However, it's important to note that most email services have a size limit for attachments (usually between 20MB and 25MB), so it's not suitable for transferring a large number of photos.
Here's how to access iPhone photos on Mac via Email:
Step 1. Open the "Photos" app on your iPhone and select the photos you want to send.
Step 2. Click the "Share" button, then choose "Mail".
Step 3. In the email interface, enter your own email address and fill in the subject and click "Send".
Step 4. On your Mac, open your email client (such as Apple Mail or Gmail web), find the email you just sent, and download the photo attachments.
Step 5. After downloading, you can move the photos to the desktop or a designated folder to complete the transfer.
The above explains how to transfer photos from iPhone to Mac, with Coolmuster iOS Assistant being the best way to transfer photos from iPhone to Mac due to its fast, stable, and lossless transfer features, making it especially suitable for bulk management of iPhone photos. Regardless of the method you choose, you can find the most suitable solution based on your needs!
Related Articles:
7 Effective Ways to Transfer Files from iPhone to Mac with Ease
How to Transfer Photos from Mac to iPhone? [6 Easy Ways]
[Guide] How to Transfer iPad Photos to Mac via USB and Wirelessly?


 Free Download for Mac
 Free Download for PC

