Photos are an important way for us to document our lives and preserve memories. Sometimes, we need to transfer photos from our computer to an iPhone so that we can view and share them anytime, anywhere. This article will introduce several commonly used photo transfer methods, including options that use iTunes and those that don't, helping you choose the one that works best for you. Let's see how to transfer photos from computer to iPhone step by step.
iTunes is an official tool provided by Apple that helps users manage content on their iPhone, including music, photos, etc. How can I transfer photos from computer to iPhone? The steps to sync photos through iTunes are as follows:
Step 1. Download and install the latest version of iTunes on your computer.
Step 2. Connect your iPhone to the computer using a USB cable and select "Trust This Computer" on your phone.
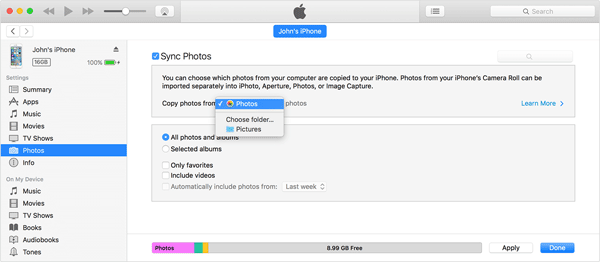
Step 3. Open iTunes, click the device icon and then select the "Photos" option.
Step 4. Check the "Sync Photos" box, then select the option next to "Copy photos from".
Step 5. Click "Choose folder..." and select the folder containing the photos you want to transfer.
Step 6. Click "Apply" to begin syncing the photos from your computer to your iPhone.
* Advantages: iTunes is an official Apple tool, stable and reliable, and allows for batch photo synchronization.
* Disadvantages: You cannot select individual photos for transfer, and existing photos on the iPhone may be overwritten after synchronization.
Although iTunes can transfer photos, its synchronization process is quite complicated and may overwrite existing content on your iPhone. Therefore, if you don't like using iTunes or prefer more flexible options, the following methods can help you transfer photos from your computer to your iPhone without iTunes.
If you want to find a great app to transfer photos from computer to iPhone, this part is your best choice. iPhone Photo Transfer is a photo manager for everyone, and it allows you to easily transfer photos from iPhone to computer or vice versa. In addition, it can also help you transfer music, videos, contacts and more between your iPhone and computer. Have a try and you will love it.
Highlights of iPhone Photo Transfer:
How do I transfer photos from my computer to my iPhone using a USB cable without iTunes?
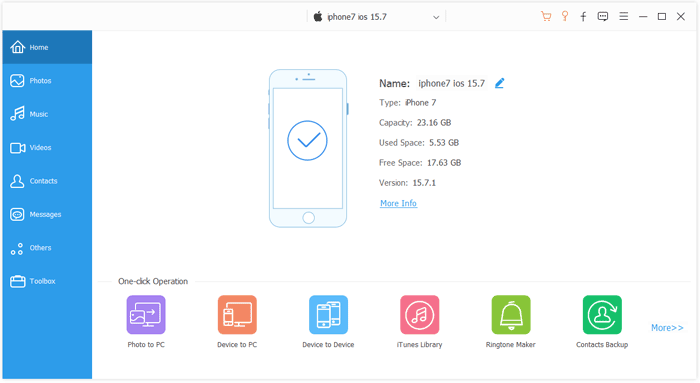
01Download and install iPhone Photo Transfer on your computer. Next, you need to connect your iPhone to the computer via a USB cable. iPhone Photo Transfer will recognize your mobile phone in seconds.
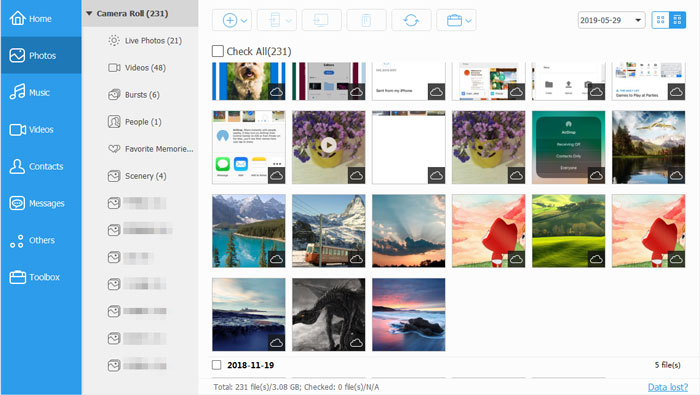
02On the main interface, click "Photos" on the left panel, and then you will see your photos folders in the middle part. Navigate the folder you want to transfer the photos and tap on the "Add" icon on the top menu.
03Open the photos folder on the computer, you can select the photos on the screen, and then click the "Open" icon. The selected photos will be transferred from the PC to your iPhone.
* Advantages: Fast transfer speed, supports batch transfers, easy to use, and doesn't require iTunes.
* Disadvantages: Requires downloading and installing software.
iCloud is Apple's official cloud storage service that allows you to upload photos to the cloud and sync them across all Apple devices. If iCloud Photos is enabled on your iPhone, you can upload photos to iCloud from your computer and then view and download them on your iPhone.
Here is how to transfer photos from computer to iPhone wirelessly with iCloud:
Step 1. Open a browser on your computer, visit the official iCloud website, and log in with your Apple ID.
Step 2. Go to the "Photos" section and click the "upload" button.

Step 3. Select the photos you want to upload and wait for the upload to complete.
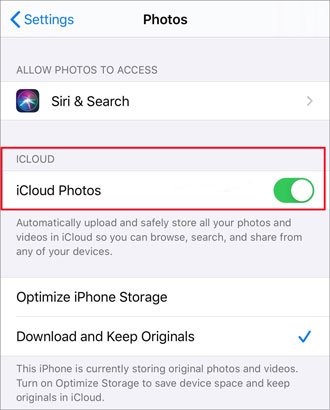
Step 4. Open "Settings" on your iPhone and tap your Apple ID at the top.
Step 5. Go to the "iCloud" section, select "Photos", and enable "iCloud Photos". Ensure your iPhone is connected to Wi-Fi, and after a short while,the photos will automatically sync to your iPhone.
* Advantages: No cable is required, and photos can be synced across multiple devices.
* Disadvantages: Requires a stable internet connection, and iCloud's free storage space is limited to 5GB. (iCloud storage full?)
If you only need to transfer a small number of photos, you can send them to your own email as attachments and then download them on your iPhone. This method is suitable for transferring scattered photos but is not ideal for large batches of photos.
How do I import photos from PC to iPhone using email? Here are the steps:
Step 1. Open your email client (such as Gmail, Outlook, etc.) on your computer.
Step 2. Create a new email and attach the photos.
Step 3. Send the email to your own email address.
Step 4. Open the email on your iPhone, tap the attachment, and download the photos.
Step 5. The downloaded photos will be automatically saved to the "Photos" app on your iPhone.

* Advantages: No additional software installation is required, suitable for transferring a small number of photos.
* Disadvantages: Limited attachment size, making it cumbersome to transfer large numbers of photos.
AirDrop is one of the best wireless methods for transferring files between Apple devices, suitable for photo transfer between a Mac and an iPhone. If both your Mac and iPhone have AirDrop enabled, you can quickly transfer photos from your Mac to your iPhone without the need for a cable or internet connection.
Here is how to transfer photos from Mac computer to iPhone via AirDrop:
Step 1. Open "Finder" on your Mac and click "AirDrop" on the left sidebar.

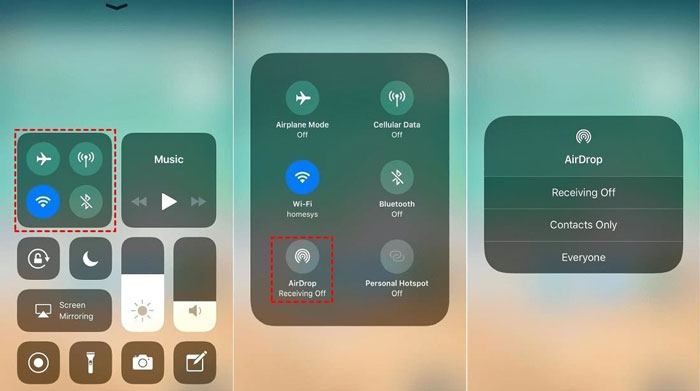
Step 2. Make sure AirDrop is enabled on your iPhone (turn on Bluetooth and Wi-Fi in the Control Center and set AirDrop to "Everyone" or "Contacts Only").
Step 3. Select the photos you want to transfer on your Mac, right-click, and choose "Share" > "AirDrop".

Step 4. Select your iPhone device, tap "Accept" on your iPhone, and the photos will be automatically saved to the "Photos" app.
* Advantages: Fast transfer speed, no cable required, and easy to use.
* Disadvantages: Only available for Mac and iPhone devices, not accessible to Windows users.
There are various methods to transfer photos from a computer to an iPhone, and you can choose the one that best suits your needs. If you're looking for a stable, efficient, and flexible transfer experience, iPhone Photo Transfer is the best choice. It supports batch transfers, doesn't require iTunes, and won't overwrite existing photos, making it ideal for users who want to easily manage iPhone photos.
If you found this article helpful, you can share this article with your friends and it is our honor that you write down your advice in the comment area or contact us by email.
Related Articles:
How to Transfer Videos from PC to iPhone with or without iTunes
How to Transfer Files from PC to iPhone with or without iTunes?
How to Transfer Files from Mac to iPhone? Solved in 5 Proven Ways
How to Transfer Music from Computer to iPhone? [5 Ways Offered]


 Free Download for PC
  Free Download for Mac

