
How to Transfer Photos from iCloud to USB Flash Drive? - 4 Useful Ways

"My iCloud storage is full, so I want to transfer photos to a flash drive. I don't want to copy them; I want to actually TRANSFER them. How do I do this?"
- from Apple Community
iCloud is a cloud storage service provided by Apple that helps users back up and store files such as photos, videos, and documents. However, due to the limited storage space in the cloud, many users wish to download their photos from iCloud to a USB flash drive for long-term backup or to free up storage space. In this article, we will provide a detailed guide on how to transfer photos from iCloud to USB flash drive, with simple and easy-to-understand steps.
This is a common method for transferring photos from iCloud to a USB drive. We can access the iCloud website, download the photos to the computer, and then transfer them to the USB.
Here is how to transfer photos from iCloud to USB flash drive via iCloud.com:
Step 1. Open your computer's browser, visit iCloud.com, and log in to your iCloud account using your Apple ID.
Step 2. Once logged in, click on the "Photos" icon to access the iCloud Photos and view/manage your iCloud photos.
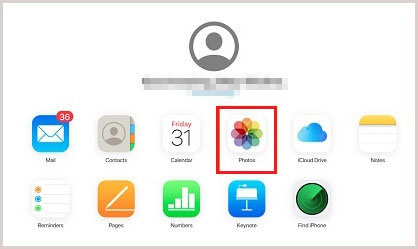
Step 3. Select the photos you want to download. You can hold down the "Ctrl" key (Windows) or the "Command" key (Mac) to select multiple photos.
Step 4. Click the "download" icon in the upper right corner of the page to save the selected photos to your computer's Downloads folder.

Step 5. Insert the USB flash drive and copy the downloaded photo files from your computer to the USB drive.
For Windows users, Apple offers the iCloud for Windows app, allowing direct access to and download of data from iCloud on the Windows system.
Here is how to transfer photos from iCloud to USB flash drive using iCloud for Windows:
Step 1. Download and install the iCloud for Windows app on your computer, then connect your USB thumb drive.
Step 2. Sign in with your iCloud account, and then click on "Photos" and select "Options".
Step 3. Check the "Download new photos and videos to my PC" option, click "Change..." to choose your USB drive folder as the destination, and then click "Done".
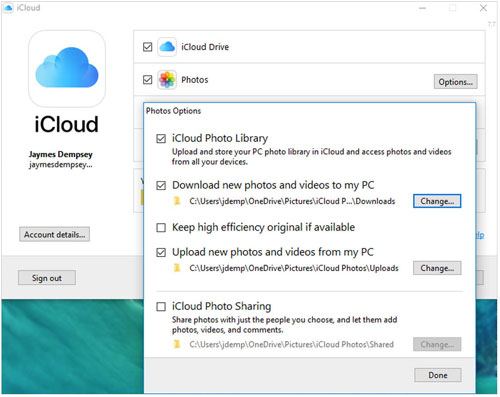
Step 4. In File Explorer, click on "iCloud Photos" in the sidebar to access your synced photos. If you're using Windows 11, open "Microsoft Photos" and then go to "iCloud Photos".
Step 5. Select all the photos you want to transfer to your USB and click "Download".
If you're a Mac user, there's no need to download iCloud desktop software. Follow these steps to transfer photos from iCloud to your computer and then to a USB drive:
Step 1. Open "Photos" on your Mac and select "Preferences" from the menu bar at the top of your screen.
Step 2. Click on "iCloud Photos" and select "Download Originals to this Mac". This will move all your photos to your Mac.
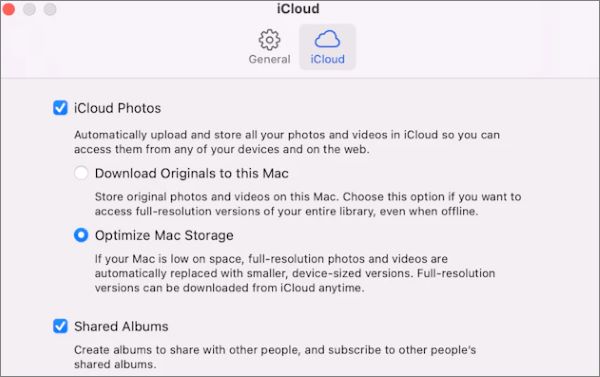
Step 3. Connect your USB drive to your computer and copy all the pictures to the USB stick.
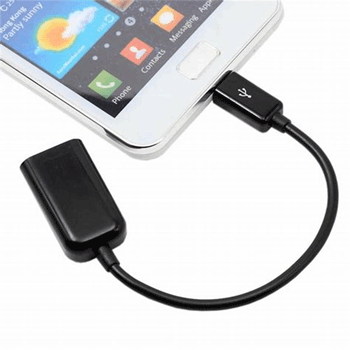
If you are using an iPhone or iPad, you can connect a USB drive to your device using an OTG adapter, then download photos directly from iCloud and save them to the USB.
Here are the steps:
Step 1. Insert the OTG adapter into your iPhone or iPad and connect the USB flash drive.
Step 2. Open the "Photos" app, go to "Albums", and find the photos you want to download.
Step 3. Tap the "Share" button on the photos, select "Save to Files", and choose the USB flash drive as the storage location.
Step 4. Once completed, the photos will be saved to the USB.
While you can download iCloud photos to a USB flash drive, the multi-step process can be time-consuming and take up significant space. If you want a more convenient way to manage and back up your photos, Coolmuster iOS Assistant is a more flexible choice. This software allows you to export photos directly from your iPhone or iPad to your computer or USB drive without relying on iCloud, making the process simple and fast.
What can Coolmuster iOS Assistant do for you?
Here is how to use iOS Assistant to back up your iPhone photos to the computer:
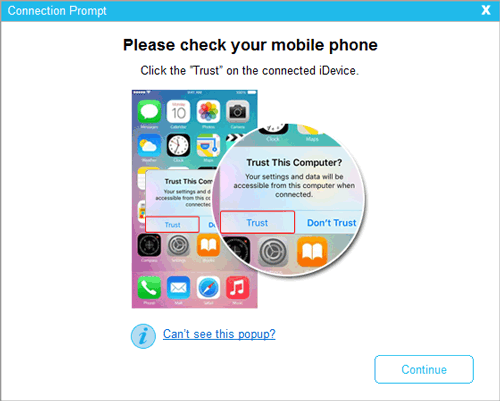
01Download the correct version of the app and launch it. When the main interface opens, connect your iPhone to the PC using a USB cable and tap "Trust" when prompted. Click "Continue" to proceed.
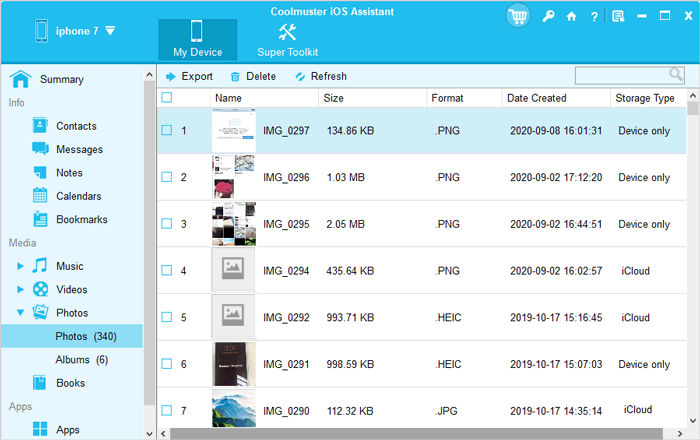
02Once your device is detected, all your iPhone data will be displayed in folders on the left panel.

03Select the "Photos" folder to preview your images and choose the ones you want to export to your computer. After making your selections, click the "Export" button to transfer the pictures to your PC.
Video Tutorial:
The methods mentioned above allow you to transfer iCloud photos to a USB flash drive, so users can choose the most suitable option based on their device. If you're looking for a more convenient backup solution, Coolmuster iOS Assistant is an excellent alternative, as it has no storage limitations and supports multiple file types, making it worth a try.
Related Articles:
How to Transfer Photos from USB to iPhone with or without Computer?
How to Transfer Photos from Android to Flash Drive [Solved in 5 Ways]
How to Transfer Videos from iPhone to USB Stick with or without a Computer?
Transfer Music from iPhone to Flash Drive (Flexible and Reliable Guide)


