
How to Export iPad Photos to External Drive with/without Computer?

With the iPad's excellent camera, you can capture all those memorable moments of your life. The longer you use your iPad, the more photos or videos stored on your device. The iPad's internal storage will be running out at some point, and you may consider moving your photos somewhere else. Apart from using cloud services like iCloud, Google Photos, and Dropbox, saving iPad photos to external hard drive is also a good choice. This article will teach you how to export iPad photos to external drive with or without a computer. Let's dive in.
To start with, let's see the best way to transfer photos from iPad to portable hard drive using a computer. The key is to get your photos from an iPad to a computer first. Then, everything else comes easy. Here, we would like to recommend a program for you to make the process simpler. Coolmuster iOS Assistant enables you to view all the photos on your iPad/iPhone from a PC. You can select the required ones to transfer to your external hard drive directly. It is a one-stop data managing software you can't miss.
The top features of Coolmuster iOS Assistant:
This program works on both Windows and Mac computers. You can download the required version and follow the guide below to transfer photos from iPad to external hard drive.
How to transfer photos or videos from an iPad to an external hard drive via iOS Assistant:
01Download and run iOS Assistant on your Windows or Mac computer. Then, connect both your iPad and external hard drive to your computer.
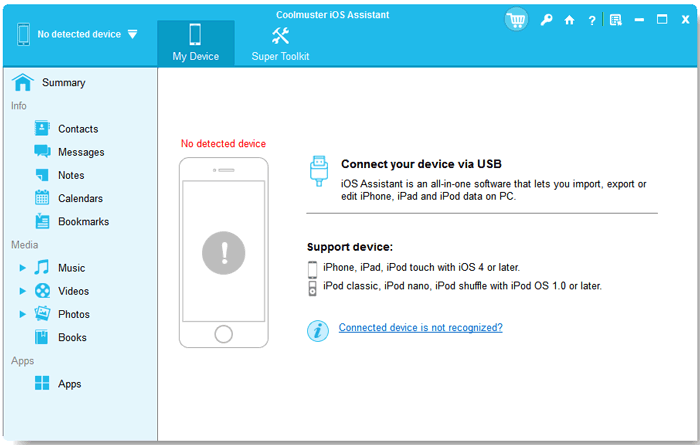
02You may need to unlock your iPad and trust this computer. After iOS Assistant recognizes your iPad, you will get the main interface below.

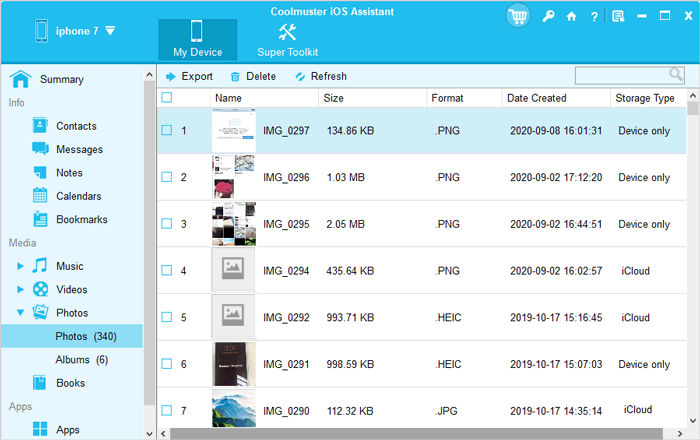
03Click "Photos" from the left menu, and then you can preview all the photos from your iPad on your computer. Choose the photos you want to move > click the "Export" button > find your external hard drive from the pop-up window > tap "OK" to save photos from iPad to external hard drive.
Video Tutorial:
If you want to move pictures from an iPad external hard drive on a Mac, some built-in apps on your Mac can help.
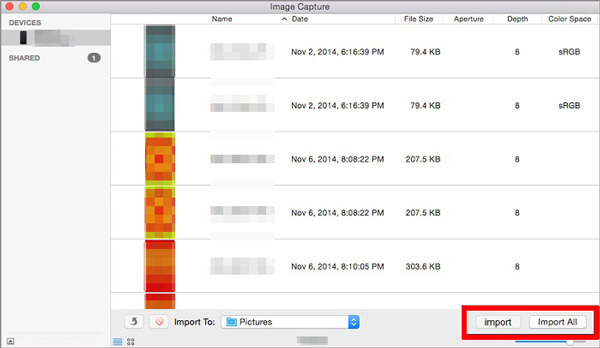
Image Capture is a useful app to transfer photos from iPad/iPhone to Mac. It even lets you delete photos on an iPhone/iPad from a Mac computer without importing them.
See how to transfer photos from iPad to external hard drive on a Mac using Image Capture:
Step 1. Link your external hard drive with your Mac, and make sure that you can find it in the Finder's sidebar.
Step 2. Connect the iPad to your Mac using a USB cable.
Step 3. The Image Capture app will launch automatically when your iPad is connected to a Mac. If it doesn't launch, you can open it by using the Spotlight search and launch.
Step 4. Click the drop-down button next to "Import To" > select others > select a folder from your external hard drive to store the iPad photos.
Step 5. After selecting, click the "Import" button to transfer photos from the iPad to the hard drive.
For Mac OS X 10.10.3 or later, iPhoto was replaced by the Photos app. The Photos app is also a convenient way to transfer photos from iPad to external hard drive on a Mac.
Here is how to export iPad photos to external drive on Mac Using the Photos app:
Step 1. Connect your iPad and the external hard drive to your Mac computer.
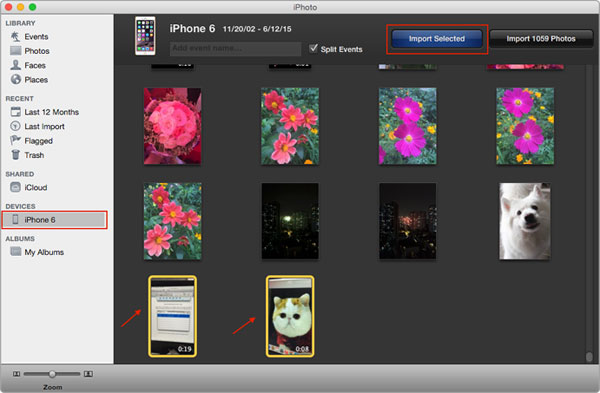
Step 2. Run the Photos app on your Mac if it doesn't launch automatically. Head to the "Devices" section and choose your iPad.
Step 3. Select the "Import to" option and choose to save the imported photos to your external drive. (Can't import photos from iPhone/iPad to Mac?)
Step 4. You can select "Import All New Photos" or select the photos you want to transfer to Mac, then click "Import Selected".
If you are using a Windows computer, there are several options you can use to finish the task. But the process is not that straightforward.
On a Windows PC, File Explorer can help you directly export iPad photos to an external hard drive. By connecting your iOS device to the computer, you can access photos or videos from your device's internal storage from your PC and then move them to your external hard drive without using third-party software. However, it can only handle photos in the iPad's Camera Roll.
Here is how to move pictures from iPad to external hard drive using File Explorer:
Step 1. Connect your iPad and the external hard drive to your computer using USB cables.
Step 2. Head to "This PC" > "Apple iPhone" > "Internal Storage" > "DCIM" > "100APPLE". You will see all the pictures in your iPhone Camera Roll.
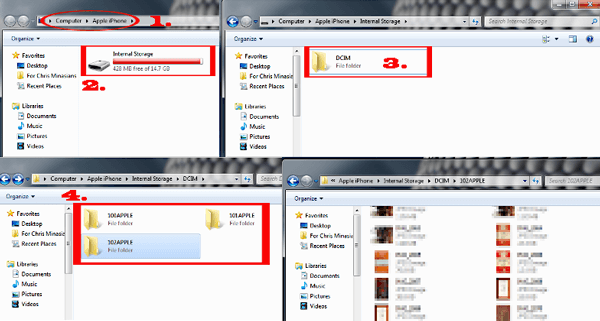
Step 3. Copy the photos you want to transfer, then open your external hard drive folder on your computer and paste the photos.
The Photos app on Windows 10/11 also helps you import photos from an iPad to a PC or hard drive folder. The drawback of this method is that this app takes a long time to scan photos.
Here is how to transfer photos from iPad to portable hard drive via the Photos app on Windows:
Step 1. Connect your iPad and external hard drive to your PC.
Step 2. Click "Allow" if there is a prompt that appears on your iPad asking for permission.
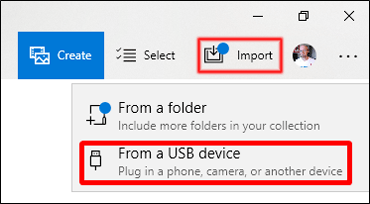
Step 3. On your computer, open the Photos app and click "Import" > "From a USB device" > choose your iPad to import from. Then, the Photos app will scan the photos and video files on your iPad. (Can't import photos from iPhone/iPad to PC?)
Step 4. After a while, you can see all the photos and videos on your iPad. You can select the items you wish to import.
Step 5. To move the selected photos to an external hard drive, click "Import settings" > "Change the import destination" > choose your external drive and click "Done".
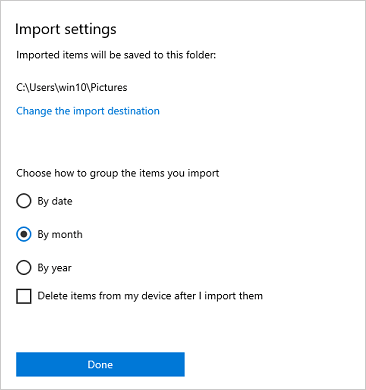
Step 6. After this, you can click "Import Selected" to start saving iPad photos to external hard drive.
If you use iCloud to sync your photos, you can also download the photos to your computer from iCloud and then transfer them to an external hard drive. However, iCloud offers limited free storage, so you may need to delete some unnecessary files to free up iCloud storage or purchase additional storage if you run out of space.
Here is how to save photos from iPad to external hard drive using iCloud for Windows:
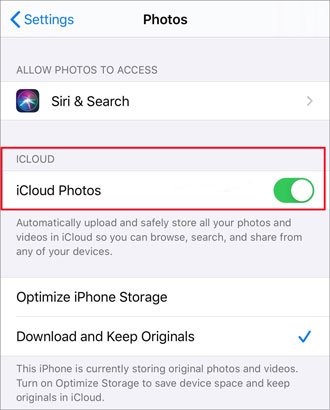
Step 1. Enable iCloud Photos on iPhone: Go to "Settings" > tap [your name] > "iCloud" > "Photos" and turn on "iCloud Photos".
Step 2. Connect the external hard drive to your PC. Then, on your Windows computer, download and install iCloud for Windows. Sign in to it with your Apple ID.
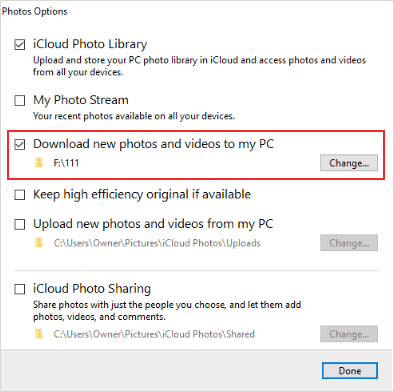
Step 3. Click "Options" next to "Photos", and then enable "iCloud Photo Library" and "Download new photos and videos to my PC".
Step 4. Click "Change" under "Download new photos and videos to my PC" > change the default location to your portable hard drive.
Step 5. Click "Done" and "Apply" to start syncing. After syncing, your iPad's photos will be saved to the external hard drive.
If you prefer not to download software, you can use iCloud.com to transfer photos from iPad to portable hard drive, whether you're using a Windows PC or a Mac.
Here are the steps:
Step 1. Enable iCloud Photos on your iPad and connect the external hard drive to your computer.
Step 2. Open a web browser on your PC or Mac and go to iCloud.com.
Step 3. Sign in with your Apple ID, and go to "Photos".
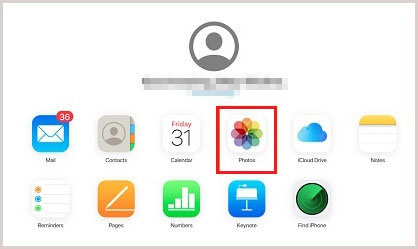
Step 4. Select the photos you want to download, click the download button (cloud icon with a downward arrow), and then choose the portable hard drive as the download destination.

iPadOS 13 allows you to directly attach an external hard drive or USB flash drive and freely move files between the external drive and your iPad. If you don't have a computer around, this is the best method to transfer photos from an iPad to a hard drive. All you need is an Apple's Lightning-to-USB or Lighting-to-USB adapter to connect your iPad and hard drive.
Here's how to transfer photos from iPad to hard drive without computer:
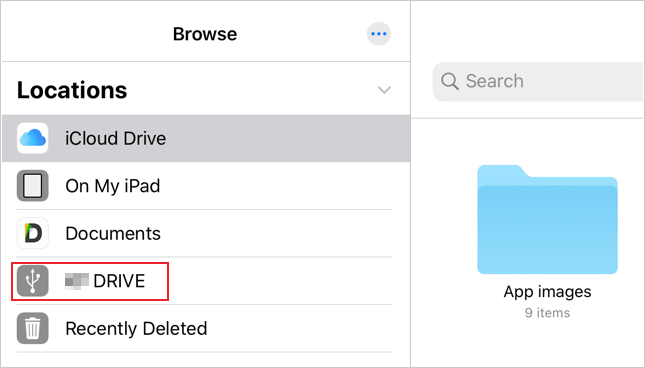
Step 1. Connect your iPad and external hard drive using the Lightning-to-USB adapter. To check if your devices are successfully connected, go to the "Files" app on your iPad > "Browse" > you will see your hard drive there.
Step 2. Open the "Photos" app on your iPad and locate the photos you want to transfer. Select the photos and tap the "Share" icon > select the external hard drive.
Step 3. Save the photos from the iPad to the external hard drive.
The above methods can help transfer photos from an iPad to a portable hard drive. You can finish this task with or without a computer. If you want to do this on a computer, you can choose Coolmuster iOS Assistant, which offers a more effortless way. You can freely choose the photos you want from the screen and then transfer them to the hard drive directly. Take a free trial now.
Related Articles:
How to Transfer Photos from iPhone to External Hard Drive in 7 Ways
How to Back Up iPad to External Drive with/without Computer?
2 Easy Ways to Transfer Music from iPhone/iPod to an External Hard Drive
[Solved] How to Use iPhone as USB Drive in a Few Simple Steps


