With high-definition cameras, the iPad can take excellent photos and videos comparable to professional cameras. But photos generally occupy a large space on your iPad. To make your iPad run smoother and make room for new data, you may want to transfer photos from iPad to SD card. Since the iPad does not have a direct SD card slot, it is not easy to export files from iPad to SD card like on other devices.
Can you transfer photos from iPad to SD card? Yes, you can. Learn the four trouble-free methods below to get it done effortlessly.
As everybody knows, every great game or program runs more smoothly on a computer. Therefore, we will first introduce how to transfer photos from an SD card to an iPad with a computer.
What is the best way to transfer photos from an iPad to an SD card? Most people hope they can preview all the pictures while selecting the wanted items in batches. If that is the case for you, make Coolmuster iOS Assistant your prior choice. It allows you to transfer everything from your iPad to an SD card directly after previewing all the contents.
Key features of Coolmuster iOS Assistant:
How do I transfer photos from iPad to SD card?
01After installing and opening the program on your computer, please plug your SD card into the computer via an SD card reader and connect your iPad using a USB cable.
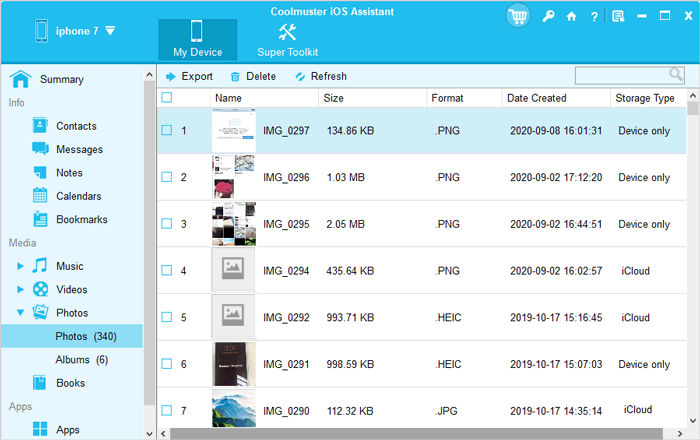
02Generally, the software will detect your iPad automatically. When a pop-up window appears on your iPad, tap the "Trust" option on it and hit the "Continue" button to move on. Once connected, you will see the following home interface.

03Choose "Photos" from the left side, preview the thumbnails, and check the items you want to transfer. Next, tap the "Export" button on the top and select the SD card as the storage place to save the photos.
Video Tutorial:
You can also transfer photos from iPad to SD card via iCloud, provided you have enabled the iCloud Photos feature on your iPad. You can first download iCloud photos to your computer and then transfer them to the SD card. However, the free storage space is only 5GB, and you may need to purchase additional storage. Also, the download and upload speeds depend on the network conditions. (How to free up iCloud space?)
Here is how to download pictures from iPad to an SD card via iCloud:
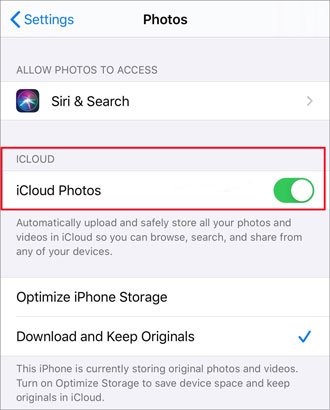
Step 1. On your iPad, go to "Settings" > "iCloud" > ensure that you have signed into iCloud with your Apple ID > tap "Photos" > enable "iCloud Photos".
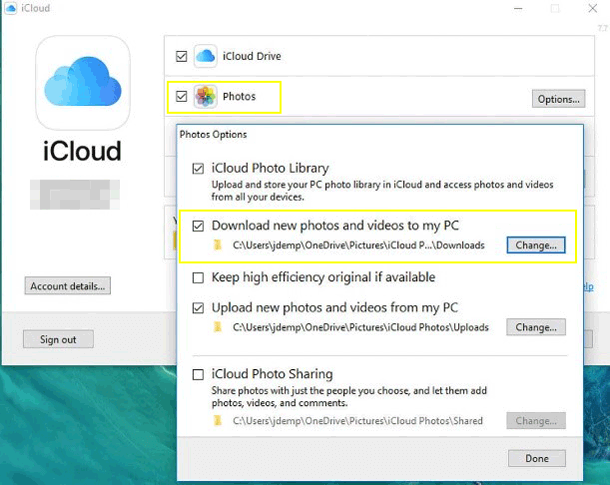
Step 2. On your computer, open iCloud for Windows and log in with the same Apple ID. (If you don't want to download iCloud for Windows, you can directly visit the iCloud website, go to the "Photos" section, and select and download the photos you need to your computer.)
Step 3. Next, click "Photos" > enter the "Options" next to Photos > tap the "Change" button next to the "Download new photos and videos to my PC" option to define output storage > tap "Done" to download the photos to your computer.
Step 4. Insert your SD card into the computer with an SD card reader. Then, copy and paste the downloaded pictures to the SD card.
If you're a Windows user and want to know how to transfer photos from your iPad to an SD card, File Explorer is a simple and efficient option that doesn't require any additional software.
Here is how to copy photos from iPad to SD card using Windows File Explorer:
Step 1. Connect your iPad and SD card to your Windows computer using a USB cable.
Step 2. In File Explorer, locate the "Apple iPad" device and click to open it.
Step 3. Navigate to the "DCIM" folder, where you'll find all your photos and video files.
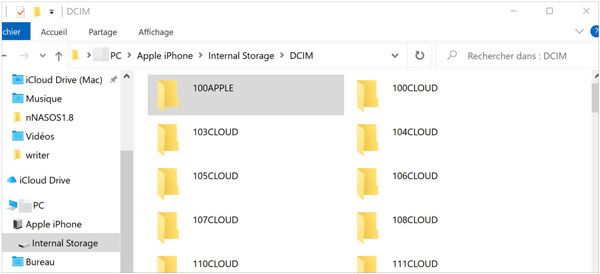
Step 4. Select the photos you want, then copy and paste them into a folder on your computer.
Step 5. Next, open the drive for your SD card and paste the saved photos onto the SD card to complete the transfer.
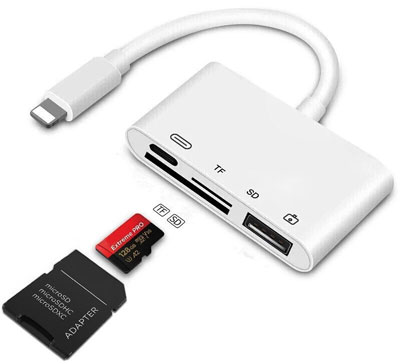
If you want to transfer photos from an iPad to an SD card without a computer, you need to use an OTG adapter to connect the SD card and the iPad. The OTG adapter is easy to get online.
How to transfer photos from iPad to SD card with an adapter?
Step 1. Insert the SD card into an SD card reader and connect the SD card reader to the iPad via an OTG adapter.
Step 2. Open the "Photos" app on your iPad, choose the desired photos, and tap the "Share" icon > select "Save to Files" > select the "DCIM" folder under the USB device to store pictures onto the SD card directly.
Below are some extra tips for using an SD card, and we hope it will do you great favor if needed.
Thanks to the four practical solutions in this post, it is not that hard to transfer photos from an iPad to an SD card. If you ask me which way is the easiest, I will recommend you try Coolmuster iOS Assistant. Besides simplicity, you will also find it the most user-friendly and fastest to use. Most importantly, it allows you to preview all images and pick the specific items to sync.
Please tell us in the comments if anytime you get into trouble. Thanks!
Related Articles:
How to Transfer SD Card to Computer? 3 Faster Methods
How to Move Pictures to SD Card on Android without Trouble [4 Ways]
How to Transfer iPhone Photos to SD Card with/without Computer?
How to Transfer Videos from iPhone to USB Stick with or without a Computer?


