In our daily lives, we often use iPod to take various photos, but storage space will eventually run out. At that point, we need to transfer the photos to a computer for backup and storage. How do I transfer photos from iPod touch to computer? Here, we will offer you eight proven solutions to transfer photos from iPod to computer without any difficulties. Whether you are a Windows or Mac user, we have you covered.
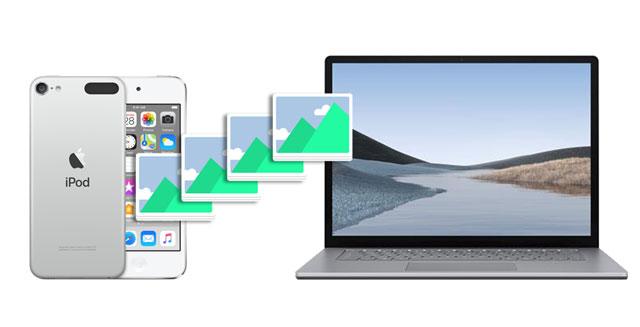
There are many ways to transfer photos from an iPod to a computer. This section mainly introduces methods that are common to both PC and Mac users.
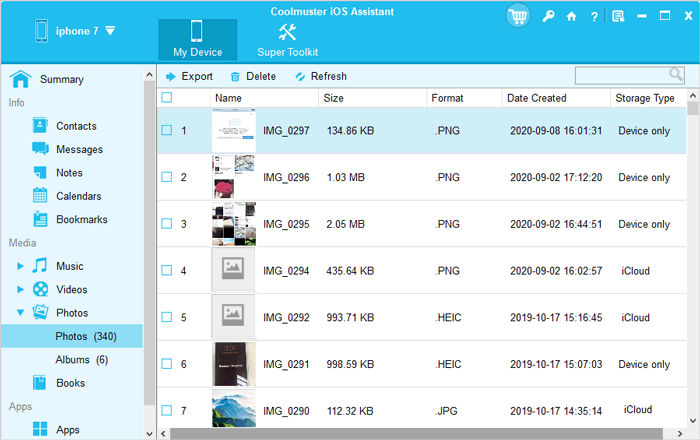
Coolmuster iOS Assistant is a powerful tool that can help you transfer photos from your iPod to your computer with just one click. It is easy to use, has a fast transfer speed, and ensures the original quality of the photos. In addition to iPod devices, it also supports other iOS devices, such as iPhone and iPad. (How to transfer photos from iPhone to computer?)
The highlights of Coolmuster iOS Assistant:
Follow the steps below to get photos off old iPod to your computer using iOS Assistant:
01Install and run this program on your PC or Mac. Plug your iPod into the computer via a USB cable and tap "Trust". When detected, it will display the iPod information on the home interface.

02Choose "Photos" on the left panel and preview all the thumbnails. Next, tick off the pictures you wish to transfer and hit the "Export" button on the top to transfer them to your PC or Mac.
Video Tutorial:
If you don't want to install software, you can use iCloud to transfer your iPod photos to your computer. Just upload photos from your iPod to the cloud via iCloud and then download them to your computer. (How to download iCloud photos to your computer?)
However, this method requires a stable internet connection, and the free storage space is limited, so you may need to purchase additional space.
Here is how to move pictures from iPod to computer with iCloud:
Step 1. Make sure your iPod is connected to Wi-Fi and iCloud Photo Library is enabled.
Step 2. Open iCloud.com on your PC or Mac and sign in with your Apple ID.
Step 3. Select the "Photos" option and locate the photos you want to download.
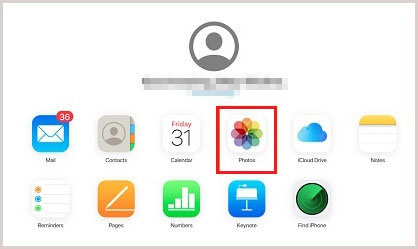
Step 4. Click the download button to save the photos to your computer.

If your iCloud storage is not enough and you don't want to purchase additional space, you can read this article to learn how to resolve it.
iPhone Says Not Enough iCloud Storage But There Is? Find the Fix Here!You can also send photos from your iPod to your email and then download them on your computer. However, this method is only suitable for a few photos. Here is how to download photos from iPod with email:
Step 1. Open the Photos app on your iPod and select the photos you want to send.
Step 2. Tap the "share" button and select "Mail".
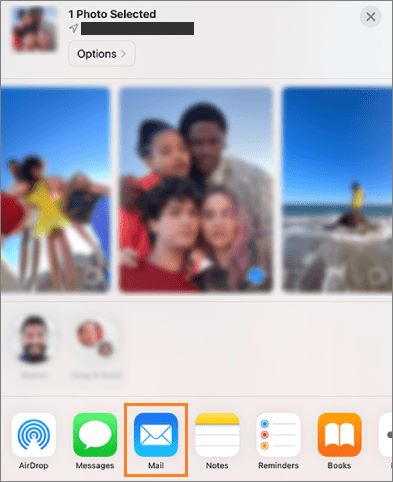
Step 3. Enter your email address and send the email.
Step 4. On your computer, log in to your email account and download the photos from the attachments.
You may own a Windows PC, like Samsung, Dell, HP, etc. For Windows users, in addition to the methods mentioned earlier, there are also some specific transfer methods tailored for PCs.
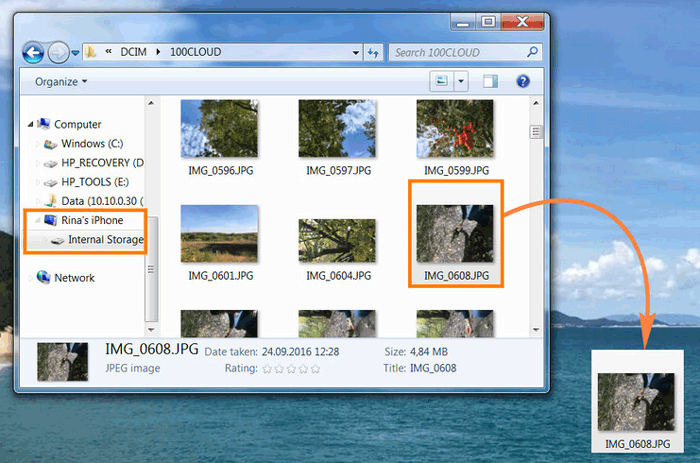
Assume your computer runs Windows 7 or later. You can import photos from iPod to PC using Windows Explorer for free. But it will be time-consuming if you copy images selectively, and it doesn't import photos from your iPod to your PC by albums.
To transfer photos from iPod to PC:
Step 1. Plug your iPod into the computer with a USB cable and tap "Trust" when prompted.
Step 2. On your computer, double-click "This PC" > your iPod name > "Internal Storage" > "DCIM".
Step 3. Pick the specific images you wish to copy and drag & drop them to your computer.
On PCs running Windows 10 or above, the Photos app will be a convenient tool to transfer photos from iPod to the computer. But it may be only workable for DRM-free and unprotected pictures.
How to import photos from iPod to PC Windows 10/11?
Step 1. Unlock your iPod and connect it to your PC Windows 10/11. Then, hit "Trust" on your iPod if asked.
Step 2. Run the Photos app on your Windows PC from the "Start" menu and tap "Import".

Step 3. Choose the "From a connected device" option and select the photos you want to import.
Step 4. Hit the "Import XX items" button below to start the photo migration.
Note: If you can't transfer your iPhone photos to your PC, you can read this article. Read this article to learn why you can't import iPhone photos to your Mac computer.
On most Windows computers, the AutoPlay window will automatically display once it detects a media device on the computer. And when you can plug your iPod into the computer via a USB cable, the system will recognize your iPod as removable storage. That's how this method works.
Follow the detailed steps below to get photos off your old iPod:
Step 1. Connect your iPod to the computer using a USB cable and wait until the computer detects your device.
Step 2. Choose the "Trust" option on your iPod if it asks you to trust the computer. After that, the AutoPlay window will show up.
Step 3. Click the "Import pictures and videos" option on the AutoPlay window and enter the DCIM folder.
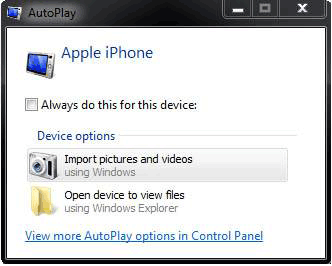
Step 4. Pick the desired photos and copy them to your PC.
If you have a Mac computer and iPod, you can sync iPod pictures to your Mac with the following two quick solutions. (If you are an iPhone user, you can click here to learn how to transfer iPhone photos to your Mac computer.)
You can use the Photos app on your Mac to help you get photos off an old iPod to your Mac within a few steps. Here's how to do it:
Step 1. Connect your iPod to your Mac via a USB cable. Then, unlock your iPod and trust the computer on your iPod.
Step 2. Launch the Photos app on your Mac.
Step 3. Select the iPod photos you wish to transfer to your Mac, and then click "Import". If you've selected specific photos, click "Import Selected" to transfer those photos from your iPod to your Mac.

Another way to transfer photos from iPod to Mac is using AirDrop, the default file sharing app on all Apple devices that run iOS 6 or above or macOS X 10.5 or higher. (AirDrop stuck on waiting?)
Here are the steps:
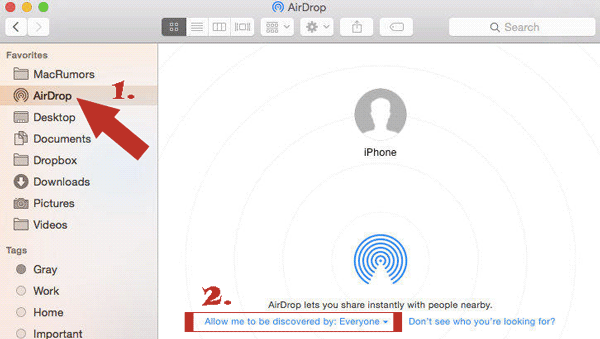
Step 1. Open the iPod's "Settings" > "General" > "AirDrop" > choose "Contacts Only" or "Everyone" to make it discoverable by your Mac.

Step 2. Run Finder on your Mac > tap "Go" > "AirDrop" > choose the "Allow me to be discovered by" option > enable "Contacts Only" or "Everyone".
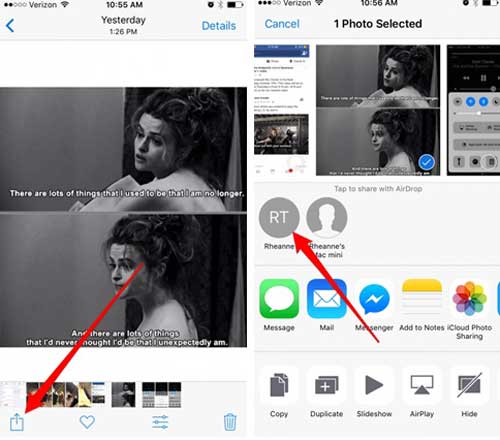
Step 3. Open the Photos app on your iPod, pick the images you want to share, and hit the "Share" icon.
Step 4. Choose your Mac's name > and hit "Send". Afterward, click "Accept" on your Mac to download the image files to your Mac.
As you can see, it's easy to transfer photos from iPod to computer PC or Mac. Coolmuster iOS Assistant is the once-for-all option to get photos off an old iPod since it works on both PC and Mac. Moreover, it enables you to preview all iPod photos and choose the wanted images to transfer in one click. Of course, other methods also work for syncing photos from iPod to the computer. You can choose them accordingly.
If you find this article helpful, please share it with more friends. Thanks!
Related Articles:
How to Transfer Music from iPod to Computer [7 Easy Ways]
How to Transfer Photos from iPhone to PC Windows 10/11 in Minutes
How to Transfer Videos from iPhone to Computer? 9 Ways You Can't Miss
7 Effective Ways to Transfer Files from iPhone to Mac with Ease


