Have you ever found yourself stuck with a bunch of photos on your Mac, that you desperately want on your iPhone? Maybe you've just edited some amazing shots from your latest adventure and want to post them on Instagram or share them with family. It might seem daunting to add photos from Macbook to iPhone, but it doesn't have to be.
In this article, we'll explore straightforward solutions to help you quickly and easily transfer your photos from Mac to iPhone, making sure you never miss a moment to share your favorite memories. So, let's get started.

Transferring photos between your Mac and iPhone is easy with the Photo Transfer. It is an intelligent iOS file transfer program that lets you sync and seamlessly manage various data like photos, contacts, music, notes, messages, calendars, and more from an iOS device.
Some key features of Photo Transfer are as follows:
Here is a free trial of Photo Transfer.
Here's how to import photos from Macbook to iPhone:
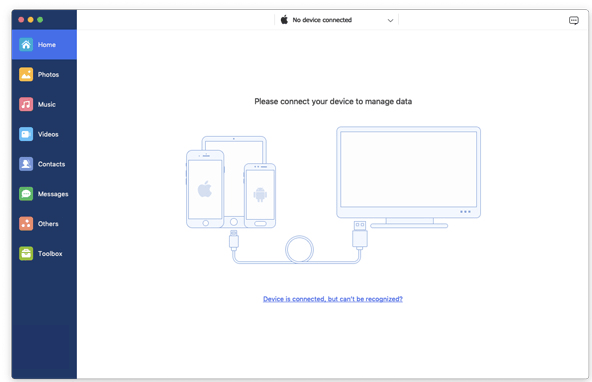
01Start by downloading and installing Photo Transfer on a Mac computer, then connect your iPhone to your Mac with a lightning cable.
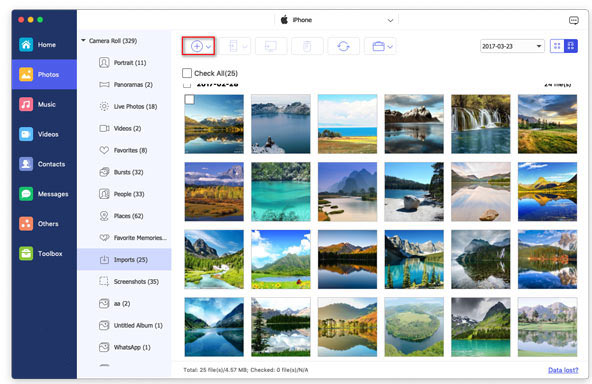
02Tap on "Photos" > tap the "Add" button. Choose the file you wish to transfer, check it, then hit "Open". After a few seconds, you can locate the transferred file on your iPhone's Photo Library.
Before syncing photos from your Mac to your iPhone, be aware that all media files on your iPhone will be erased. This is important and should be considered before proceeding with the syncing process.
Starting with macOS Catalina, Finder replaces iTunes, and all its functions are integrated into Finder. Therefore, macOS Mojave and earlier versions will use iTunes, while macOS Catalina and later versions will use Finder.
So depending on the version of your Mac computer, follow these steps to sync files with your iPhone:
Using iTunes:
Step 1. Connect the iPhone to the Mac computer. Once iTunes opens, click the device button and select "Photos".
Step 2. Check the "Sync Photos" option and choose which photos you want to transfer.
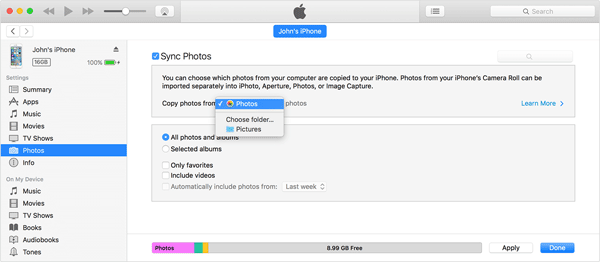
Step 3. Hit "Apply" to sync your photos to your iPhone from your Mac.
Using Finder:
Step 1. Launch Finder, then connect the iPhone to your computer with a lightning cable. Unlock it and trust your Mac.
Step 2. Select your iPhone, followed by the category to share. Check "Sync" and choose photos to be shared.
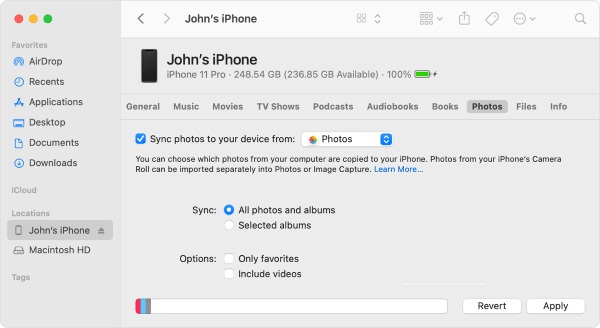
Step 3. Tap "Apply" to transfer your files.
Step 4. Once done, check the transferred items in the Photos app on your iPhone.
iCloud is also a better way to transfer photos from Mac to iPhone. However, iCloud Photos should be enabled on the Mac so that your photos can sync to your iCloud account. Besides, ensure there's sufficient space in iCloud. Your iPhone should have Photos App installed.
Step 1. Head to Settings on your iPhone and tap on the option for "your name". Choose "iCloud".
Step 2. Next, navigate to "Photos" and then enable "iCloud Photos".
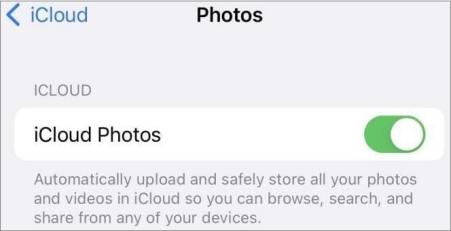
Step 3. Go to the Apple menu on your Mac and click "System Preferences".
Step 4. Then choose "iCloud" and log into your account. Once done, click "Options", then enable iCloud Photos, and hit "Done".
Can't Miss: If you can't import photos from iPhone to Mac, here are the real fixes.
You can transfer photos from your Mac to your iPhone using AirDrop, a great wireless transfer feature. You just have to turn it on before you can share photos between two Apple devices. Before using AirDrop, you must ensure Wi-Fi and Bluetooth are enabled on both devices and that any personal hotspots are off.
Ensure your AirDrop settings are set to "Contacts Only" or "Everyone" instead of "Receiving Off", and place your iPhone and Mac near each other. After ensuring everything is set, you can follow these steps to move your photos:
Step 1. Enable AirDrop on Mac by heading to "Finder" and clicking the "Go" menu. Then select "AirDrop" and turn on "Bluetooth" and "Wi-Fi". Under the "Allow to be discovered by" option, choose "Everyone" or "Contacts Only".
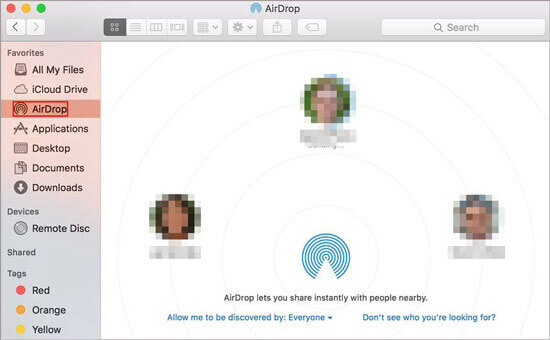
Step 2. Next, you should activate AirDrop on an iPhone. Swipe up or down on your phone's screen to open the "Control Center". Next, select AirDrop and set your iPhone to be discoverable by "Contacts Only" or "Everyone".
Step 3. After successfully connecting your Mac and iPhone, you can now start sharing pictures between these devices. There are two ways to use AirDrop. You can drag the pictures you wish to share from a Mac to an iPhone to the recipient's picture and tap "Send".
Alternatively, you may choose the "Share" icon in the app. Select "AirDrop", then select the recipient, and hit "Done".
Google Photos app is a cloud storage service that lets you share photos between devices. All you need is the same account on both devices and enough storage in iCloud; just follow a few simple steps.
Step 1. First, upload photos from your Mac to Google Photos. You can do it directly from the Google Photos application if it's not installed on a Mac. Or, you can go to the Google Photos website and sign in to your account. After that, tap the "Upload" tab to send the photos to iPhone.
Step 2. Install the Google Photos application on your iPhone and log in using the account to upload the photos on your Mac.
Step 3. Once you've imported photos from your Mac, you will see them in the app. Choose the photos you want and download them to your iPhone.
Dropbox is a cloud storage service that can keep all your files organized online for easier access. So, no matter where you are, you will have all your photos within seconds, as long as you have an internet connection. But Dropbox requires lots of data for both uploading and downloading files. Here's how to export photos from Macbook to iPhone using Dropbox:
Step 1. First, download, and open the Dropbox application on Mac. Then, choose the pictures to upload and hit the "Upload Photos" button. After uploading all the images, you will get them on your Dropbox account.
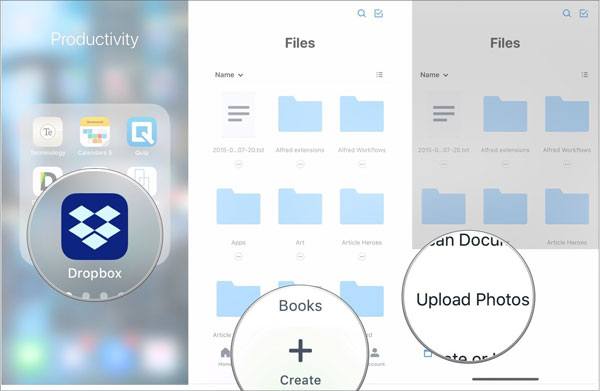
Step 2. Go to App Store and install the Dropbox app on your iPhone. After installing it, open and log in to your account to download your pictures.
Step 3. Select the images and download them to your iPhone.
Note: There is a risk of losing data and a restriction on how much data can be transferred or uploaded. You can only upload files up to 2 GB. This will limit someone who regularly moves photos between devices. So, the best solution is to use Photo Transfer software.
That's all on how to move photos from Macbook to iPhone. We've narrowed down the top options for you. In recap, we can say iTunes involves a tedious process with potential data loss. Even though iCloud photos offer accessibility across various devices, it also presents a risk of severe data loss, making it impractical to transfer large, high-quality images.
On the other hand, Airdrop uses Wi-Fi and Bluetooth, minimizing data loss problems during transfers, but it can be unreliable and insecure. Google Photos also comes with a storage limit. And Dropbox? While it's a solid option, its 2GB file transfer limit makes it not a good option.
So, the best solution to transfer photos from your Mac to your iPhone is through Photo Transfer. It is the easiest and most hassle-free solution for transferring photos between devices.
Related Articles:
How to Sync Contacts from Mac to iPhone with 4 Simple Ways (Must Read)
How to Transfer Files from iPhone to Mac without iTunes [Full Guide]


