
How to Transfer Videos from Mac to iPad? (Step-by-step Tutorial)

Whether it's for watching movies on the iPad or showcasing a short film you've made, transferring videos or other files from a Mac to an iPad is a common need. Fortunately, Apple offers users several methods to easily achieve this. This article will detail how to transfer videos from Mac to iPad in four effective ways. Let's look at them one by one.
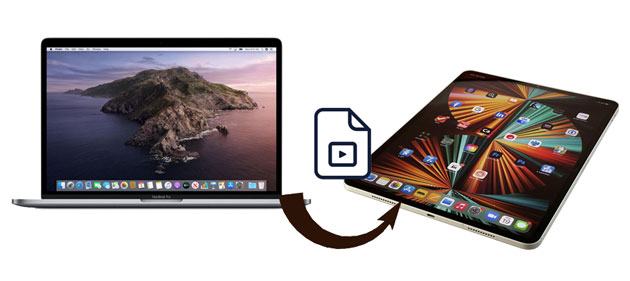
Wonder how to batch-import videos from Mac to iPad selectively? You cannot miss iPad Video Transfer. With this powerful software, you can transfer videos and other files from Mac to iPad or iPad to Mac without quality loss, including movies purchased from the iTunes Store, downloaded from YouTube, and recorded camera videos.
The key features of iPad Video Transfer:
How do I transfer videos from my Mac to my iPad without iTunes? Here are the steps:
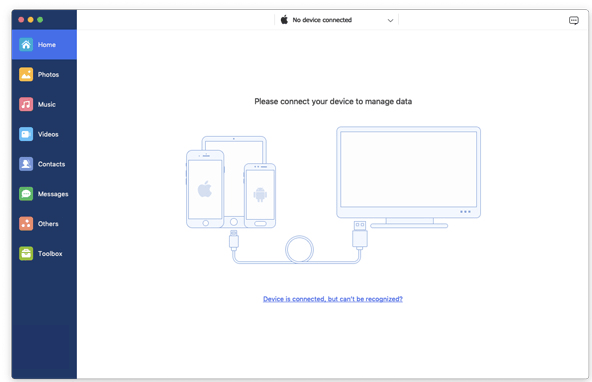
01After downloading the software on your Mac, install it and connect your iPad to it via a USB cable. Later, the program will detect your iPad automatically and scan the files on your iPad.
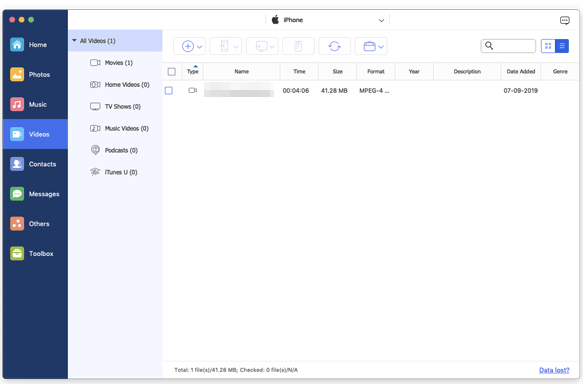
02Click "Videos" on the left panel of the main interface and wait for all the movies to be loaded successfully. Then, select a video folder you want to transfer, hit the "Add" icon on the top, and choose the desired videos on the screen. Finally, click the "Open" button to import them to your iPad.
If you don't want to download software, you can also use Apple's official tool to transfer videos from Mac to iPad.
If you are using older versions of macOS, you can still import videos from Mac to iPad using iTunes. However, the syncing process may erase the existing media files on your iPad.
Here is how to transfer videos from Mac to iPad using iTunes:
Step 1. Connect your iPad to the Mac via a USB cable and launch iTunes if it doesn't open automatically.
Step 2. Click "File" > "Add to Library", locate the videos you want to transfer and tap "Open" to import them to the iTunes library.
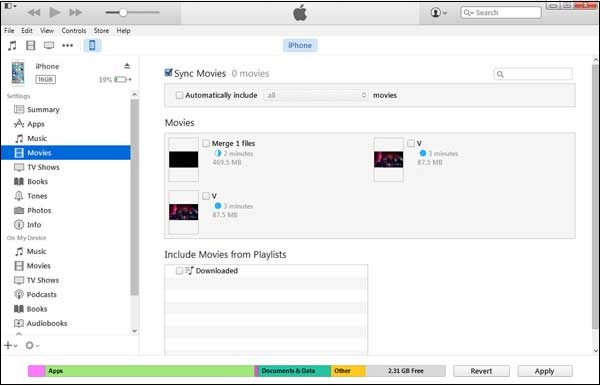
Step 3. Click the iPad icon in the iTunes window and select "Movies" under "Summary".
Step 4. Check the "Sync Movies" option, pick the videos you wish to transfer, and hit the "Apply" button.
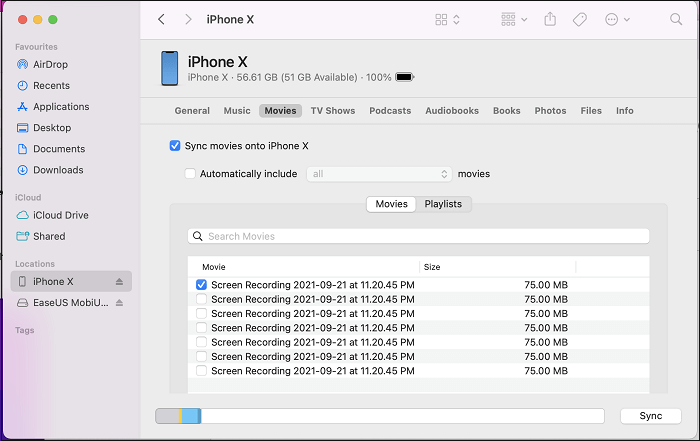
If you use a Mac with macOS Catalina and higher versions, you can transfer videos from Mac to iPad via Finder. The following steps show you how:
Step 1. Connect your old iPhone to your Mac and open Finder.
Step 2. In Finder, select your device and click on "Movies".
Step 3. Check the box for "Sync movies onto iPhone [your iPhone's name]" and click "Sync". Confirm the sync when prompted.
Step 4. Once the sync is complete, you can find the videos on your iPhone/iPad.
Can you AirDrop videos from Mac to iPad? Sure. AirDrop is a wireless way to connect and sync data between the Mac and iPad. Therefore, if you prefer a wireless way to transfer videos from Mac to iPad, you can place them nearby and start with the instructions below.
How do I transfer videos from my Mac to my iPad via AirDrop? Here are the steps:
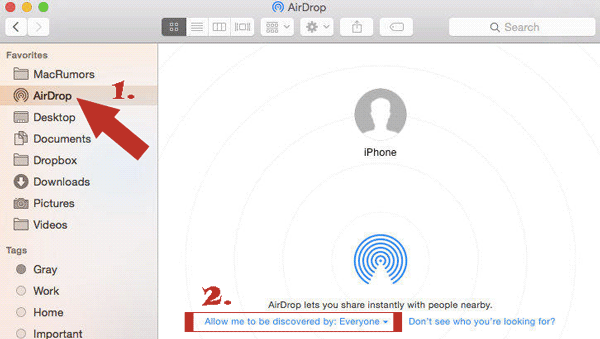
Step 1. Open Finder on your Mac and choose AirDrop from the left window. After that, make it discoverable by "Everyone".
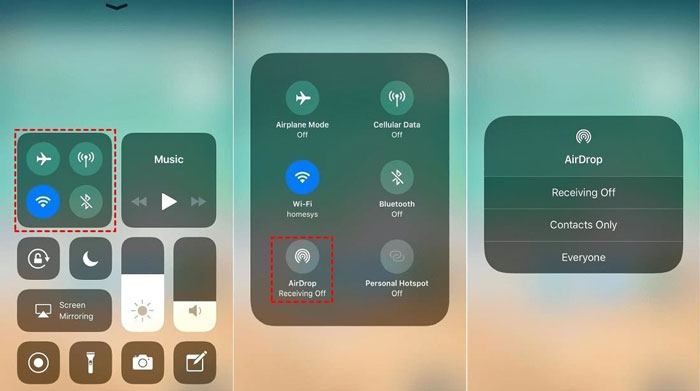
Step 2. Enable "AirDrop", "Bluetooth", and "Wi-Fi" from the Control Center on your iPad and make it visible to "Everyone". (AirDrop not working on iPhone/iPad?)
Step 3. On your Mac, drag the videos you want to transfer to the recipient image in Finder and tap "Send". Or, click the "Share" icon inside an app > select "AirDrop" > choose the recipient > hit "Done" to send videos from your Mac to your iPad.
For users who only need to transfer a small number of video files, email is a simple and quick method. You can send the video files as attachments to yourself and then download them on your iPad. While this method is suitable for smaller video files, it may be limited by attachment size for larger files.
Here is how to transfer videos from MacBook to iPad using email:
Step 1. Open the "Mail" app on your Mac and compose a new email.
Step 2. Add the recipient and click the attachment icon to select the video file, then send the email.
Step 3. Open the "Mail" app on your iPad, find and open the email.
Step 4. Download the attachment and save or watch the video.

Now that you have mastered four ways to transfer videos from Mac to iPad, you may wonder which one is the best choice. It's hard to see which way is the best to choose since they all have distinct advantages. But if you are looking for an easier way to selectively transfer videos without size limitations and data loss after preview, I recommend you try iPad Video Transfer. It is much simpler than other methods and won't consume the network during transfer.
What's more, you will get instant technical help anytime you run into trouble.
Related Articles:
[Step-by-Step Guide] How to Transfer Videos from iPhone to iPad?
How to Transfer Videos from Android to iPad with/without Computer
How to Transfer Files from PC to iPad with or without iTunes?
[Guide] How to Transfer iPad Photos to Mac via USB and Wirelessly?


