
4 Easy Ways | How to Transfer Voice Memos from iPhone to Computer?

In daily life and work, we often use the voice memo feature on the iPhone to record important information, meeting contents, or sudden inspirations. However, as these voice files accumulate, a problem arises. We all know that iPhone storage space is limited, so if you want to record more and more voice memos in daily life and work, it's best to transfer some older voice memos from your iPhone to your computer to free up more space on your iPhone. This article will detail four methods on how to transfer voice memos from iPhone to computer, helping you manage these valuable data easily.
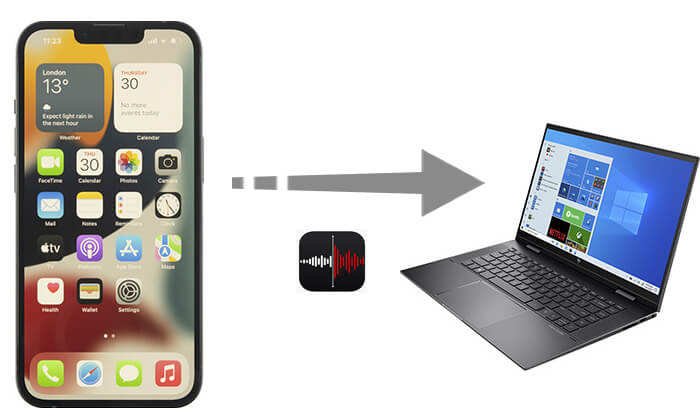
If you are looking for the fastest and simplest way to transfer voice memos, Coolmuster iOS Assistant is your best choice. It is a powerful iOS data management tool that can quickly and securely transfer data from your iPhone to your computer, not limited to voice memos. With just a few simple steps, you can easily complete the transfer.
Main features of Coolmuster iOS Assistant:
Here is how to transfer voice memos from iPhone to PC using iOS Assistant:
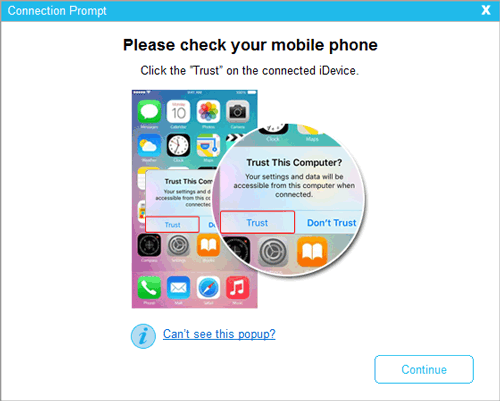
01Download and install the right version of this program on your PC or Mac. Connect your iPhone to computer via USB cable and then launch the program, you'll get a interface just like the below. Please follow the onscreen prompt to tap "Trust" option on your device and click "Continue" option on the program to move on.
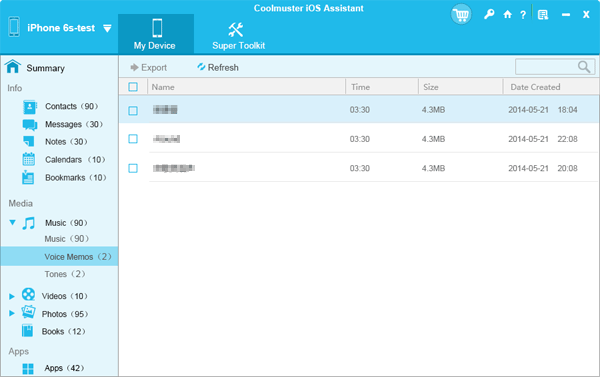
02When your iPhone has been connected to the program successfully, you will see the main interface of the program with your device info and manageable file types for your iOS device.

03Click "Music" > "Voice Memos" on the left panel, you'll see all voice memos on your iPhone will be listed in the right panel. You can select the wanted voice memos and hit the "Export" button to export from your iPhone to your local drive on the computer immediately.
Video Tutorial:
Another great option to transfer voice memos is using iCloud. It allows you to wirelessly transfer your voice memos from iPhone to computer without needing a USB cable. All of your Apple devices will automatically sync your recent voice memos. You have two options to choose from. One option is to use iCloud to sync your voice memos across both devices, and the other is to use iCloud Drive to export the voice memos to your computer.
If you are a Mac user, you can download and edit your recordings on your Mac by syncing voice memos over iCloud. Here is how to take voice memos off iPhone to Mac:
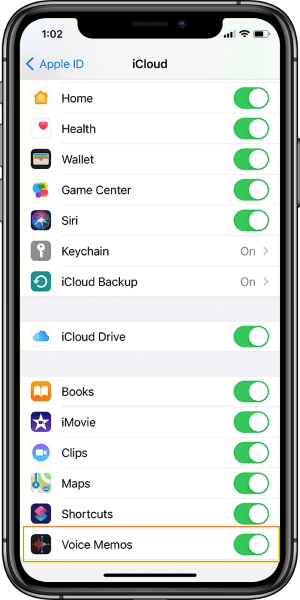
Step 1. On your iPhone, go to the "Settings" app and tap "iCloud".
Step 2. Scroll down to find "Voice Memos" and toggle it on.
Step 3. On your Mac, choose the Apple menu and select "System Settings".
Step 4. Click "iCloud" on the right, then select "Options" next to "iCloud Drive".
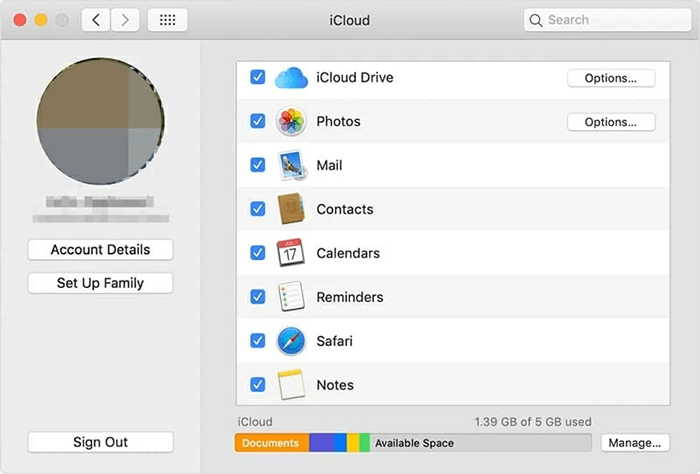
Step 5. Enable "Voice Memos" in the list. Your voice memos should now sync from your iPhone to your Mac.
If you want to learn more about how to transfer voice memos from your iPhone to your Mac, you can read the following articles:
How to Transfer Voice Memos from iPhone to Mac in 1 ClickIf you don't own a Mac, you can export voice memos to iCloud Drive and download them onto your Windows PC. Here's how to get voice memos from iPhone to PC:
Step 1. In the Voice Memos app, select the recordings you want to export.
Step 2. Tap the three-dot icon.
Step 3. Select "Save to Files" from the Share menu. If it doesn't automatically open to iCloud, tap "iCloud Drive".
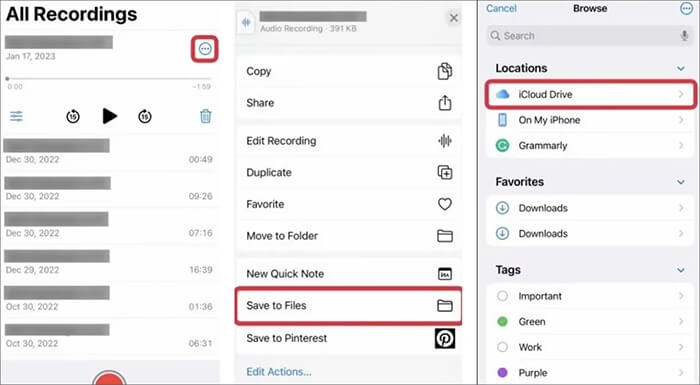
Step 4. Select a destination folder to save the recordings.
Step 5. Access the voice memos in iCloud Drive on your computer.
iTunes can also be a useful tool for transferring voice memos from your iPhone to your computer. If you use a PC, you can transfer voice memos using iTunes. This is also possible on Macs, but only on those running Mac OS 10.14 Mojave or earlier versions of the system software.
Here is how to import voice memos from iPhone to computer with iTunes:
Step 1. Ensure you are using the latest version of iTunes.
Step 2. Run iTunes and connect your iPhone to the computer using a USB cable.
Step 3. Click the iPhone icon in the left sidebar, and then choose "Music" from the sidebar.
Step 4. Check the "Sync Music" box, and be sure to also check the "Include voice memos" box.
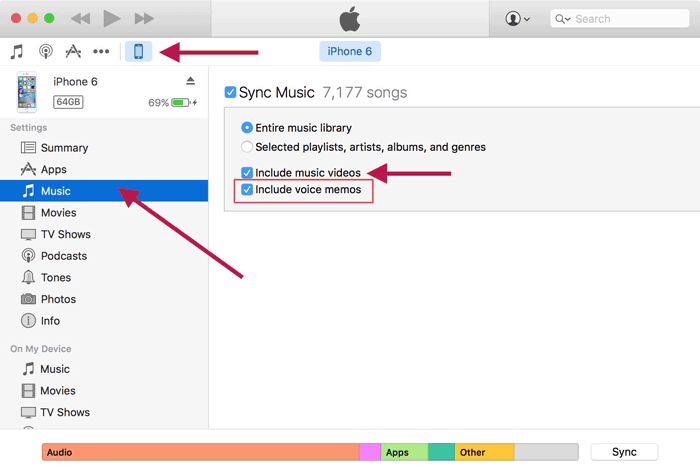
Step 5. Finally, click the "Apply" button.
The built-in sharing feature of iPhone Voice Memos can also be used to transfer voice memos.
You can send individual voice memos from your iPhone to any other service, such as Mail, Google Drive, Gmail, etc. Later, you can receive these items by logging into these services' accounts on any device. Here, we take Mail as an example. This method works well when there are only a few voice memos to be transferred.
Here is how to download iPhone voice memos to computer with Mail:
Step 1. Launch the Voice Memos app on your iPhone.
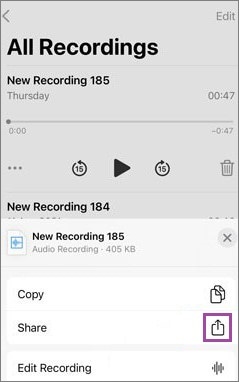
Step 2. Select the voice memos you want to transfer, tap on the three-dot icon, and choose the "Share" option.
Step 3. On the share screen, select the "Mail" option to transfer your voice memos to your computer via email.
Step 4. Enter your own email address in the "To" field and hit "Send".
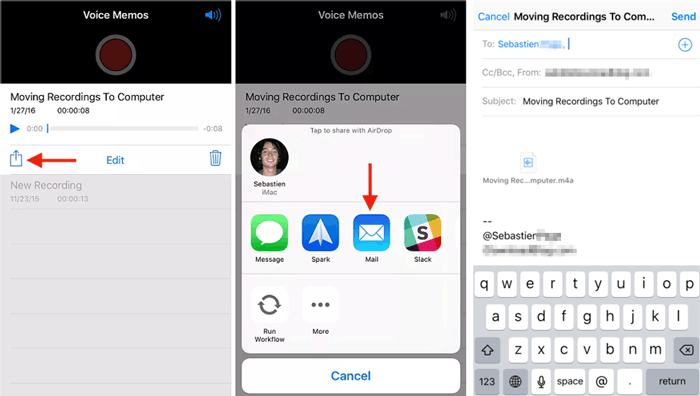
Step 5. Open your email inbox on your computer and download the memo you just sent to yourself.
If your target device is an AirDrop-supported iOS device, such as a Mac, iPad, or another iPhone, the sharing feature also allows you to transfer voice memos via AirDrop. Here is how to pass voice memos from iPhone to computer via AirDrop:
Step 1. Ensure that AirDrop is activated on both the iPhone and Mac.
Step 2. Open the Voice Memos app on your iPhone and choose the voice memos you want to transfer to your Mac. Then, tap the "Share" button.
Step 3. In the pop-up menu, opt for the "AirDrop" option.
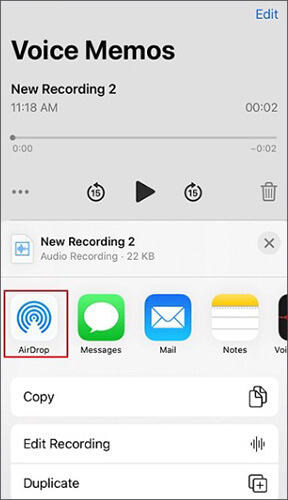
Step 4. Your Mac should appear in the AirDrop section on your iPhone. Tap it, and the selected memo will be sent to your Mac via AirDrop.
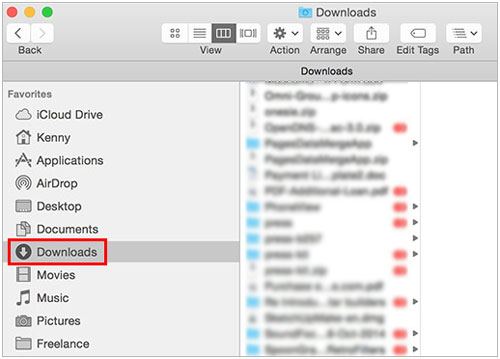
Step 5. Navigate to the "Downloads" folder on your Mac to find and access the received voice memo. (Click here to learn where AirDrop files go on your iPhone or Mac.)
That's all about how to transfer voice memos from iPhone to computer. Regardless of which method you choose, you can easily transfer voice memos from your iPhone to your computer. However, considering ease of operation and efficiency, it is recommended to use Coolmuster iOS Assistant. This software not only quickly transfers voice memos but also supports the management of various other data types, truly achieving a one-click solution that saves time and effort.
Related Articles:
How to Transfer Voice Memos from iPhone to iPhone? [Top 6 Ways]
How to Send Large Audio Files from iPhone to Android, Computer and Cloud
[3 Ways] How to Make a Voice Memo a Ringtone on iPhone Effortlessly?
How to Recover Voice Memos from iCloud Smoothly | 2 Advanced Solutions


