
How to Downgrade from iOS 17 to iOS 16 Without Losing Data in 4 Ways

Since the new iOS 17 release, users have been eager to experience its new features. However, the new iOS 17 is still in its new stages and may have countless bugs and glitches. In that case, it is advisable to roll back and wait until the iOS 17 is stable. However, downgrading from iOS 17 can result in data loss. So, how to downgrade from iOS 17 to iOS 16 without losing data? Read this guide to learn how.

Downgrading from iOS 17 to iOS 16 will erase all your data. To prevent this, back up your device before removing the iOS 17. Below are different ways to back up an iPhone before a downgrade:
Coolmuster iOS Assistant is the best iOS manager that helps users easily backup, restore, transfer, and organize their iOS files. With this tool, you can back up your whole iPhone to your computer or selectively back up your iPhone data, such as messages, contacts, calendars, photos, music, videos, books, apps, bookmarks, notes, etc. to your computer.
Key Features of Coolmuster iOS Assistant:
Steps to back up iPhone data via Coolmuster iOS Assistant:
01Launch Coolmuster iOS Assistant on the computer and connect your iPhone. Hit Trust and tap on Continue to proceed.
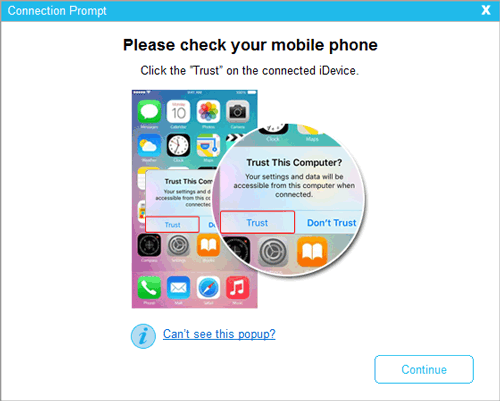
02When the software detects your device, you will see all files arranged on the primary interface in categories.

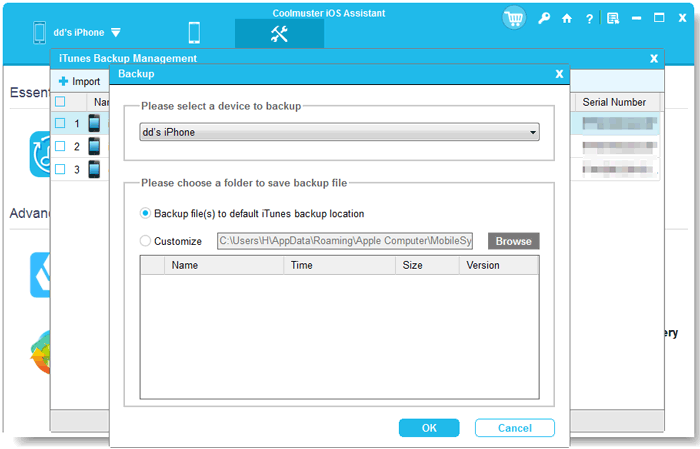
03To back up your whole iPhone, go to Super Toolkit > iTunes Backup & Restore > Backup. Select the device you want to back up, click Browse to choose a location to store the backup files, and then tap OK to start the backup process.
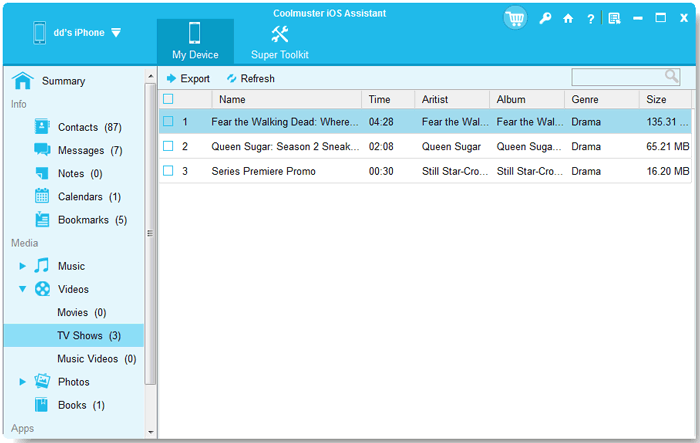
To selectively back up your iPhone data, for instance, to transfer videos, click the Videos folder on the left panel to open more detailed info on the right. Preview as you select the videos you wish to export to the PC. Tap the Export option to back up the files to the computer.
Video Tutorial:
iCloud is an essential cloud service developed by Apple to allow users to sync data across devices. Therefore, you can keep your data in iCloud before removing your iOS 17. You don't need a computer to back up data.
Below are steps to use iCloud to back up your iOS device before a downgrade:
Step 1. Launch Settings on the phone, select your device's name, and select iCloud.
Step 2. Find the iCloud Backup option and click on it. Turn on automatic backups and click on the Back Up This iPhone button to create a backup of your device.
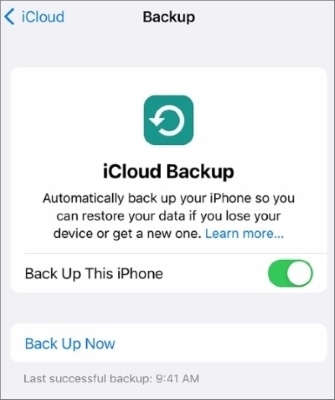
Note that iCloud backs up data on the server and has a limited free storage space of only 5GB. When the free storage is exhausted, you will have to buy an additional space.
Wondering how to get more iCloud storage space? Check out this guide >
Not Enough iCloud Storage? Fix This Issue with This Full GuideApart from iCloud, you can also use iTunes to back up your device. You only need a computer and a USB cable to complete the task. After creating the backup, you can restore your files quickly after downgrading your iOS 17. Here is how to back up data via iTunes:
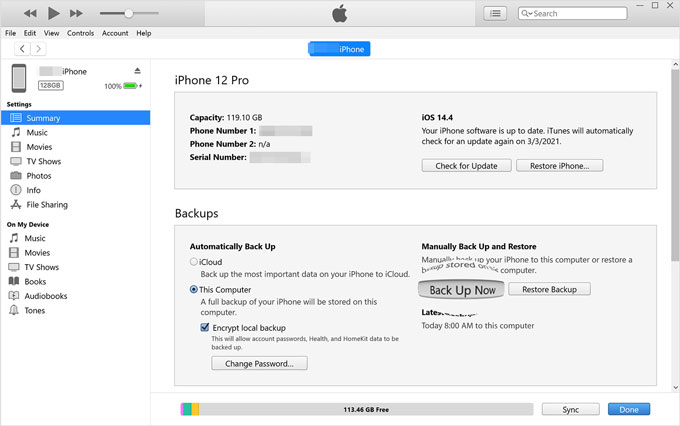
Step 1. Open iTunes on the computer, then connect your iPhone to the PC using a cable.
Step 2. From there, tap on the iPhone button at the upper part of the screen, then head to the Summary section.

Step 3. Choose This Computer under the backups as your backup destination. Tap Back Up Now. Now, wait for the program to back up your device.
After you back up your iPhone, you can downgrade iOS 17 to iOS 16 now. Here, we will show you various ways to roll back iOS updates. Let's look at them one by one.
The best and most effective way to downgrade iOS is to use iOS System Recovery. It is a reliable and powerful iOS downgrader tool that can help you return to your previous iOS version in a few clicks. It provides a much safer way since there is no data loss. Besides, it can also fix many other iOS-related problems, like the iPhone stuck in headphone mode, Apple logo, etc.
Here's how to downgrade your iPhone using the iOS System Recovery:
01Download and install the program on the computer. Open after installing it by following the instructions on the screen. Next, select the iOS System Recovery option from the primary interface. Plug your iPhone into the computer with a USB and hit Trust if prompted.
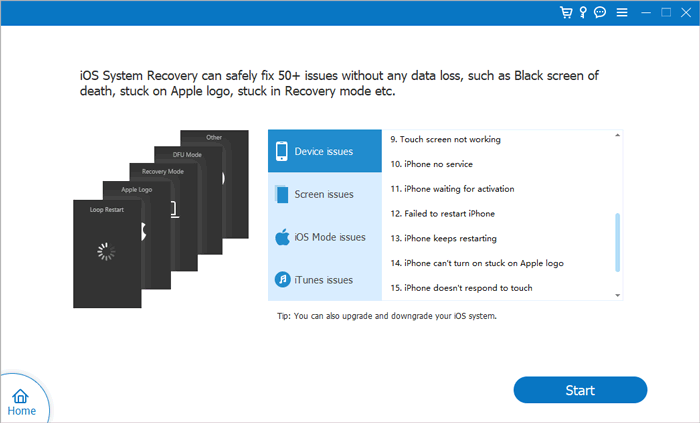
02From the popup, you'll see several issues the tool can fix. Next, tap the Start button to proceed.
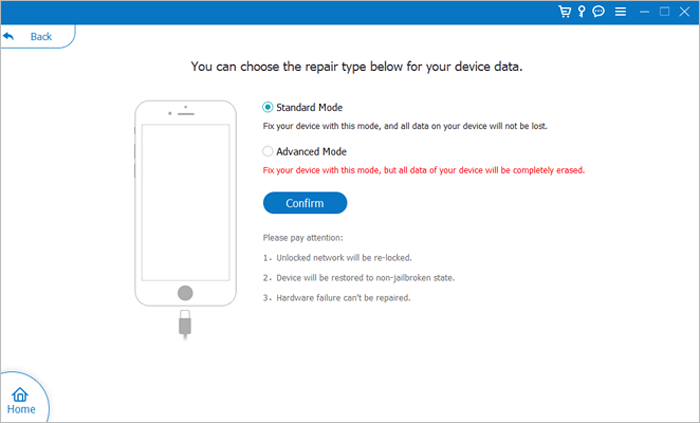
03Choose either Standard Mode or Advanced Mode. The tool will recognize basic info about the iPhone. Tap Confirm to continue.
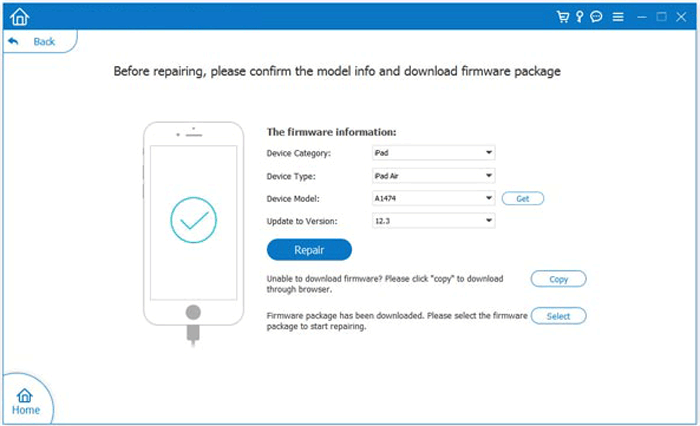
04Click the Repair button to begin downloading the firmware package and fixing your iOS device.
Apart from acting as a backup program, iTunes is a great service to downgrade iOS 17 to iOS 16. Below are steps to downgrade to older iOS via iTunes:
Step 1. Put your iPhone into recovery mode. To do this, press and quickly release the Volume Down button, then do the same with the Volume Up button. Next, press and hold the Side button until the recovery mode screen appears. (Is the iPhone stuck in recovery mode?)
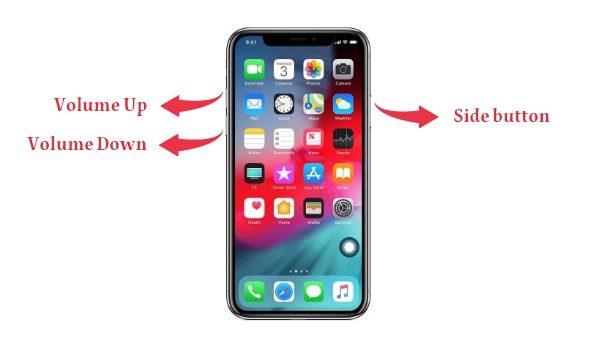
Step 2. iTunes will automatically detect your device in recovery mode, and a pop-up window will appear on the screen. Click Restore, and iTunes will start downgrading or restoring your device to iOS 16. Be aware that all data will be erased.
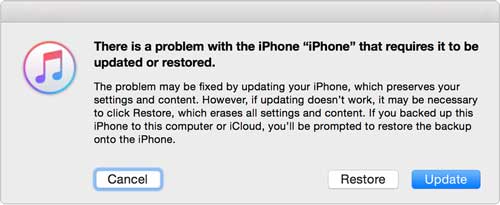
Step 3. The entire process may take a few minutes, so be patient until it finishes. Once complete, restore your iPhone data from your iCloud or iTunes backup.
Another method to downgrade iOS 17 to iOS 16 is by removing the iOS 17 profile in the Settings app. Here are the steps:
Step 1. Open Settings application on iPhone/iPad. Scroll down to General and click on it.
Step 2. Find VPN & Device Management and click on it.
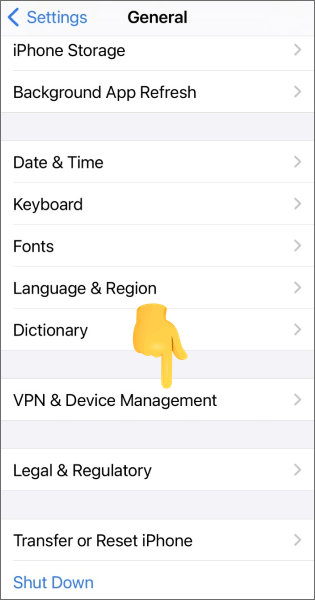
Step 3. Click on iOS 17 Software Profile and choose the Remove Profile option, then confirm the selection.
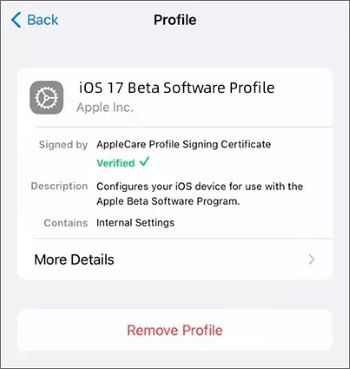
Step 4. Finally, restart the device.
You can also use 3uTools to downgrade iOS, but you require stable internet, install 3uTools, and a USB to connect the phone to a computer. You should also turn off the Find My iPhone feature and ensure you've created a backup.
Here are steps to downgrade from iOS 17 to 16 via 3uTools:
Step 1. Open 3uTools on the computer, then connect the iPhone to the PC with USB. Your iPhone should appear in the 3uTools interface after it is detected successfully.
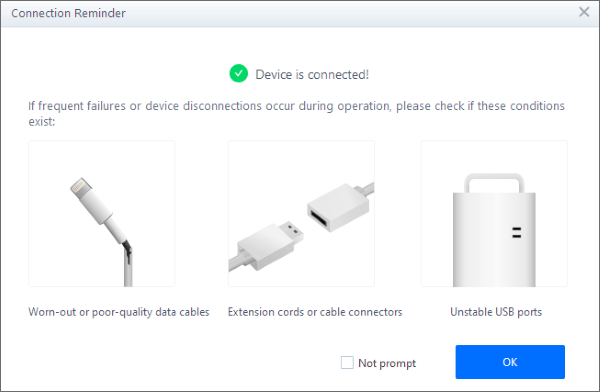
Step 2. Tap the Flash & JB button at the top of the interface for more flashing options. The current installed iOS version will be shown, and other compatible iOS versions you can install on the phone. Choose the iOS version to downgrade.
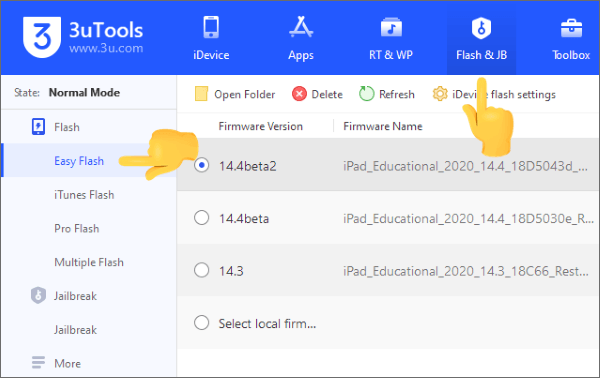
Step 3. Choose Easy Flash at the bottom and tap the Flash option at the lower right corner. It will begin flashing the chosen firmware file on the iOS device.
Step 4. Wait for the downgrade to finish, and your iDevice will automatically reboot after the flashing completes.
After reading this guide, you will know that it is possible to downgrade from iOS 17 to iOS 16. iTunes is a valuable service that can help you with this process. Also, tools like 3uTools can come in handy. However, iOS System Recovery seems the easiest option to perform a downgrade, providing more convenience and speed to get this job done and without data loss. Its advanced features come in handy while trying to fix issues in your device.
Either way, ensure you back up your iPhone with Coolmuster iOS Assistant before rolling back an iOS update, as it will help to avoid data loss.
Related Articles:
How Long Does iOS 17 Take to Install? Find the Answer Here!
13 Proven Ways to Overcome iOS 17 Not Installing Challenges
How to Fix iOS 17 Not Showing Up on My Phone? [6 Fixes]
iOS 16/17 iMessage Not Working [11 Basic Tips & 1 Ultimate Repair]