
[Solved] iPhone Photos Not Showing Up on PC? Quick Solutions Here!

"iPhone photos not showing on PC. When transferring photos from my iPhone 6 Plus (using iOS 8.3) to my PC, only some of the photos are showing up in the DCIM folder. The rest of the photos are missing. For example, I have 540 photos on my phone that I wanted to copy over. Only ~140 of them show up in Windows Explorer to be transferred. Where are the rest of the files and how can I make sure I'm not missing any?"
- from Apple Community
In daily life, many users are accustomed to transferring photos from their iPhone to a PC for backup or editing. However, sometimes, after connecting the iPhone to the PC, the photos on the iPhone fail to show up on the PC, preventing users from completing the desired tasks. This article will explain why this issue occurs and introduce several common methods to fix the problem of iPhone photos not showing on the PC.
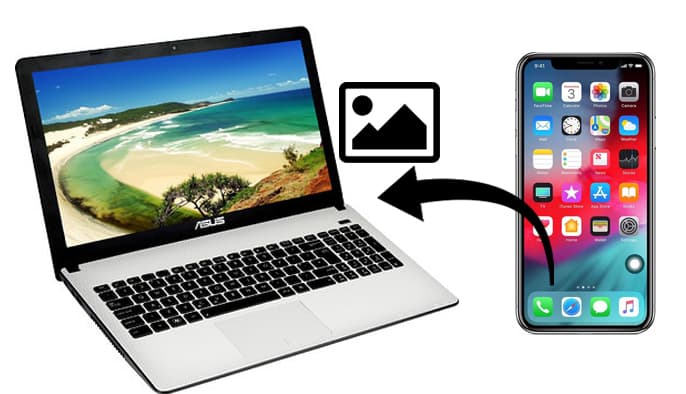
Here is a list of factors for the iPhone not showing all photos on computer:
However, this is not the end of the world when you can't view iPhone photos on PC. The following tips have proved to be useful for showing iPhone photos on a PC. Simply check these fixes out:
To protect the information of iOS users, the DCIM folders containing your photos are not accessible to the computer when your iPhone is locked. Please check if your iPhone is locked.
If it is, unlock your iPhone and reconnect it to the computer. You should then be able to access the DCIM folder under Apple iPhone to view your photos.
Believe it or not, the USB cable might be the reason you can't access photos on iPhone from PC. A frayed or loose cable can result in poor connectivity. Try using a different USB cable, tap "Trust" in the pop-up window, and then open your PC to import photos from your iPhone.
iPhone pictures not showing up on PC may indicate that your computer doesn't have the necessary permissions to access them. When you connect your device, a pop-up window will prompt you for authorization. If you don't grant permission, you can't see iPhone photos on PC. To resolve this issue, simply follow the guide below:
Step 1. Connect your iPhone to your computer using a USB cable.
Step 2. Open iTunes > Click on "Menu" > Go to "Account" > Select "Authorizations" > Choose "Authorize This Computer" > Enter your username and password.
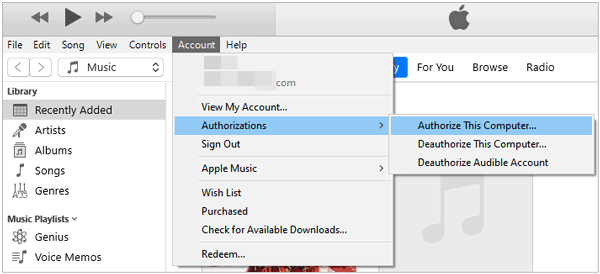
Step 3. Once you've done that, you should be able to access the DCIM folder and view the pictures on your device.
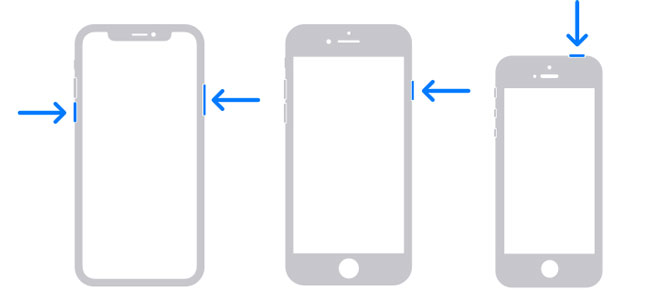
Minor system glitches can sometimes cause connection issues, and restarting the device may help resolve them.
For iPhone X, 11, 12, 13, or later:
For iPhone 6, 7, 8, or SE (2nd or 3rd generation):
For iPhone SE (1st generation), 5, or earlier:
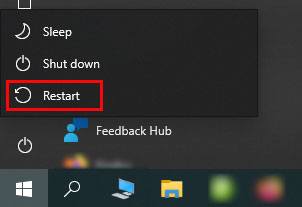
Step 1. Start by pressing the "Windows" button, followed by the "Power" button.
Step 2. Click "Restart" to reboot the PC.
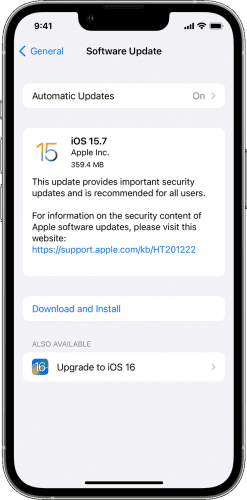
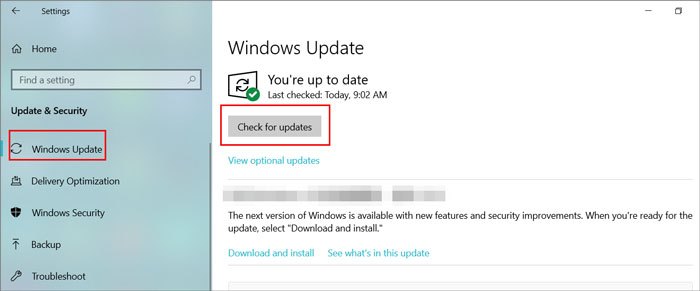
Older versions of the system may have compatibility issues, leading to connection failures between the iPhone and PC. If you find not all iPhone photos showing up on PC, you can update your iPhone and computer with the steps shown below:
Update your iPhone: Go to "Settings" > "General" > "Software Update" > Click "Download and Install" if there is a new iOS update after it automatically checks for updates. (iPhone software update failed?)
Update your Windows PC: Select the "Start" button > Go to "Settings" > Click on "Update & Security" > Choose "Windows Update", then click "Check for updates".
If your iCloud Photos is enabled, all your photos are automatically saved to iCloud, meaning you can only access photos through iCloud, not on your PC or Mac. To ensure your iPhone photos show up on your computer, make sure to disable iCloud Photos. Here's how:
Step 1. Open "Settings" on your iPhone > Tap on your name and select "iCloud" > Then tap on "Photos" > Turn off "iCloud Photos".
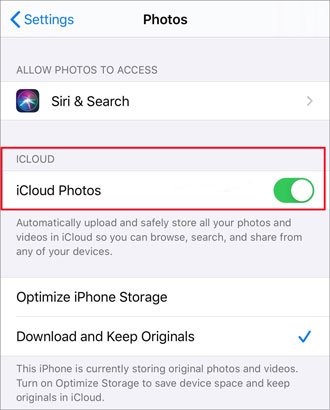
Step 2. If some of your photos are stored in iCloud, you'll need to download them to your device first. Click on "Download Photos & Videos" to retrieve your iCloud photos. (How to download iCloud photos on PC?)
AutoPlay is a convenient feature in Windows 10 that allows you to select a program to display photos, music, and videos when you connect a media device. When you plug in your iPhone, the AutoPlay window will appear, prompting you to choose software for importing your photos.
To ensure your iPhone photos show up on Windows, you should manually enable AutoPlay. Here's how:
Step 1. Open "Settings", click on "Devices" in the sidebar, and navigate to "AutoPlay".
Step 2. Then, select "Use AutoPlay for all media and devices". Below this option, you can choose the default AutoPlay settings for when you connect your iPhone.
The connection between your iPhone and computer relies on the Apple USB driver. If you can't view iPhone photos on PC, the issue may be with the Apple USB driver. Follow these steps to fix it:
Step 1. Press the "Windows" key and the "R" key to open the Run dialog, then type "devmgmt.msc" and press "Enter".
Step 2. In "Device Manager", expand the "Portable Devices" section.
Step 3. Click "Uninstall device" to remove the Apple driver. Reconnect your iPhone, and the driver will install automatically. If you see "Update driver", click it to update the driver.

If other methods don't work and your iPhone is not showing all photos on your PC, restoring your iPhone to factory settings may be the last resort. Before restoring, make sure you have backed up all your data from the iPhone.
To do this, follow the steps below:
Step 1. Open iTunes and connect your iPhone to the computer.
Step 2. In iTunes, click the device icon and select the "Restore iPhone" option.
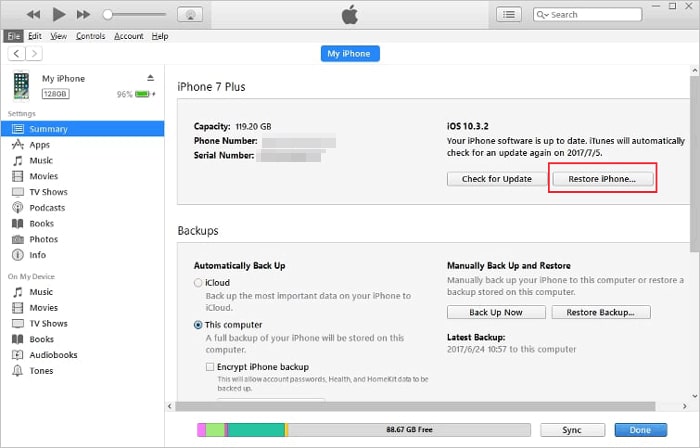
Step 3. Wait for the restore process to complete, then set up your iPhone again and try connecting it to the computer once more.
iPhone photos not showing up on computer, and want the easiest and safest way to import photos from iPhone to PC? Coolmuster iOS Assistant is the ultimate solution for you. It enables you to sync, view, and manage iOS data on a computer without using iTunes. You can easily preview and export all files or select a single item from iPhone/iPad/iPod to a computer or iTunes default location for backup.
Key features of Coolmuster iOS Assistant:
Here is how to transfer photos from iPhone to PC using iOS Assistant:
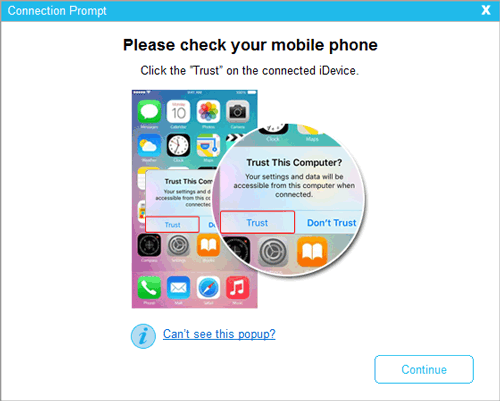
01Install and launch iOS Assistant on your computer. Connect your iPhone to your computer with a USB cable. Click the "Trust" option on your iPhone if "Trust This Computer" pops up, and then tap "Continue" on this program to move on.
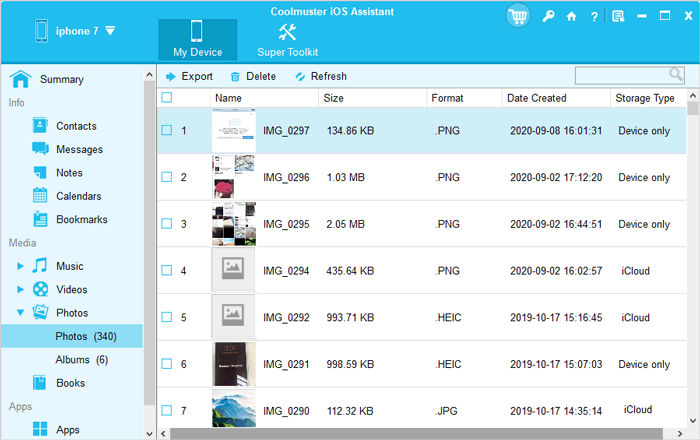
02Once your device is detected by this program, you will see the main interface as below.

03To import photos from your iPhone to your PC, click "Photos" from the left panel, preview and select the photos you want to transfer, and hit the "Export" button on the top menu.
Video Tutorial:
iPhone photos not showing up on PC is a very common issue when connecting an iPhone to a computer. If you run into this snag, you can adopt the above approaches to fix this problem. You can also utilize Coolmuster iOS Assistant to view and import photos from iPhone to PC directly. This useful software is extremely easy, secure, fast, and user-friendly.
If you have better ways regarding this issue, you are welcome to share your opinions with us. Or, if you get into difficulties when using it, feel free to let us know by leaving a comment below.
Related Articles:
How to View iPhone Photos on PC? 4 Easy Ways
14 Ways to Fix the iPhone/iCloud Photos Not Showing Up on Mac Issue
Can't Transfer Photos from iPhone to PC? [Reasons & Solutions]
[Must Read] How to Organize iPhone Photos on Computer with Ease?


