
[Easily Fixed] What to Do When Photos Disappeared from iPhone?

Your iPhone is not just a communication device; it's also your personal photo album, capturing cherished moments and memories. However, it can be distressing to discover that your photos disappeared from iPhone.
In fact, this is a very common phenomenon on iPhone. So, when you find photos hidden or even disappeared from the iPhone Photos app, do not worry too much; there are possible ways to find them. Simply read this article, and you will find the solutions to get photos back to your iPhone.
Some people may want to get to the root of the matter, "photos disappeared from iPhone". Well, here are some common issues they may concern:
Q1. Why do photos disappear from my iPhone?
Why did my photos disappeared on my iPhone after update? As a matter of fact, a lot of factors may result in photos missing from iPhone, and the most common ones are as below:
Q2. Where did my photos go on my iPhone?
Well, how do iPhone photos disappear? Actually, when you or someone else deletes a photo on an iPhone, the photo attribute changes from Allocated to Unallocated but it still exists in the system. And, when new data is generated on the iPhone, the new information will occupy the space of Unallocated items first and overwrite them.
Q3. Can I find the all photos gone from iPhone?
"My pictures disappeared from my iPhone; is it possible to find them back?" Before disappeared photos are overwritten by the new data, it is still possible to get them back to the iPhone. You can follow the instructions from our superior IT engineers and experienced users to recover deleted photos on your iPhone.
iPhone photos disappeared from camera roll? How to fix it? Here are the proven tips to make disappeared iPhone photos show up in the Photos app again.
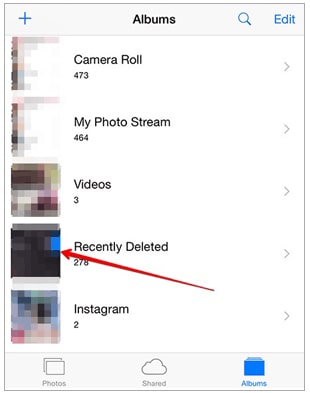
If you have deleted photos from the Photos app unintentionally, the deleted iPhone photos will stay in the Recently Deleted folder for 30 days. You can check your Recently Deleted folder to see whether the disappeared photos are there:
Step 1. Navigate to the "Photos" app on your iPhone and select "Albums".
Step 2. Scroll through the options and locate "Recently Deleted" under "Utilities".
Step 3. Locate your missing photo, tap on it, and select the "Recover" option. For multiple photos, choose "Select" and then click "Recover".
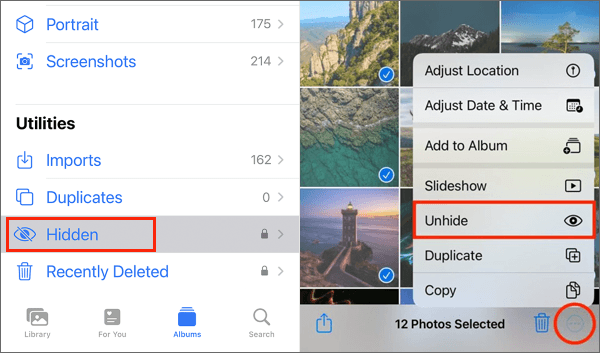
If pictures on iPhone disappeared, they might be in the hidden folder within the Photos app. Just check your hidden album to see whether you have ever hidden photos on your iPhone and reveal the necessary photos. Here are the steps:
Step 1. Launch the "Photos" app and navigate to the "Albums" tab.
Step 2. Access the "Hidden" album under "Utilities".
Step 3. Choose the photo you wish to reveal.
Step 4. Click on "More", then select "Unhide" to recover pictures that are missing from your iPhone.
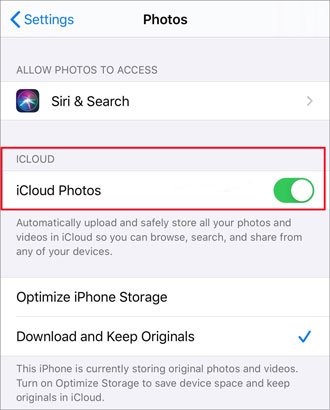
iCloud Photos syncs all photos to iCloud, and it allows you to access all camera roll photos on all of your devices. If you use iCloud Photos, syncing issues may lead to photos in iPhone disappeared. Verify your iCloud settings in the Photos app to ensure proper synchronization. Here is how to do it:
Step 1. Navigate to "Settings" > [your name] > "iCloud", then select "Photos".
Step 2. Enable "iCloud Photos". This will help sync your photos across your devices.
If you have more than one Apple ID, like me, you may sign in each Apple ID in turn to do different things. So, if your live photos disappeared from iPhone, you can check whether you have logged into your device with the same Apple ID. If not, sign in with the correct Apple ID and access the photos you like.
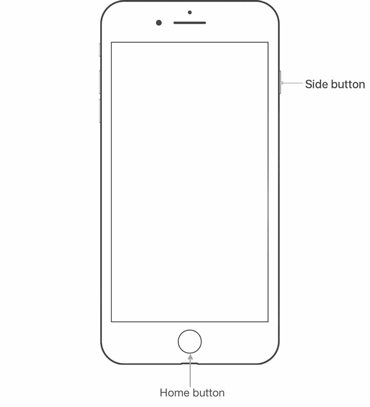
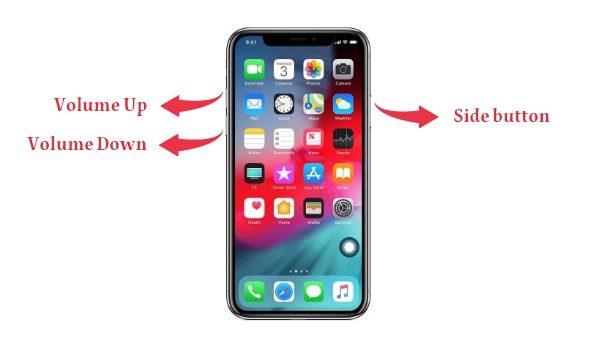
All my pictures disappeared from my iPhone? Don't worry. In general, many minor bugs can be fixed by simply restarting your device. Hence, if iPhone photos disappear, you can give it a try. Here are the steps:
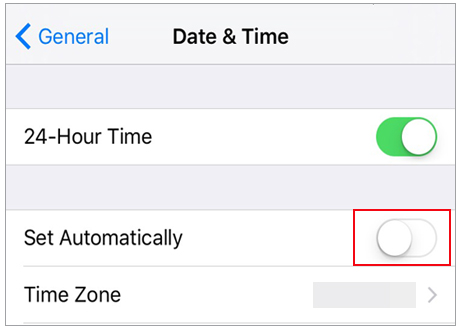
Invalid data and time happen rarely and randomly. If photos disappeared from iPhone while you found the data and time on the iPhone were inaccurate, You have the option to configure or modify the date and time settings on your iPhone. Here are the steps:
Step 1. Go to "Settings" > "General" > "Data & Time".
Step 2. Enable "Set Automatically" to let it automatically update the data and time. And you can also select the correct "Time Zone".
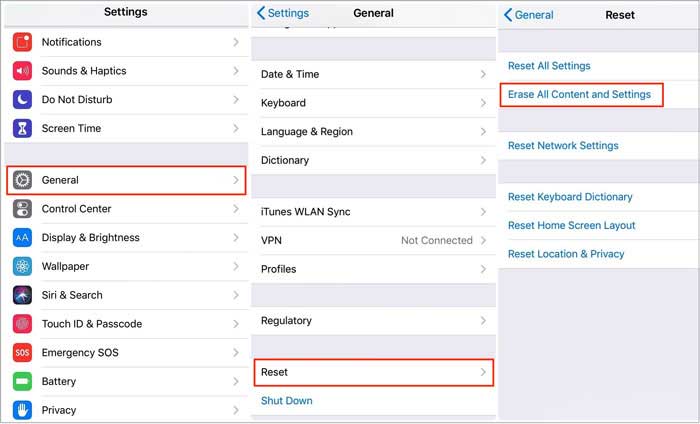
If other solutions fail and you have been regularly backing up your iPhone to iCloud, you may consider restoring photos from iCloud backup. To restore lost photos on iPhone from iCloud, you can follow these steps:
Step 1. Navigate to "Settings" on your iPhone, then go to "General", followed by "Reset". Choose "Erase All Content and Settings", and finally, select "Erase iPhone". Once you confirm the operation, your iPhone will restart, leading you to the initial setup screen.
Step 2. Establish your iPhone as a new device. On the "Apps & Data" screen, select the "Restore from iCloud Backup" option.
Step 3. Sign in to your Apple ID, choose the backup file that includes missing photos, and enter the Apple ID to confirm this operation. Wait until the whole process is complete.
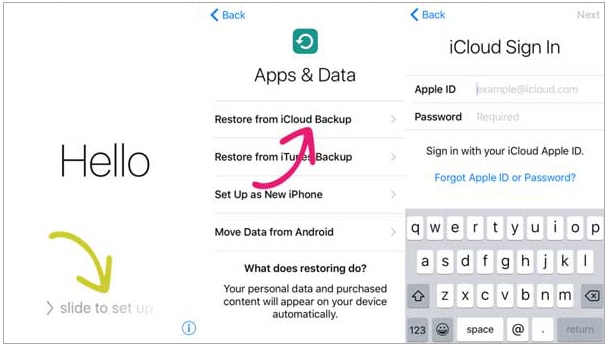
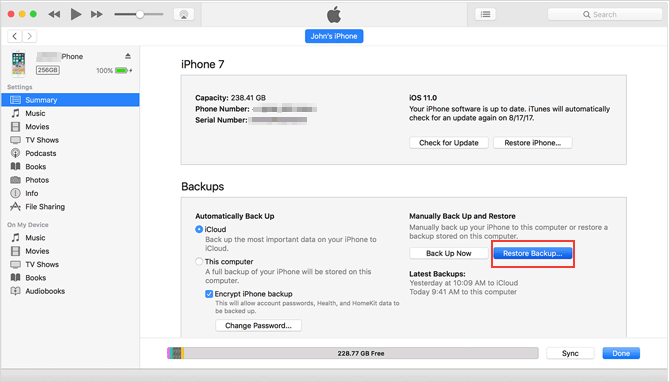
If you have backed up your iPhone to iTunes previously, chances are that you will get back those missing photos to iPhone from iTunes. As iTunes will permanently erase all current data on the iPhone, you will lose data if you take it this way. Here is how to do it:
Step 1. Install the latest version of iTunes on your computer and connect your iPhone to this computer with a USB cable.
Step 2. Tap "Trust" when the "Trust This Computer" window pops up.
Step 3. On the iTunes window, click "Summary" from the left panel, tap "Restore Backup..." from the right panel, choose the last backup file from the pop-up window, and hit the "Restore" option.
Well, if all the above methods cannot find missing photos, and meanwhile, if you have ever backed up your iPhone using iTunes, you can use a professional iPhone data recovery app to recover lost photos on your iPhone.
Coolmuster iPhone Data Recovery is a comprehensive and user-friendly software designed to help iOS users recover lost or deleted data from their iPhones, iPads, or iPods. This powerful tool is equipped to retrieve various types of data, including contacts, messages, photos, videos, call logs, notes, and more. Besides, you can preview all types of data before recovery and recover lost files selectively. What's more, it doesn't need to reset the device or overwrite the existing data on the device when restoring data from iTunes.
Key Features:
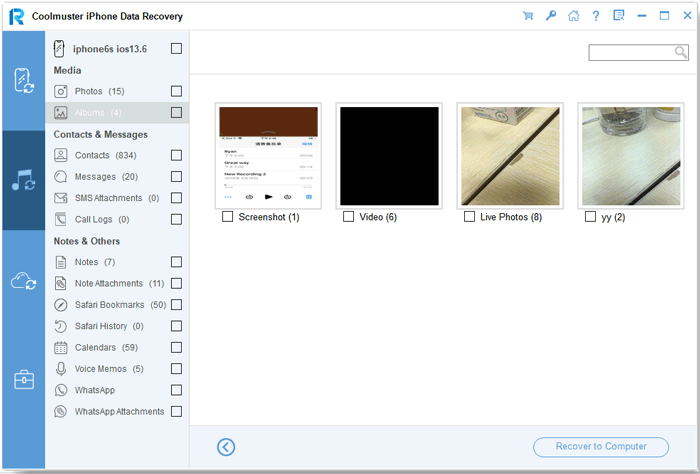
Here is how to use Coolmuster iPhone Data Recovery to get the lost photos on your iPhone:
01Download, install, and launch the application on your computer. Then, choose "Recover from iTunes Backup File".
02This software will scan the default iTunes backup location on your computer. Choose an iTunes backup file containing your disappeared photos and then tap "Start Scan".
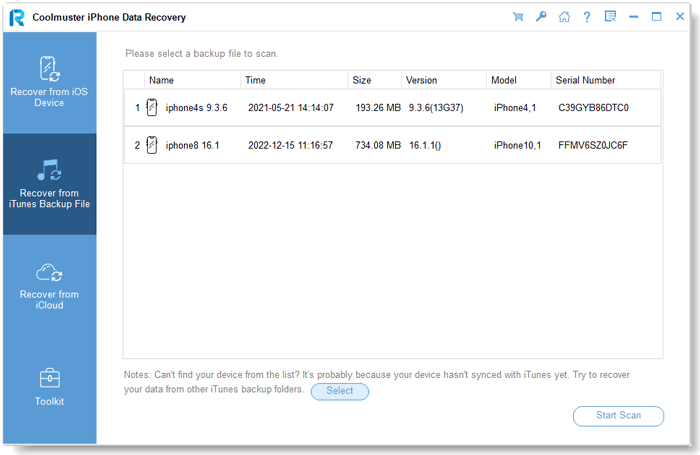
03After scanning, choose "Photos" and click the "Start Scan" button again to scan your photos.
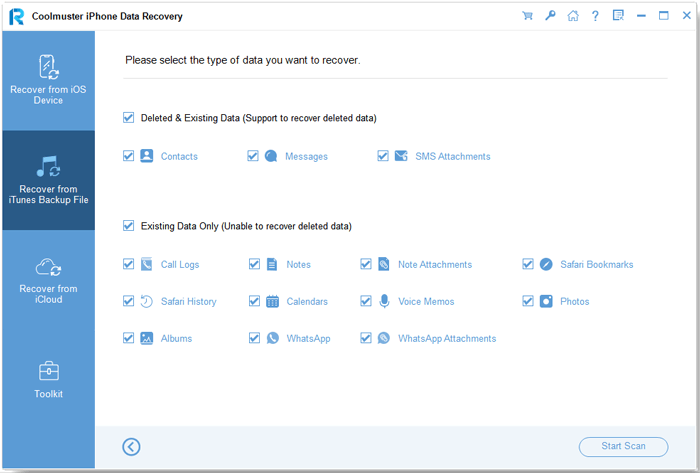
04Preview and select the photos you want to restore. Once selected, click "Recover to Computer" to retrieve the deleted photos to your computer.
Video Tutorial:
Now you understand why all your photos disappeared from iPhone and how to get lost photos back to your iPhone. To prevent this problem from happening again, here are some useful tips for you:
1. Regularly back up iPhone data and Apple ID to iCloud or use some professional iPhone backup software.
2. Clear the unimportant files in the iPhone's internal memory to free up the storage.
3. Never restore files from any unknown backup.
Losing important data from iPhones for no reason will make people sick. If the photos disappeared from iPhone quietly, you can try the nine possible solutions in this article to get back lost photos on the iPhone. They are all effective. Well, considering data security and success rate, we highly recommend you try Coolmuster iPhone Data Recovery. It's easy to operate and safe.
Finally, if you encounter any difficulty during use, feel free to leave a comment below.
Related Articles:
9 Ways to Fix the iPhone Photos Disappeared from Camera Roll Issue
How to Fix Photos Missing from iCloud? [8 Essential Solutions]
17 Optional Methods to Find the Videos Disappeared from iPhone Back
How to Recover Photos from iPhone without iCloud [With Tutorial]


