Want to sync iPhone to Mac? Mac and iPhone are powerful Apple devices that allow users to store their files. But it is when they are combined that you get to experience the power of Apple's ecosystem cohesion. You can connect the iPhone to a Mac in various ways to have seamless file sharing. Read this guide to learn how to sync your iPhone with your Mac and share your files seamlessly.
The best way to sync iPhone with Mac is using the professional software Coolmuster iOS Assistant. It synchronizes various file types, such as contacts, messages, notes, calendars, and more, from an iPhone to your Mac and vice versa. No data loss is encountered during the process. Additionally, it allows you to back up and restore files in just one click. It works in the shortest time possible, and it is secure.
So, if you want ideal software for all your transfer needs, this is your option. It makes it easier to migrate files from an iPhone to a Mac and vice versa in one click.
Key features of iOS Assistant:
How to sync your phone to your Mac? Here are the steps:
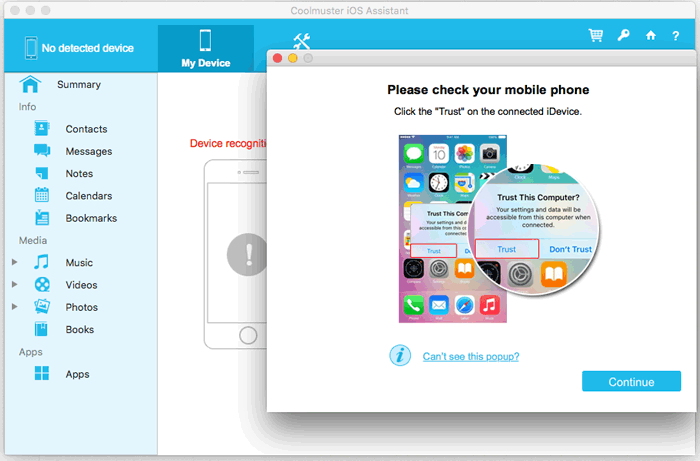
01First, download iOS Assistant on the Mac and launch it. Then take a USB cable to connect the iPhone to the Mac. Hit the "Trust" icon when you see a pop-up window to trust the computer. Once done, click on "Continue" to proceed.
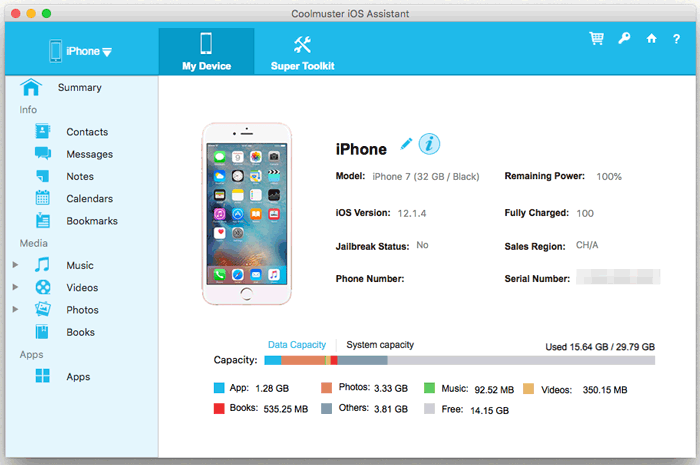
02You'll see an interface when the iPhone has been successfully connected to the Mac and is detected by the software. All files in your iPhone will be arranged on the primary interface in different folders.
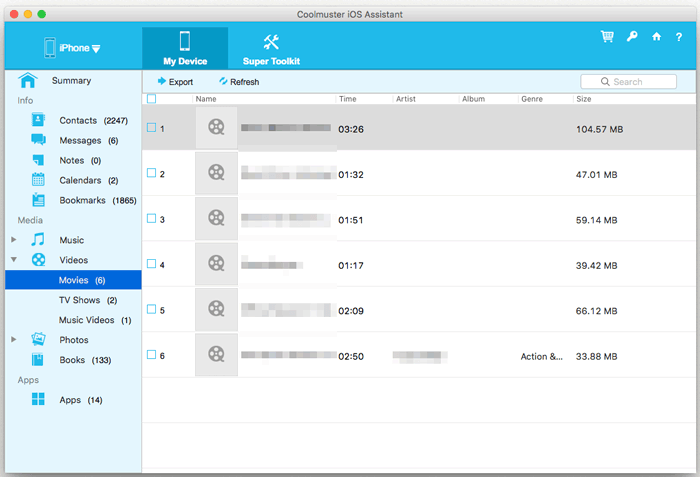
03Click on the files you want to sync. For instance, hit on the "Videos" option to sync videos. Choose the video files you want to sync and click on the "Export" tab. Select the output of the files you are transferring and begin the transfer of videos to Mac.
Video Tutorial:
Apple introduced iTunes for convenient and easier data transfer between a computer and an iOS device. By doing this, you can easily move music, videos, books, and various other items between your Mac and iPhone.
Here's the process for syncing your iPhone to your Mac with iTunes:
Step 1. Connect the iPhone to the Mac using a USB cable. (iPhone won't connect to Mac?)
Step 2. Launch iTunes and click the iPhone icon in the interface.
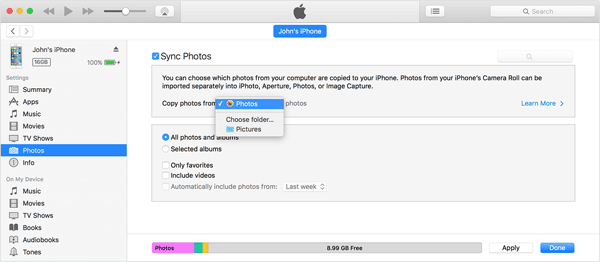
Step 3. In the left sidebar, select the items you want to sync (music, movies, photos, etc.).
Step 4. Check the "Sync" option, then click the "Apply" or "Sync" button at the bottom right.
Step 5. Wait for the synchronization to complete, and the iPhone data will be transferred to the Mac. (iPhone won't sync with iTunes?)
Starting with macOS Catalina, Apple replaced iTunes' data management functionality with Finder. During the first sync between your iPhone and Mac, a cable is required to establish the connection. However, after the initial setup, you can enable Wi-Fi syncing, which allows you to wireless sync iPhone to Mac.
Here is how to sync iPhone to Mac using Finder:
Step 1. Connect your iOS device to your Mac using the provided USB cable or a Lightning-to-USB-A cable.
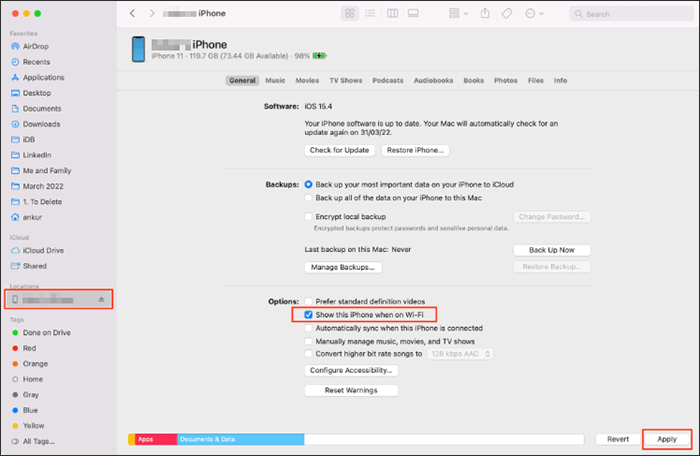
Step 2. Open a Finder window on your Mac running macOS 10.15 or later.
Step 3. In the sidebar, find and select your iPhone.
Step 4. Click on the "General" tab at the top of the window.
Step 5. Check the box next to "Show this iPhone when on Wi-Fi".
Step 6. Click "Apply" to save the changes and enable Wi-Fi syncing for your iOS device.
iCloud is a good storage service where you can keep most of your files. It helps us sync iPhone wirelessly with Mac. Provided the devices are both connected to the same Apple ID and have stable internet, they can be synced easily. You just need to enable the iCloud sync on the devices, and everything else will follow smoothly.
Here's how to sync iPhone to MacBook wirelessly via iCloud:
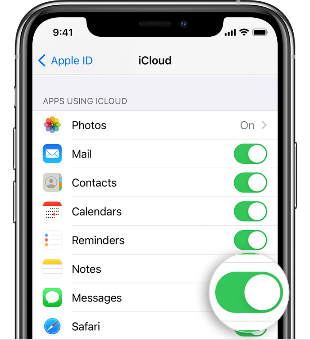
Step 1. On your iPhone, go to "Settings" > "Apple ID" > "iCloud", and enable the content you want to sync (such as "Photos", "Contacts", "Notes", etc.). Make sure your iPhone is connected to Wi-Fi and has sufficient battery.
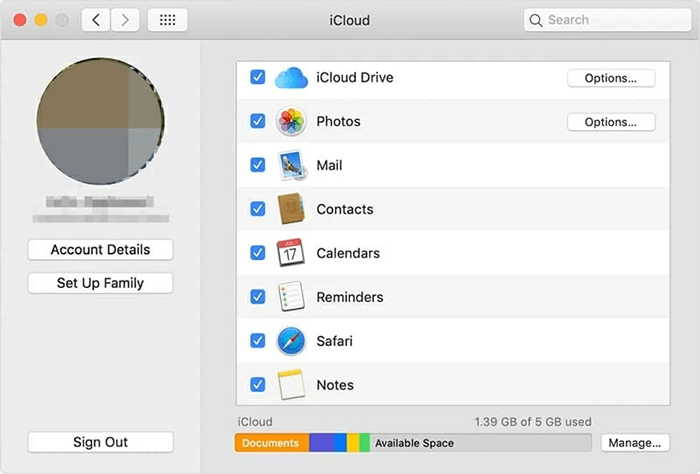
Step 2. On your Mac, go to "System Settings" > "Apple ID" > "iCloud", and enable the same data sync options as on your iPhone.
Step 3. After a few minutes, the data from your iPhone will appear in the corresponding apps on your Mac.
Note: The free iCloud storage is limited to 5GB, so it's recommended to clean up regularly or purchase additional storage. You can click here to learn how to free up iCloud storage.
AirDrop also comes in handy for wireless sync from iPhone to Mac. You just have to ensure both devices have, Wi-Fi, Bluetooth, and AirDrop switched on. (AirDrop not working?)
Here's how to connect iPhone to Mac wirelessly via AirDrop:
Step 1. Ensure the devices are connected to a stable network. Next, enable Bluetooth on iPhone and Mac systems.
Step 2. On your iPhone, open the "Control Center", press and hold the network settings block, tap to open "AirDrop", and choose "Everyone" or "Contacts Only".
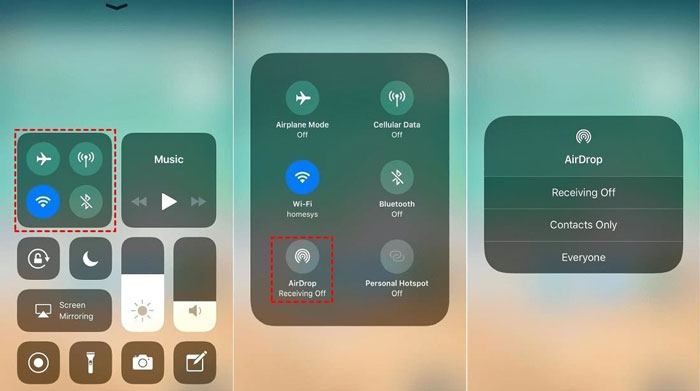
Step 3. On your Mac, open "Finder" > Click "AirDrop" on the left sidebar, and set it to be visible to "Everyone" or "Contacts Only".

Step 4. On your iPhone, open the content you want to share (such as a photo) and tap the "Share" button. Select your Mac from the device list.
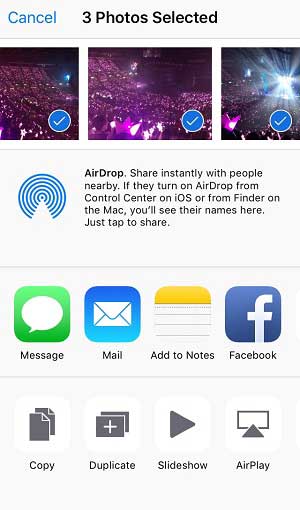
Step 5. On your Mac, click "Accept" to complete the transfer.
The above are all possible ways to sync iPhone to a Mac, enabling you to share files between them effortlessly. A better solution to sync iPhone to Mac is through Coolmuster iOS Assistant. It is very safe, secure, and quick to transfer files from iPhone to Mac – proved by users worldwide.
Related Articles:
How to Sync Contacts from iPhone to Mac with/without iCloud
Comprehensive Guide: How to Sync Messages from iPhone to Mac
[Ultimate Guide] How to Transfer Files Between iPhone and Mac?
How to Sync Notes from iPhone to Mac in Minutes - 5 Reliable Ways


 Free Download for Mac
 Free Download for PC

