
Where Are iPhone Backups Stored on Mac? Easy Guide for Users

Backing up your iPhone on a Mac ensures that your data is safely stored, but many users are unsure of where the iPhone backup is stored on a Mac. Understanding this not only helps check the status of the backup files but also aids in managing your Mac's storage space. Then, where are iPhone backups stored on a Mac, actually? This article will provide a detailed overview of the storage path for iPhone backup files on a Mac, as well as how to view and manage them.
On a Mac, iPhone backup files are typically created through iTunes or Finder. These backup files are stored by default in the Library directory of the Mac system, with the following path:
Path: ~/Library/Application Support/MobileSync/Backup/
In this path, you can find folders for each backup file, which are named with random alphanumeric combinations to ensure data security and privacy. It's important to note that if you are using macOS Catalina or a later version, backups are done through Finder instead of iTunes.
After we know where iPhone backup is stored on Mac, where can to find my iPhone backup on Mac? Here are three ways you can use to find the backup on your Mac.
Spotlight is the built-in search tool on Mac that helps users quickly locate the backup files. Here are the steps to find backup files on Mac using Spotlight:
Step 1. Press "Command + Space" on your Mac to open the Spotlight search bar.
Step 2. Type "~/Library/Application Support/MobileSync/Backup/" and press "Enter".
Step 3. The system will directly navigate to the backup folder, where you can see all the backup files.
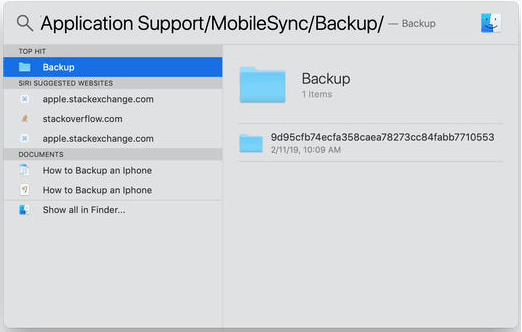
This method is quick and convenient, making it suitable for users who are not familiar with system folder paths.
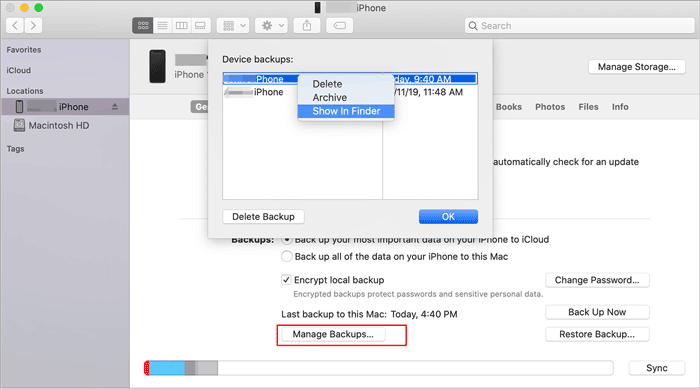
Depending on the version of macOS, you can use Finder or iTunes to view your iPhone backup files. This method allows you to easily check details like backup dates and sizes, ensuring that your backup files are valid and meet your needs.
Step 1. Connect your iPhone to the Mac using a cable.
Step 2. Open Finder and locate your device name in the "Locations" section.
Step 3. Click "Manage Backups", and a window will pop up showing all saved backup files.
Step 1. Open iTunes and connect your iPhone.
Step 2. Click the device icon, then select "Summary".
Step 3. Click "Manage Backups" to view all backups.
Note: If you want to change your iTunes backup location, you can click here to learn how to do it.
If you choose to back up your iPhone via iCloud, the backup files are not stored locally on your Mac but are instead saved in the cloud. You can follow these steps to find your iCloud backups:
Step 1. Open "System Preferences" and select "Apple ID".
Step 2. Click on "iCloud", then choose "Manage".
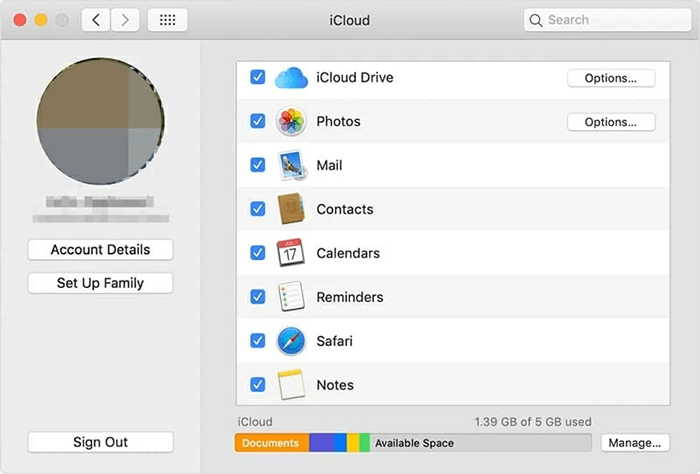
Step 3. In the "Backups" section, you can view the iCloud backup information for your iPhone.
This method is suitable for users who back up using iCloud, as it does not take up local storage space on your Mac.
Managing and deleting unnecessary backup files can free up storage space on your Mac and help you maintain your backup data more efficiently. Here are the specific steps for managing your backups:
Step 1. Open Finder/iTunes and connect your iPhone device.
Step 2. Select your device name and click on "Manage Backups".
Step 3. In the pop-up backup list, select the unwanted backup file, then click "Delete Backup".
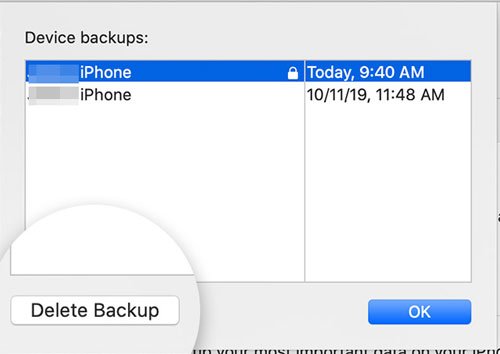
Step 4. After confirming the deletion, the backup file will be removed from your Mac.
Although iTunes and Finder are common iPhone backup tools on a Mac, their default backup locations are fixed, preventing users from freely choosing where to store backup files, which makes managing and locating them inconvenient. Coolmuster iOS Assistant offers a more flexible backup experience for users. With this software, you can easily back up your iPhone data to your Mac and customize the backup location. This feature allows you to store iPhone backups in any directory on your Mac, making it easier to find and organize backup files while also utilizing your Mac's storage space more effectively.
What can Coolmuster do for you?
Here is how to use iOS Assistant to back up an iPhone to a Mac computer:
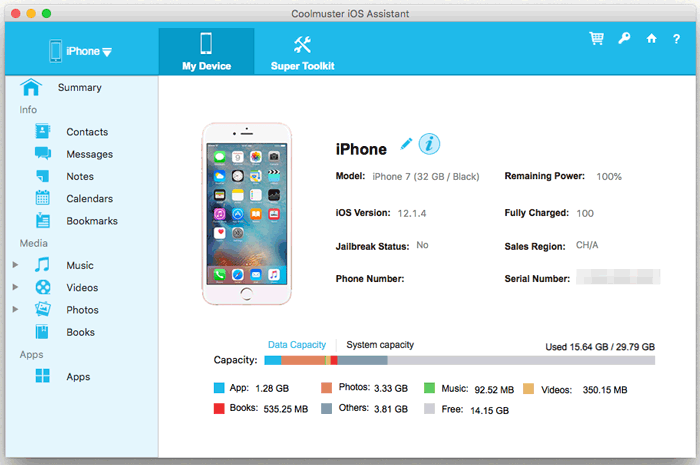
01Install and launch the Mac version of this software, then connect your iPhone to the Mac computer using a USB cable.
02If prompted, tap "Trust" on your iPhone. Then, click "Continue" in the program. Once your iPhone is successfully connected, the main interface will appear.
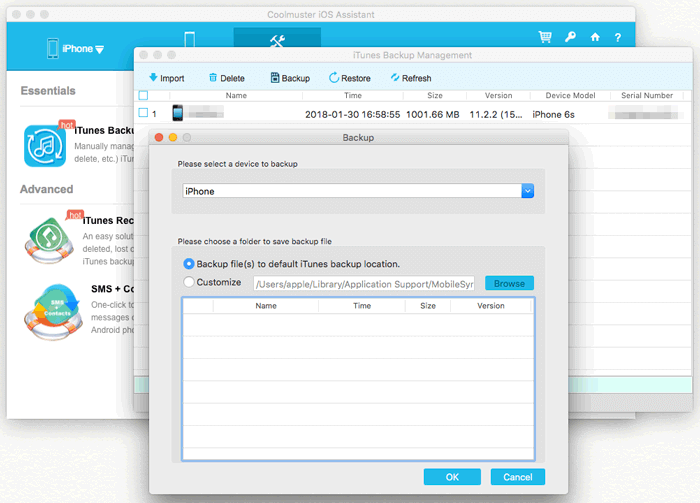
03To back up your entire iPhone, go to the "Super Toolkit" section in the top menu, select "iTunes Backup & Restore", and click "Backup". Choose your iPhone from the drop-down menu, select a location for the backup file, and then click "OK" to start the backup process.
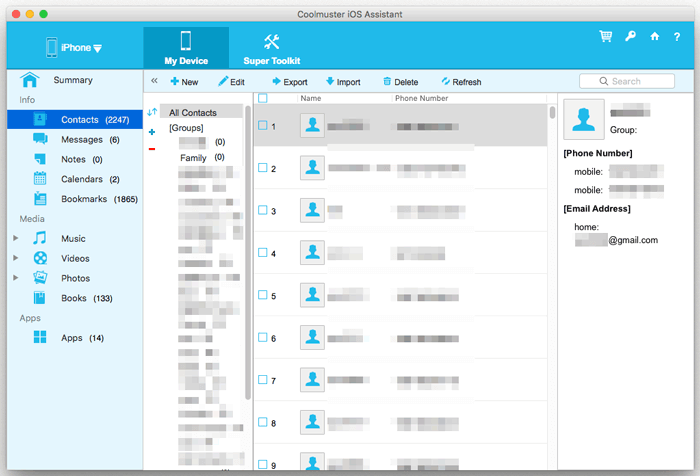
If you want to back up specific files, navigate to the "My Device" section, select the file type you wish to back up, and click the "Export" button to begin transferring those selected files.
Where are iPhone backups stored on Mac, and how to find iPhone backups on Mac? I believe you have to know the answer. Managing iPhone backup files on a Mac through iTunes/Finder can meet basic needs, but these tools have fixed backup locations, offering less flexibility. In contrast, Coolmuster iOS Assistant provides greater freedom, allowing users to customize the backup location based on their needs and easily save backup files to any directory on the Mac. This flexibility not only helps effectively manage storage space but also makes backup files easier to find and manage, making it an ideal choice for iPhone users looking to back up data on a Mac.
Related Articles:
How to Check Last Backup on iPhone in 3 Different Ways?
iPhone Shows No Backup on iCloud? Reasons and Solutions Inside!
What Does iTunes Backup Include? [A Comprehensive Guide]
How to View My iTunes Backup Files with or without Restoring Data? (Solved)


