
[Full Guide] How to Back Up Locked/Disabled iPhone with Ease?

"My phone is locked, asking for passcode, which I do not remember, I want to back up my phone, how can I?"
- from Apple Community
When an iPhone is locked or disabled, many users feel anxious because they worry about not being able to back up important data. So the question arises: Can you back up a locked/disabled iPhone? How to back up a locked/disabled iPhone? After reading this article, you will find the answer.
Can you back up your iPhone if it's disabled? The answer is yes. Although a locked or disabled iPhone cannot operate normally, as long as the device has established a trusted connection with a computer, you can still back up data through various methods, including using professional tools or official methods. If a trust relationship has not been established, you will need to unlock the device first.
Understanding this, let's see how to back up disabled iPhone with or without iTunes easily.
Here are two ways for you to back up a locked/disabled iPhone that has already established a trust relationship.
When it comes to the most effective solution on how to back up locked or disabled iPhone, you should try a professional tool -- Coolmuster iOS Assistant. It is one of the best software to back up iPhone/iPad/iPod to computer. It supports multiple files, including contacts, text messages, notes, calendars, bookmarks, music, videos, photos, books, and more.
Main features of Coolmuster iOS Assistant:
Download the free trial version of iOS Assistant on your computer and see how to back up a locked iPhone to a computer with a few steps.
01Download and run iOS Assistant on your computer, then use a USB cord to connect your locked iPhone to the computer. After your iPhone is detected by the software, you will see the main interface as below:

Note: Please ensure to use a computer that trusted by the iPhone before. Otherwise, the program can not detect the iPhone.
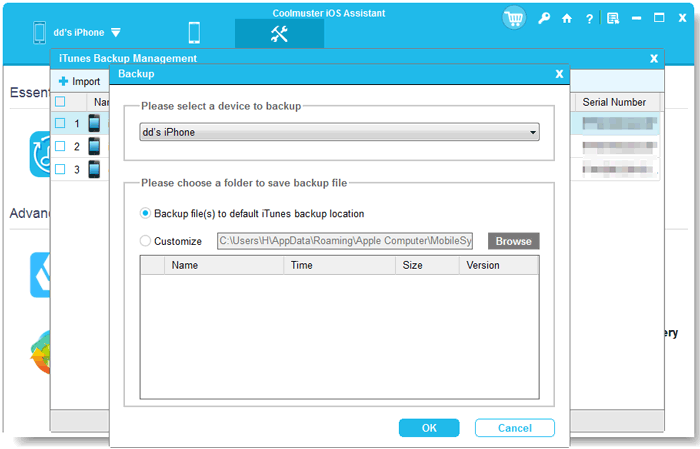
02Select the "Super Toolkit" section and then click "iTunes Backup & Restore". Click "Backup" and select the location to save the backups, then click "OK" to back up the locked iPhone to PC with 1 click.
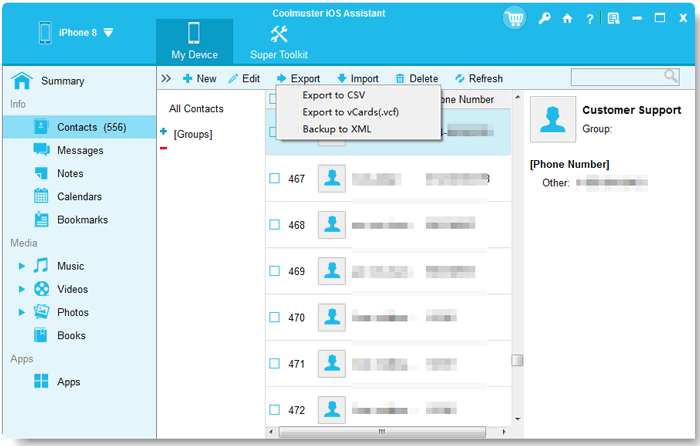
If you want to back up some specific files, just select the file types on the main interface > tick off the required items > click the "Export" button to save the files from locked/disabled iPhone to PC.
Video Tutorial:
If your iPhone has synced to iTunes before and didn't restart since the last time connected, in this case, iTunes will remember the password and won't require you to unlock the iPhone. Then, it's very easy to back up disabled iPhone with iTunes. Here's how:
Step 1. Launch iTunes on your computer, then connect the locked iPhone to the computer with a USB cable.
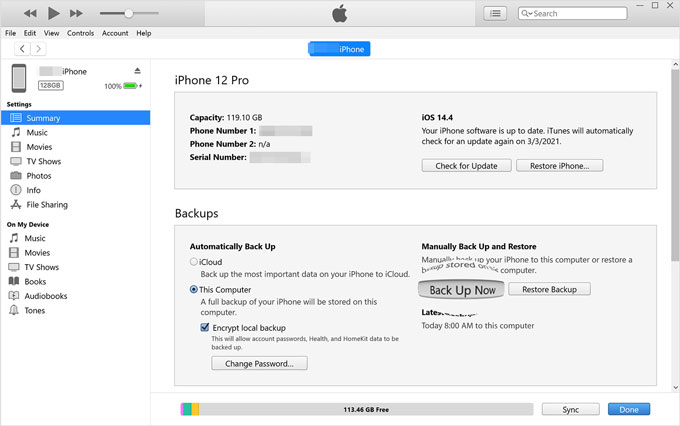
Step 2. Click the device icon on the top-left and click "Summary".
Step 3. Go to the "Backups" section, select "This Computer" and then click "Back Up Now" to start backing up your locked iPhone to PC. (iTunes Back Up Now greyed out?)
What should you do if you don't trust your computer? How to back up disabled iPhone without trusting computer? The only way is to first unlock your locked/disabled iPhone and then back it up. iPhone Unlocker is an unlocking tool designed for iOS devices. Whether you've forgotten your password, your iPhone is disabled, or the device is locked with an Apple ID, it can help users easily remove these restrictions without requiring a password. It's an ideal solution for restoring your iPhone to normal use.
Here is how to unlock a locked/disabled iPhone without a password using iPhone Unlocker:
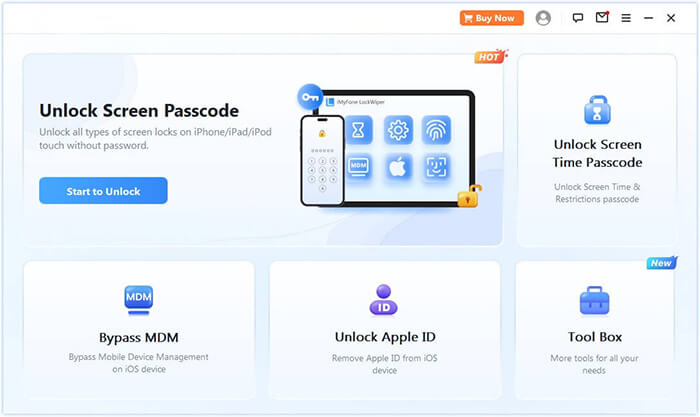
01Launch the iPhone Unlocker and select the "Unlock Screen Passcode" mode. Click "Start to Unlock", then press "Start" and connect your iPhone to the computer using a USB cable.
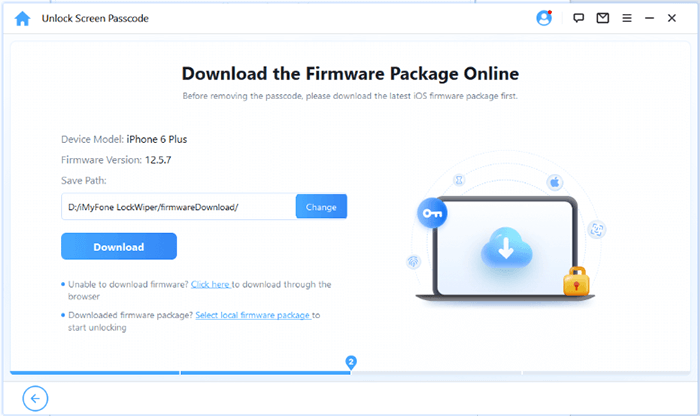
02Put your iPhone into Recovery Mode or DFU Mode. The software will automatically detect your device model. You can choose a different location to save the firmware package and then click "Download" to begin the download.
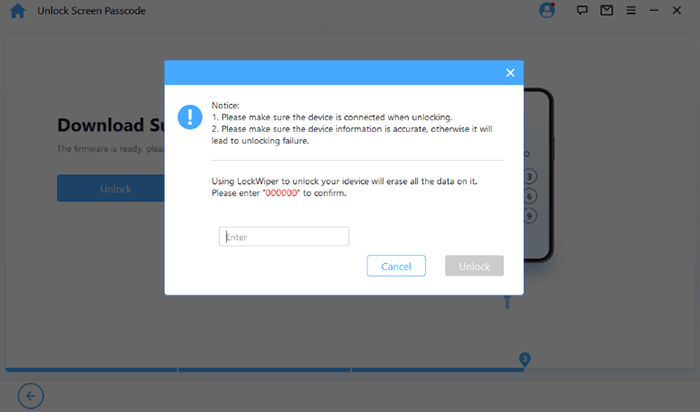
03Click "Unlock" to proceed. Carefully read the prompt, enter "000000" to confirm your consent to unlock the device, and then click "Unlock" once more.
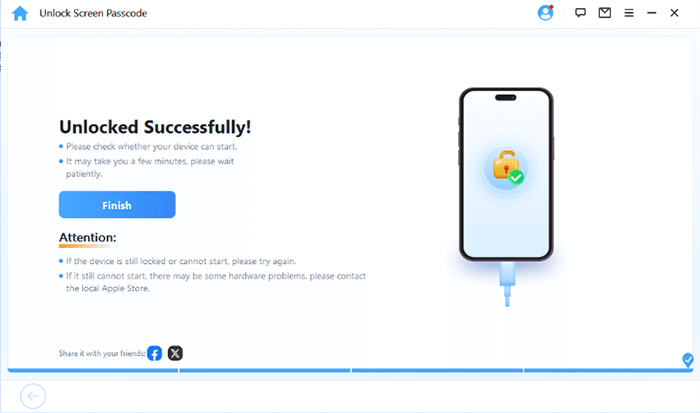
04After a few minutes, the screen passcode on your iPhone will be successfully removed.
Q1. How to back up disabled iPhone without trusting computer?
If the device has not established a trust relationship with the computer, you will need to unlock the device first. You can use iPhone Unlocker to unlock it, and then use iTunes, iCloud, or Coolmuster iOS Assistant to back up your data.
Q2. How to back up locked iPhone to iCloud?
If iCloud Backup is enabled on the iPhone and the device is connected to a Wi-Fi network, data will automatically be backed up to iCloud. If the device is locked, you will need to unlock it first in order to manually trigger the backup.
Q3. How to recover data from disabled/locked iPhone?
If you have backed up your disabled/locked iPhone to iCloud or iTunes, you can restore the backup to a new device.
That's all about how to back up locked/disabled iPhone. If the locked device has established a trust relationship with the computer, we highly recommend you use Coolmuster iOS Assistant. As you can see, unlike iTunes, which doesn't allow you to preview your iOS files before backing up, iOS Assistant enables you to preview and selectively export files stored on the locked iPhone to PC.
However, if the device has not established a trust relationship with the computer, we recommend using iPhone Unlocker to unlock the iPhone first, and then proceed with the backup. Download them and give them a try. If there are any problems, let us know by leaving a comment below.
Related Articles:
How to Back Up iPhone without Passcode [Simple Guide]
How to Recover Data from Locked iPhone with or without Backup?
[Without Password] How to Recover Photos from Locked iPhone 16/15/14/13/12/11
[Comprehensive Guide] How to Factory Restore a Locked iPhone?


