
What If My iPhone 14/13/13 Pro/12 Screen Is Yellow? Here's The Fix!

The screen is one of the essential parts of any smartphone. In fact, it's the only thing you can use to see the phone - and it's also one of the most fragile parts. iPhones are known to be the most sophisticated gadgets worldwide. But, their screen is bound to suffer anomalies just like other smartphones. One of the abnormalities these devices face is a yellow screen. Although not entirely common, yellow screens are pretty common in iPhone 12 and iPhone 12 Pro devices. If you own an iPhone and by bad luck - iPhone screen is yellow, read this article to find out the cause of iPhone yellow screen and solutions to the problem.
Why is my iPhone screen yellowish? A yellow screen is not as serious as it seems. It's just an inconvenience and is not something to get worried about. Still, you may want to take some precautions to avoid more issues.
i. Wrongly set Night Shift mode that's causing iPhone 12 to have a yellow screen.
ii. True Tone Display may also be a culprit behind the yellow tint on your iPhone's screen.
iii. The operating system is outdated, or there is a bug in your iPhone.
iv. The iPhone's hardware is damaged, leading to a yellow screen/tint.
v. Auto Brightness settings can make the device change its screen color.
You may like:
iCloud Backup Failed | iPhone Not Backing Up to iCloud (12 Fixes)
iPhone Won't Update? Here's How to Fix!
iPhone screen looks yellow. It can be quite devastating. But don't worry! There are really easy solutions you can use to fix it.
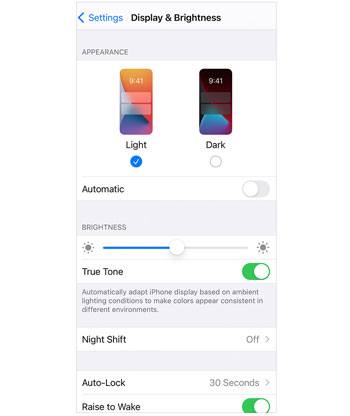
Night Shift is a feature that was introduced in 2016 on iOS 9.3 to dim the amount of blue light emitted from phones at night, making it easy on the eyes. While this mode may look appealing, it sometimes does not seem to work correctly. Since the mode automatically adjusts colors being shown to warmer colors, it can generate iPhone screen yellow tint. Therefore, you should turn off this feature and see if that solves the issue. Here is how to turn off the Night Mode feature;
Step 1: Head to your Settings on your iPhone.
Step 2: Proceed to "Display & Brightness"
Step 3: If the Night Shift is on, disable it by toggling the slider to grey.
The Auto Brightness feature on your iPhone is one of the most basic features of any smartphone. It helps adjust the display brightness according to the available light in the room. Even though this feature is important, it might make the device to have a yellow screen. So, try turning it off by doing this to fix iPhone yellow tint screen;
Step 1: Open the Settings application on your iPhone and head to "Accessibility." When there, tap on the "Display & Text Size" option.
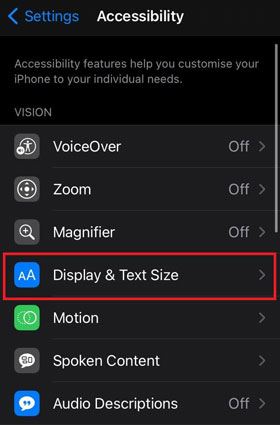
Step 2: Look for the Auto-Brightness feature and toggle the slider to green or grey.
Since iPhone yellow screen of death is a screen problem, it's best to adjust some screen settings to fix it. One of the screen settings that should be adjusted is True Tone. The feature is meant to adjust your device's color temperature and brightness for a more natural viewing experience. But, it may sometimes bring a yellow screen.
When True Tone is on, you'll see the phone's display appearing warmer than normal, making the screen look greenish or yellowish. However, after disabling it, it'll lessen the warm display color. Do this to disable the 'True Tone.'
Step 1: Start by opening the Settings app.
Step 2: Then navigate to "Display & Brightness."
Step 3: If True Tone is enabled, just toggle the slider from green to grey to turn it off.

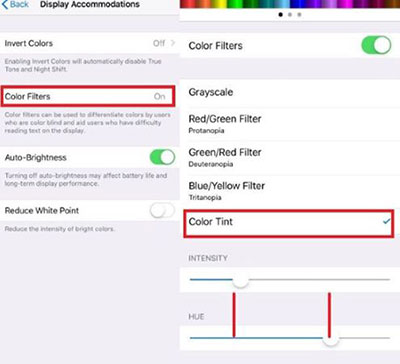
Normally, on most smartphones, there's an option for changing color tints. In the settings, there's an option to help you change the standard white light to a yellow tint for reading purposes. This Apple iPhone yellow screen prevents your eyes from the harsh rays emitted from the screen and the light intensity. You can adjust the Color Tint to do away with the yellow tint. But before you do that, make sure both True Tone and Night Shift are off.
Change the Color Tint by following these steps;
Step 1: Open the Settings application on your iPhone and head to "Accessibility."
Step 2: Then head to "Display & Text Size."
Step 3: You'll see the Color Filter option; switch it on by toggling the slider next to it from green to grey.
Step 4: Once done, choose "Color Tint."
Step 5: Adjust the "Intensity" and "Hue" according to your preferences.
As you know, Apple allows users to update their device's system every few weeks. The updates usually include new features, bug fixes, and more. Therefore, it's best to keep your device updated by updating it from time to time. The latest iOS update also comes with bug fixes that will prevent the iPhone screen from turning yellow.
Before a software update, ensure your phone is connected to a WiFi network and has a sufficient charge of 50%. Do this to update your iPhone to the latest iOS version.
Step 1: Head to the Settings on your iPhone.
Step 2: Choose "Software Update"
Step 3: Check for any updates available. If there's an update, it'll show on the screen.
Step 4: Click the "Install Now" option to download the update. Wait patiently for the process to finish.
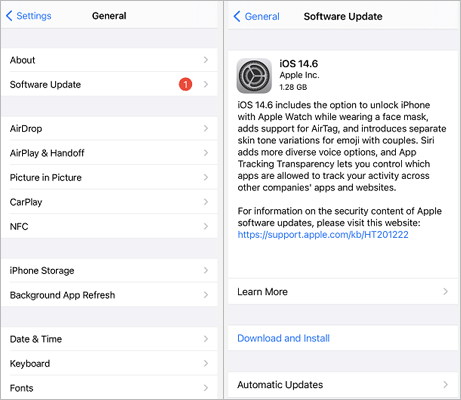
Step 5: Your device will restart on its own after the update.
See more:
iPhone Screen Keeps Flickering, How to Fix it?
Failed to Export or Delete iPhone Photos with iCloud Photo Library Enabled? [Solved]
Have you tried the solutions above, but your device still shows a yellow screen? Then it could be due to a serious software glitch. The easiest and most reliable solution would be to use iOS System Recovery. This app lets you fix iPhone yellow screen to normal in a few minutes. With its two recovery modes, you'll be able to repair your iPhone without worries. The best part is that the software supports all iOS phones and can repair any model of your iPhone back to normal.
Is that yellow screen annoying you? Do not worry anymore, as iOS System Recovery is the best app purposely made for all iOS system problems, such as iPhone white screen, iPhone grey screen, iOS bugs, iPhone clicking on its own, etc. The app is safe enough, and it won't put your data at risk whatsoever. Wonderful, right?
Remarkable Features of iOS System Recovery:
* Repair the iPhone's yellow screen back to its normal state.
* Repairs system problems on all iOS devices.
* Two recovery modes to repair your iPhone.
* Compatible with all iOS devices, and it's iOS 16 supported.
* Compatible with Windows and Mac computers.
* Very easy and safe to use.
Here are the steps you need to take to fix iPhone 12/12 Pro/13/14 yellow screen using iOS System Recovery;
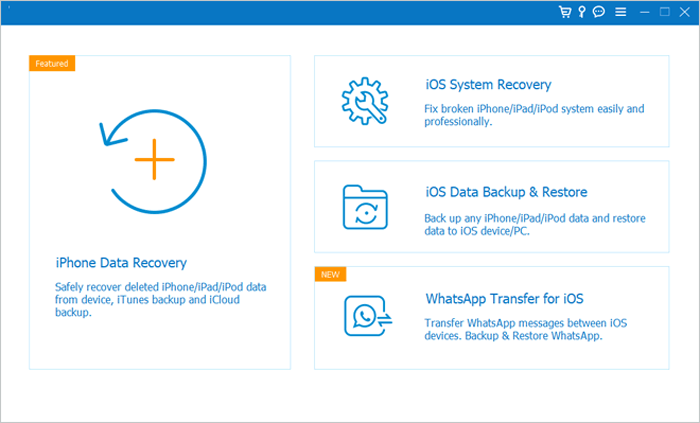
01 Download and install the software on your computer. After that, launch it and click on "iOS System Recovery."
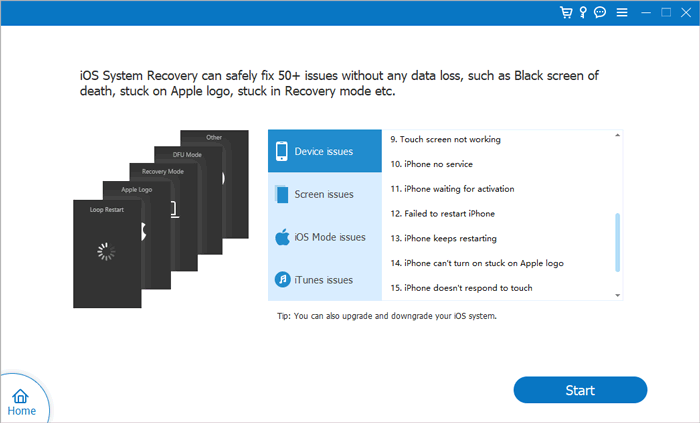
02 Connect your iPhone to the computer with a lightning cable, click "Trust" as prompted, then tap the "Start" icon.
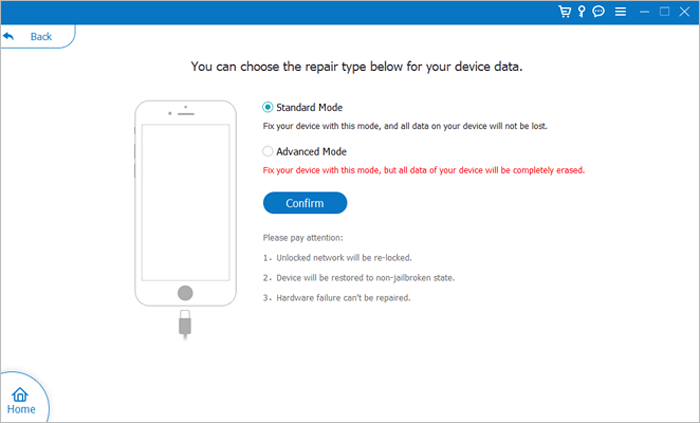
03 Ensure your device information, like name, model, etc., is correct, then choose the recovery mode you want to use to repair your device, either Standard Mode or Advanced Mode. You can choose Standard Mode, which doesn't erase your data. After doing that, click on the "Confirm" icon.
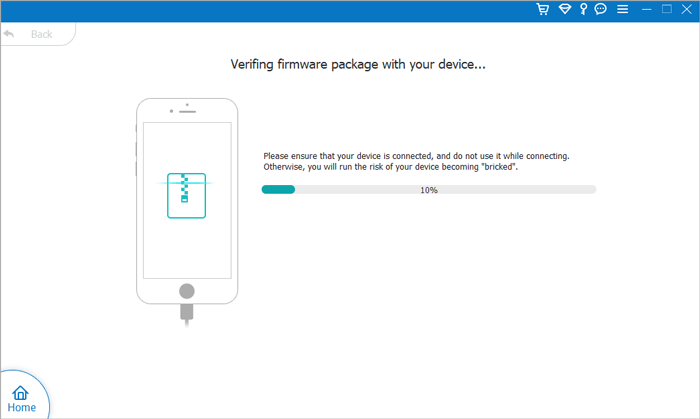
04 Hit the "Repair" button at the lower part of your screen to download the firmware to start the repair process.
If none of the solutions in this post fixed the screen yellow issue on iPhone, then it's about time you get hassled. Well, not literally, but you need to contact Apple's official support for help. Maybe your iPhone has a hardware issue that the Apple support can only fix. The company has experienced and professional technicians who can give you a hand and fix your iPhone yellow screen issue with the right tools.
There you have it. Hopefully, you can fix your iPhone 14/13 pro/12 yellow screen issue and return your iPhone to normal. Though the solution above can fix the yellow screen problem on most iPhone devices, we recommend the iOS System Recovery for the best result. Have you tried it yet? Well, if not, give it a try.
Related Articles:
iPhone "Save Image" Not Working, How to Fix?
How to Fix Green Lines on iPhone Screen? Proven Solutions Are Here
iPhone Internal Storage DCIM Folder Is Empty on Windows 10? Fix It Here
[Solved] How to Update iPhone without Wi-Fi? (iOS 14/13/12/11 Supported)
Not Enough iCloud Storage? Fix This Issue with This Full Guide